

DIY: Powder Bathroom Wall Treatments
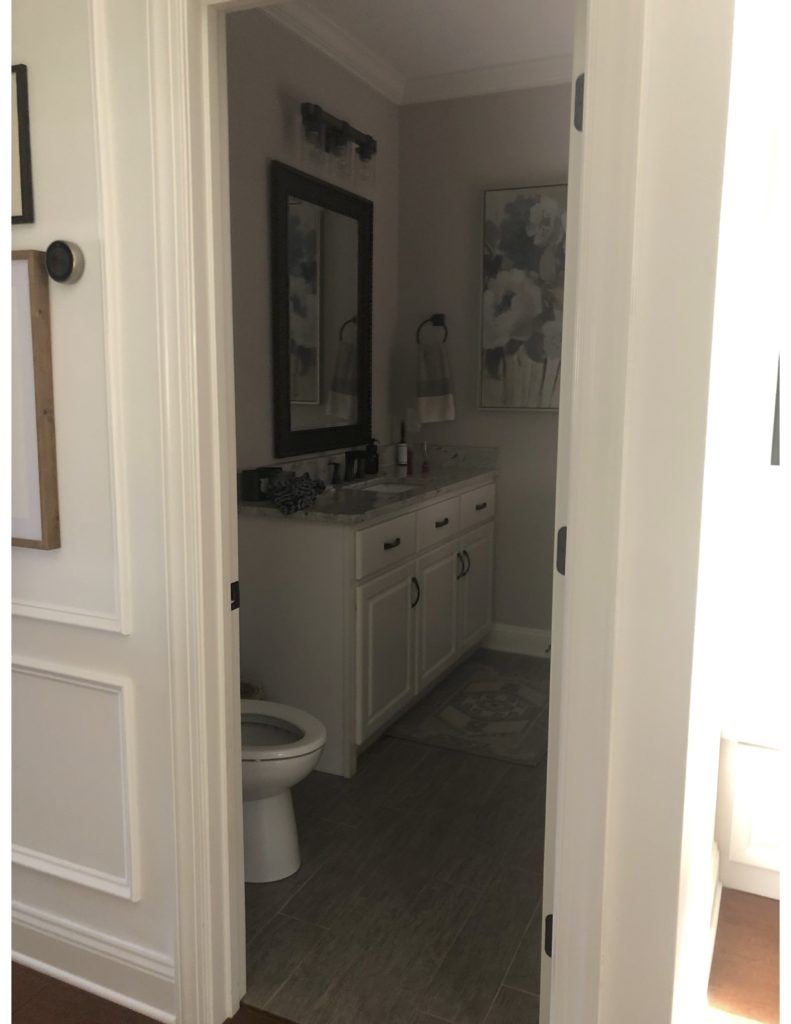
DIY: Powder Bathroom Wall Treatments. I have been getting questions on and off since the powder bathroom has been completed on how I did our wall treatments so I’m going to share everything I did. I am NOT an expert by any means and the stuff I learned was from watching youtube and reading from other bloggers so let’s dive in!
I found inspiration from Jason Arnold Interiors on a library he was completing. I love the way recessed paneling gives an old world feeling. I wasn’t really sure how to make that happen until I found Young House Love’s blog article where they attempted the same exact wall treatment in their bathroom renovation. I will link it here as it was extremely helpful for me.
THE INSPIRATION:
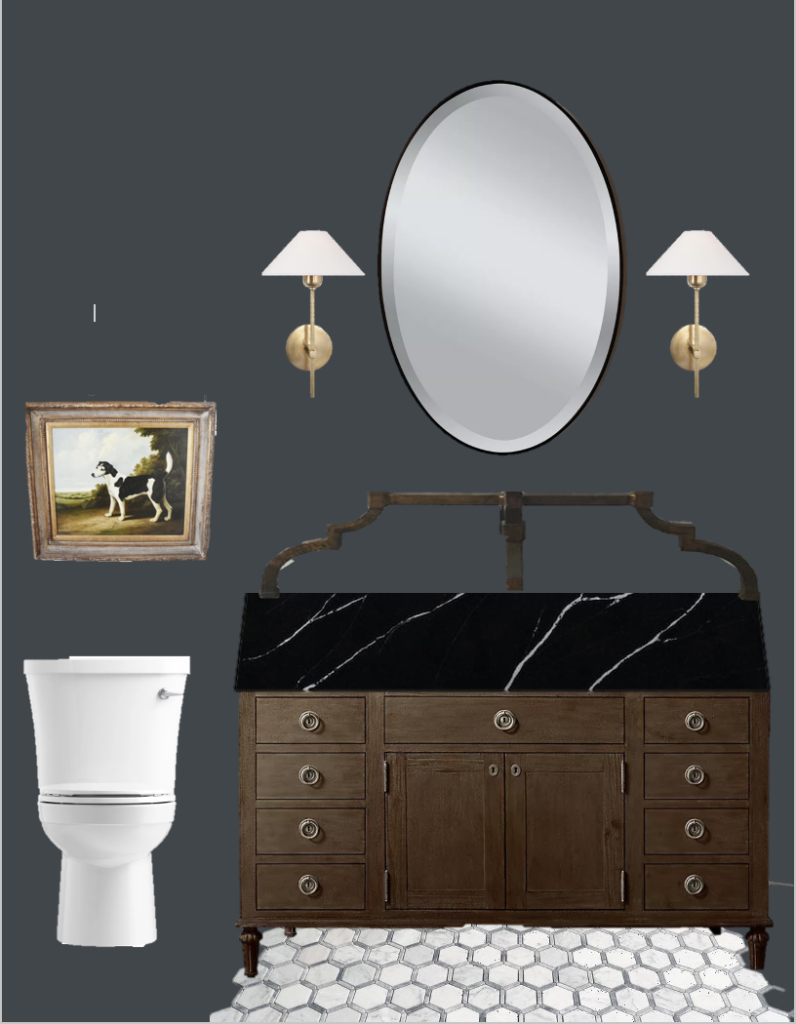
THE PLAN:
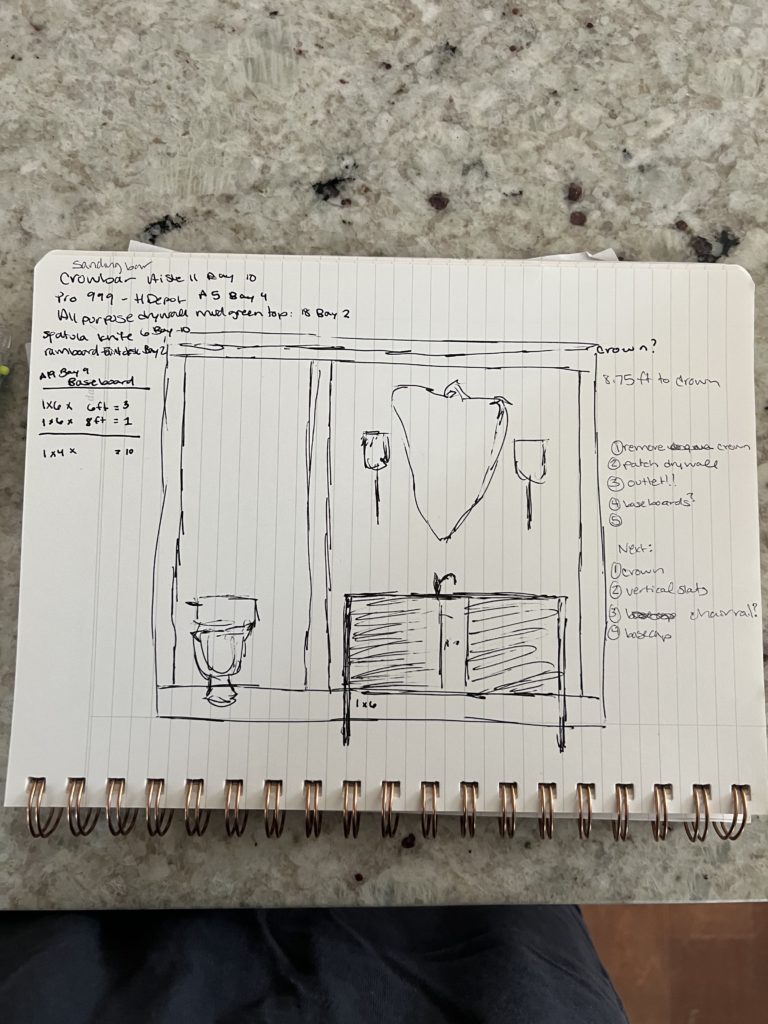
MATERIALS & SUPPLIES:
Wood
- 8ft primed 1×4″ boards for the vertical slats & to make the boxes
- 8ft primed 1×6″ boards for the baseboard
- primed base cap molding to frame inside the boxes
- crown molding
Everything Else
- Tape measure
- Molding Pry Bar
- Laser measure
- Level
- Miter Saw
- Wood Filler
- Caulk
- Stud Finder
- Sander
- Ramboard to Protect our floors. We used it to make shims too
- Nail gun: 16 gauge for 1×4, baseboards. 18 gauge for base cap
- Multitool
THE PROCESS
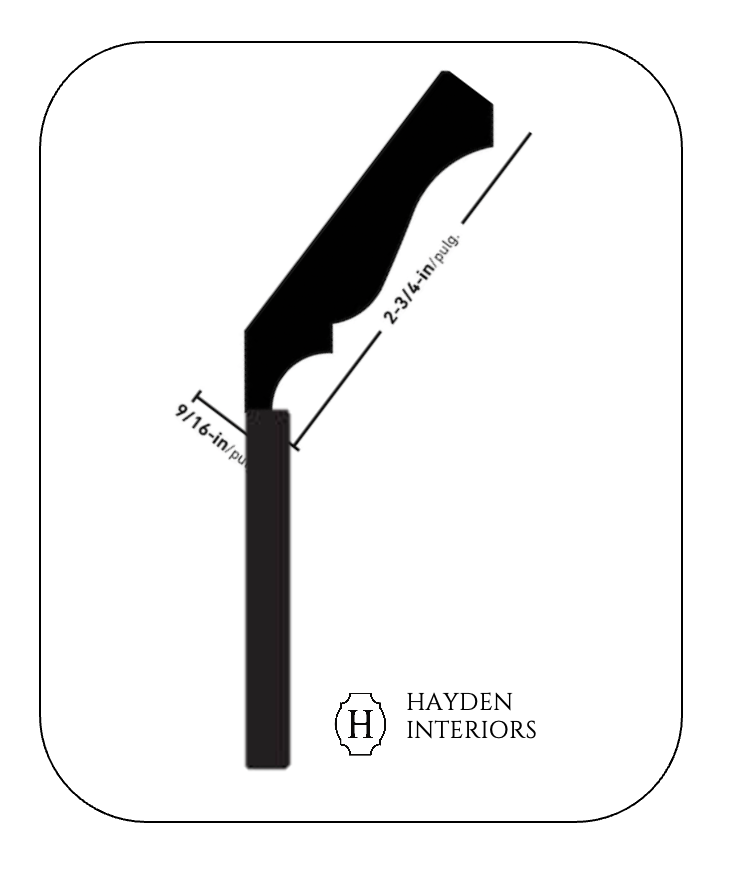
STEP 1: INSTALL CROWN
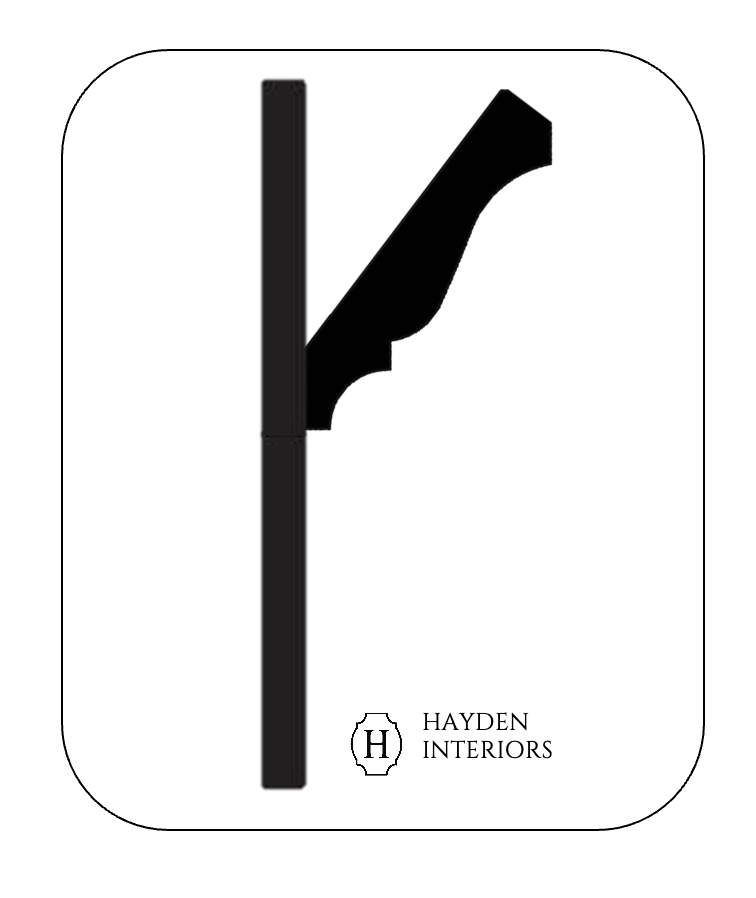
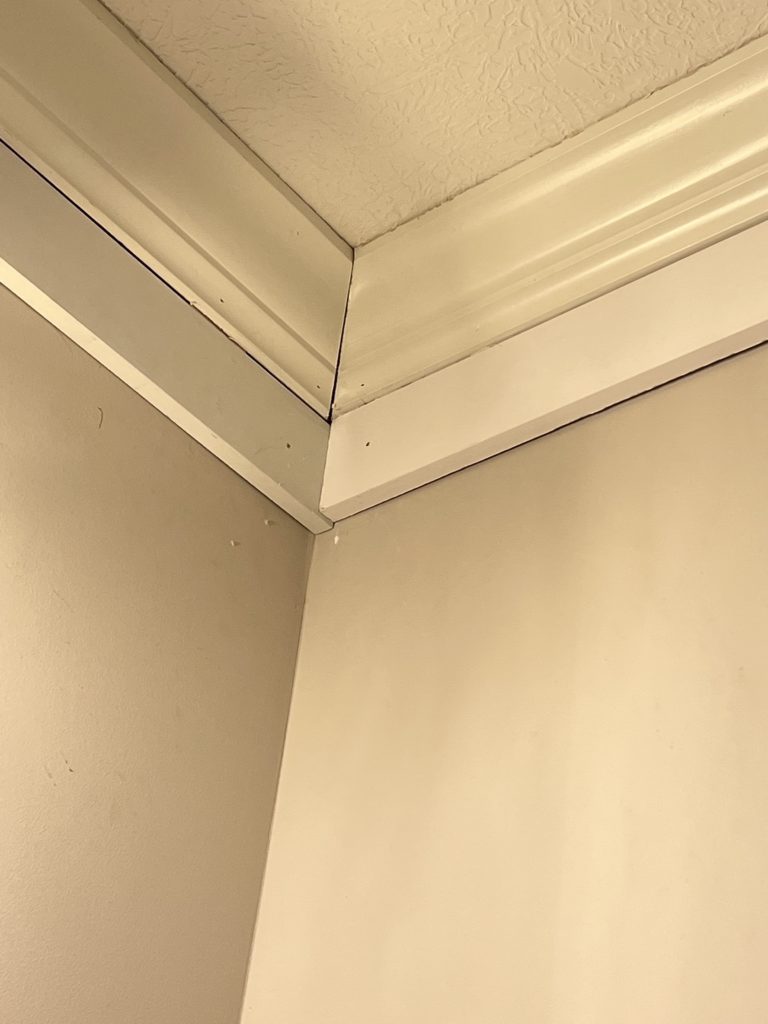
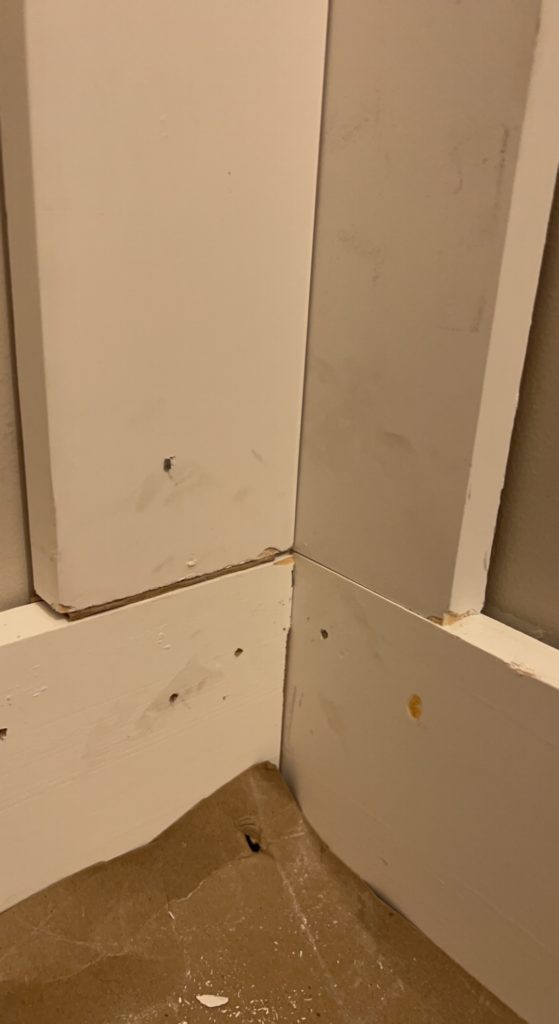
The first thing I knew I needed to do was figure out was how I was going to keep our existing crown and incorporate the new paneling wall treatment into our design. From Young House Love’s blog post, they used a 1×6 with base cap molding for their crown which is the exact same as baseboard, but I felt like that would be inconsistent from the rest of our house if I applied that treatment for our crown. Plus I do still love our crown molding and wanted to use it if I could. The problem was that the crown depth and the depth of the 1×6 board would not be flush. The 1×6 would stick out deeper than the crown and that would not give a very finished look. View the image below to see what I’m talking about. So I had to figure out a solution.
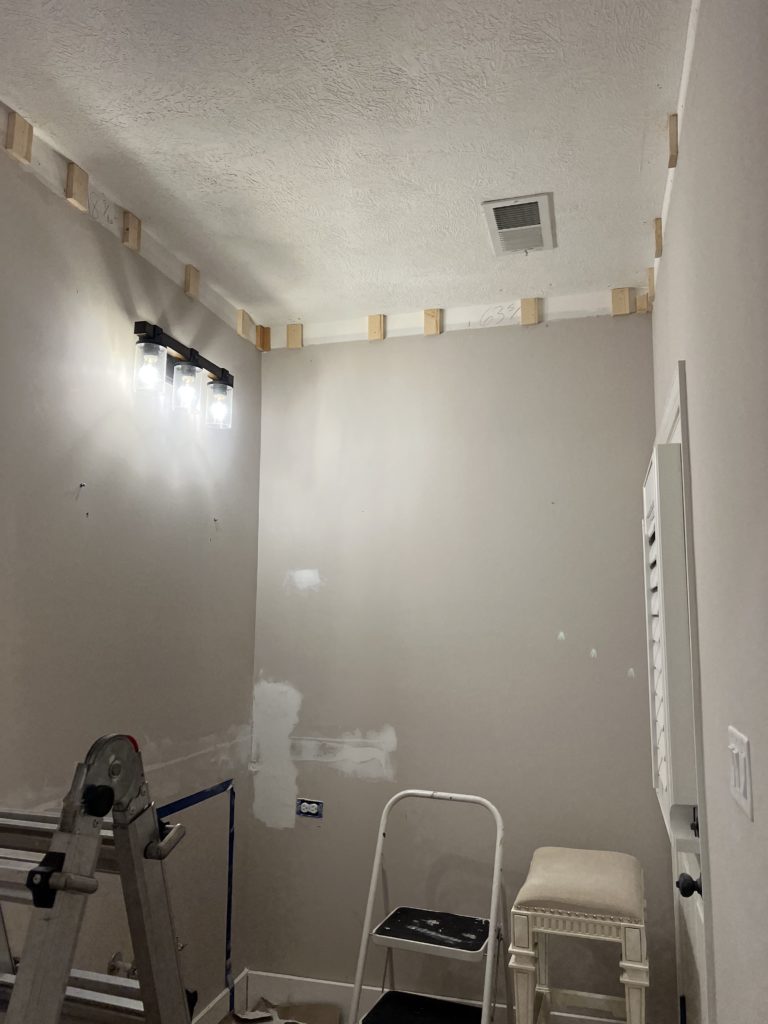
I have no idea if this is right and I’m sure there is an easier / better way but this is what I did. I decided to take the crown off and add 1x4s cut into 4 inch blocks behind each piece of crown so that when I install the 1×6 horizontal box under the crown, everything would sit nice and flush giving it a finished look.
After removing the crown, I placed these blocks on the studs and put two against each other in every corner so that the crown had something to attach to.
HOW TALL DOES YOUR BACKER BLOCK NEED TO BE?
PRO TIP: Save yourself some trouble and figure out the exact angle the crown sat off the wall in order to measure how tall to cut the backer block. OR look at the difference in paint color and measure to that line. The first time I cut each block 4.25 inches and it ended up hanging BELOW the crown molding which exposed the block and defeated the purpose! So I had to take them all off and cut each block down to a height of 4 inches. And I had over 30 blocks! I could have saved myself time if I had used the correct angle that the crown hit the wall OR measured to where the paint changed color so I would know where the block needed to end. Of course the paint method wouldn’t work if your entire wall is all the same color. You can see here that ours was not.
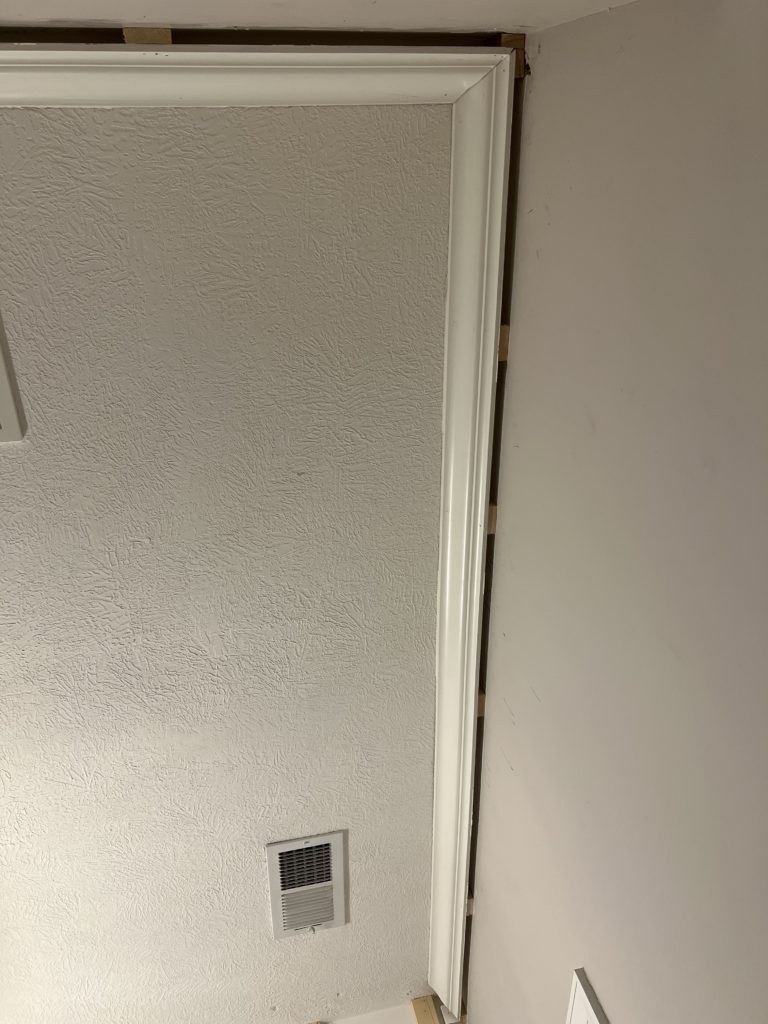
After messing up all the blocks and then recutting them down to the correct height, I installed the crown over it. Much better the second time with no blocks exposed under!
See how everything sits nice and pretty now that the crown is bumped out?! Walls are never perfectly level so caulk would eventually fill the gaps on those warped boards. So happy with how it turned out!
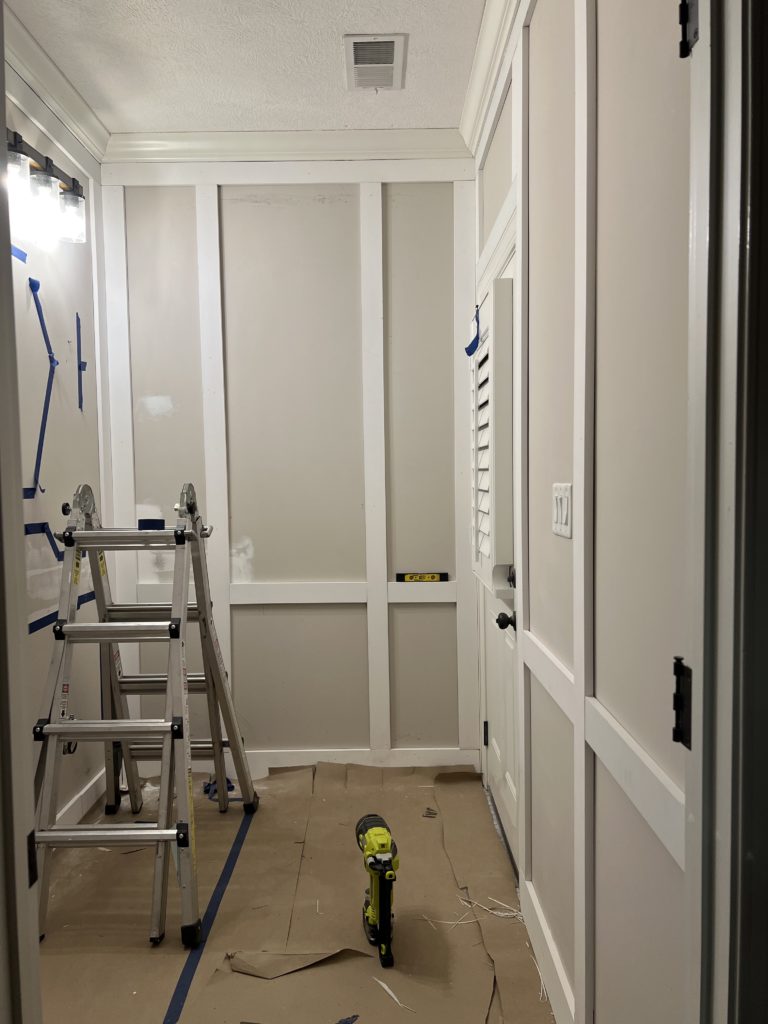
STEP 2 INSTALL 1×4 UNDER CROWN & 1×6 BASEBOARD
I installed 1×6 around the room for the baseboards for a chunkier appearance. We will add the base-cap molding later. Our old baseboards were 5 inches tall and our new baseboards will end up being a little over 6 inches which is an upgrade to me!

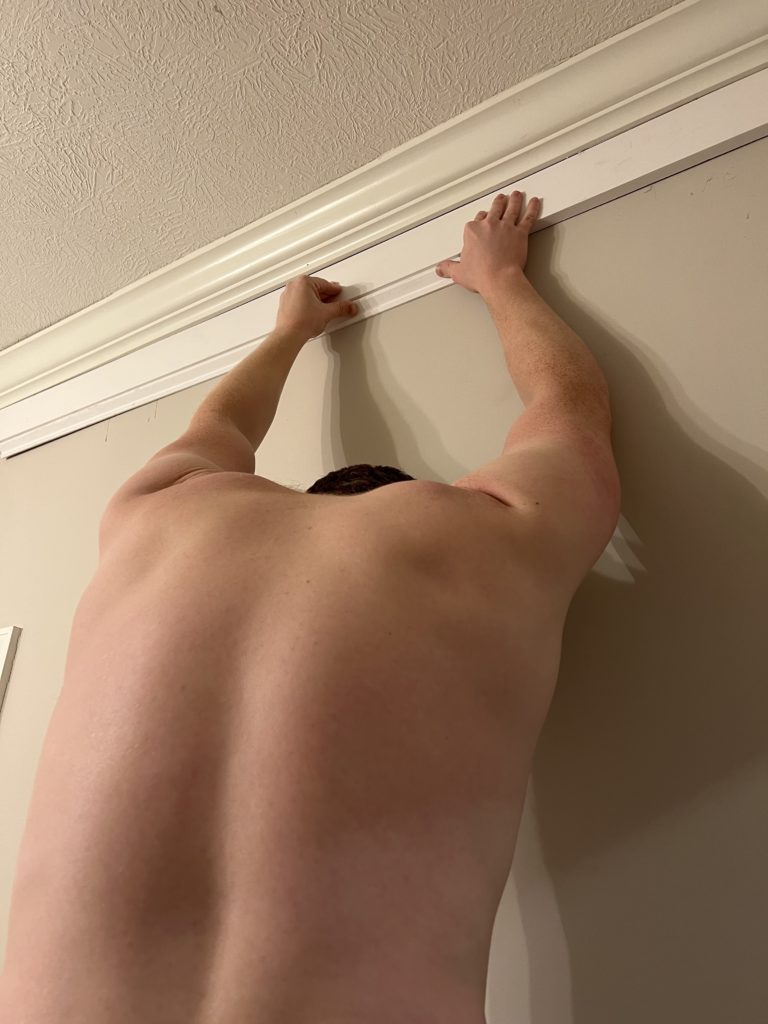
Then, I added 1×4 boards under the crown around the entire room. That will end up being the top of my molding box.
I didn’t worry too much about gaps because caulk fixes everything!
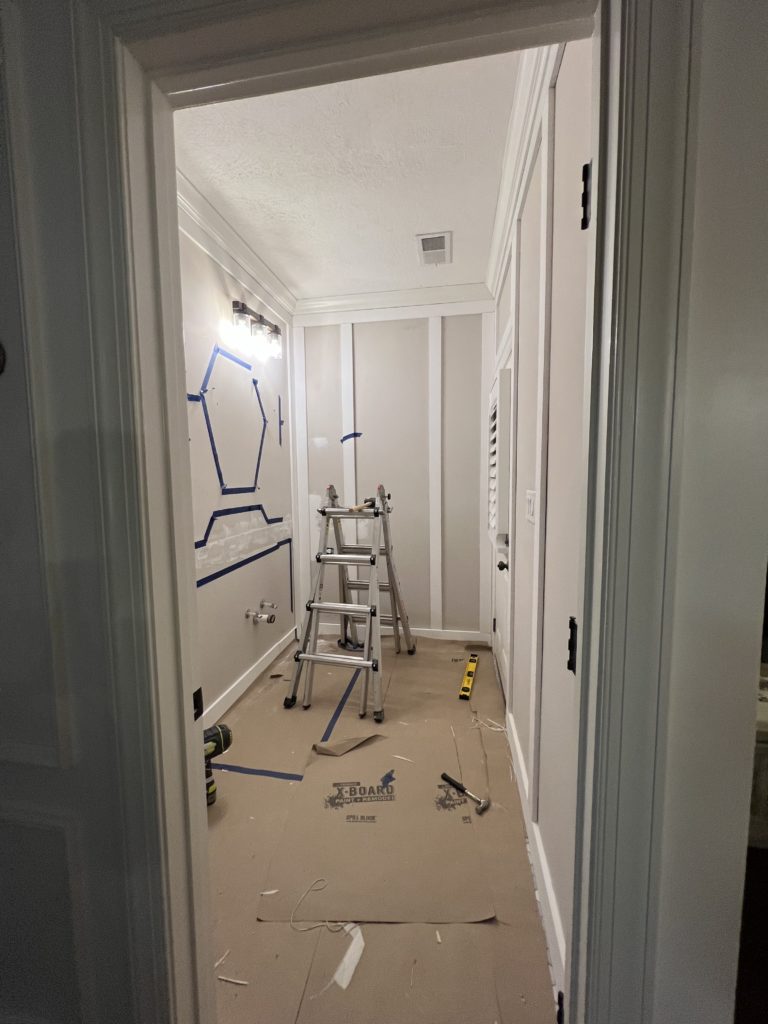
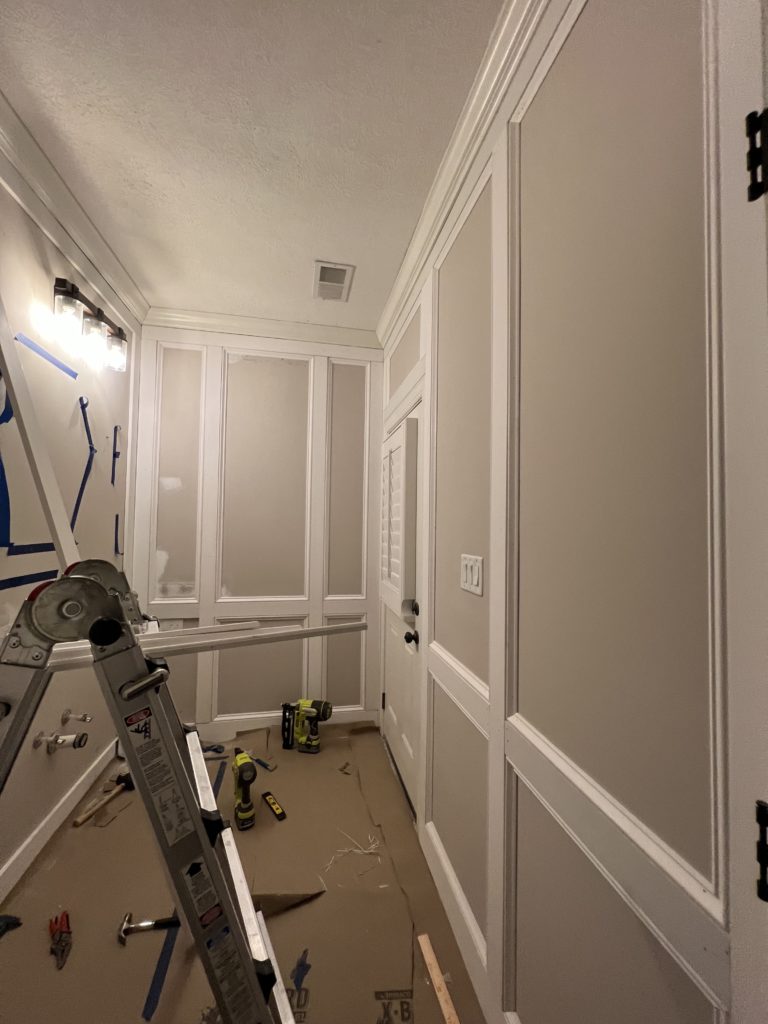
STEP 3 INSTALL VERTICAL SLATS
Planning is key here! These will become your boxes so thoughtful preparation is key. I took it wall by wall in the room since each wall had different architectural elements. I planned the wall with the vanity/toilet first which took weeks, but decided to install it last to make sure all my cuts were correctly framed around the toilet/vanity. Since it was so complicated, I will go over how I planned it in step 4.
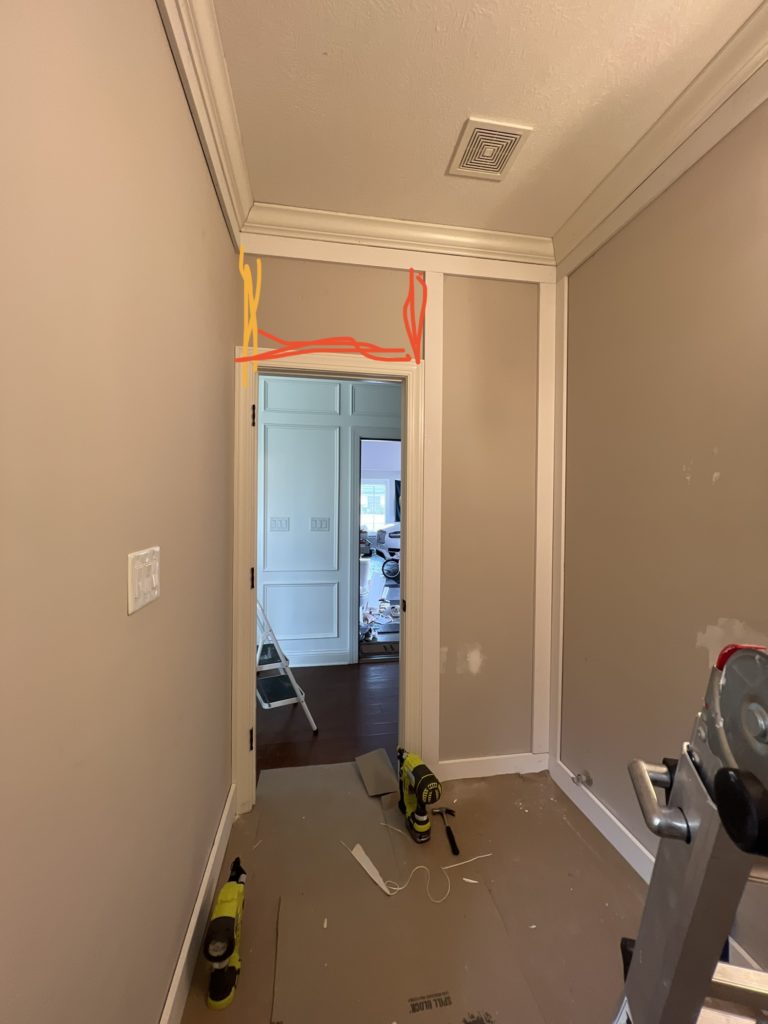
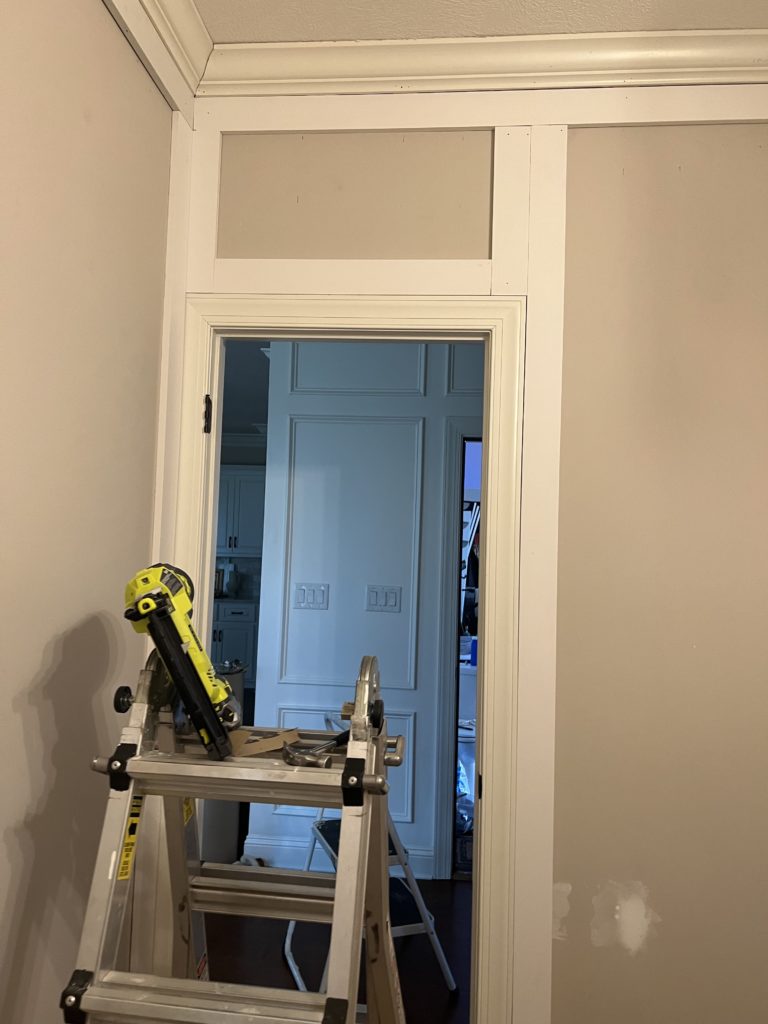
For the doorway wall, I started by placing a vertical slat next to the doorframe and then added one of course to the corner of the room. Figuring out how to go around each door was a little complicated. Ideally you would probably take off the trim around any windows or doors, but I didn’t want to do all that so I’ll show what I ended up coming up with.
I did the same thing for the next wall. Placed one up to the corner and the next one parallel to the door frame.
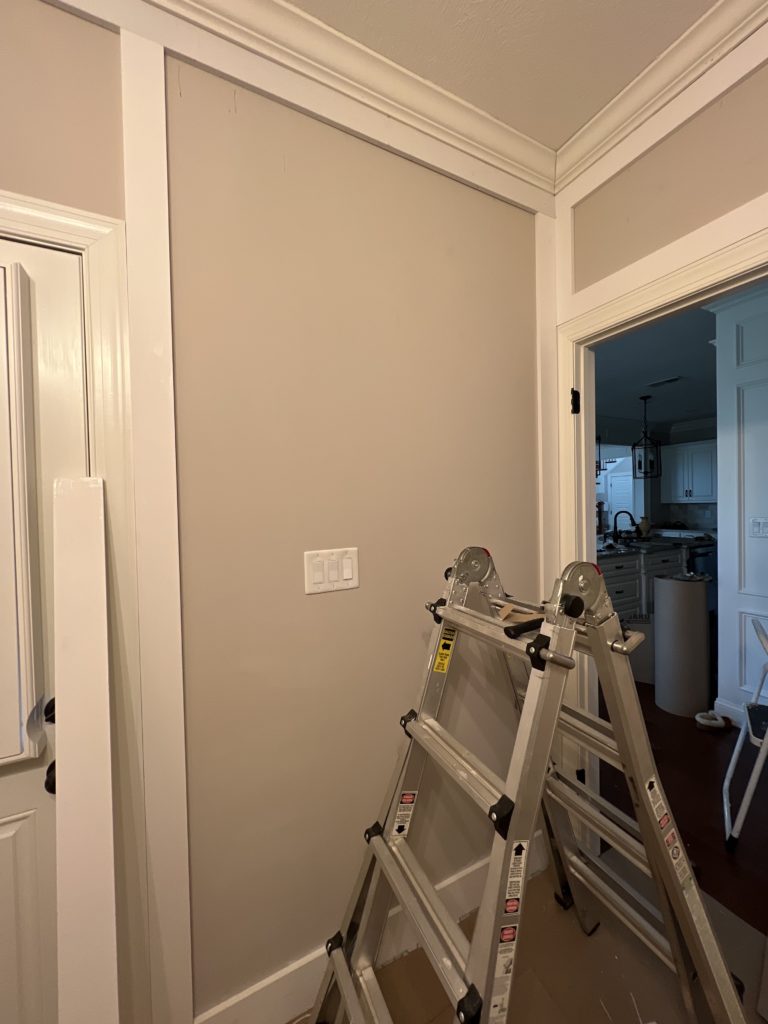
This wall seemed a bit bare so I ended up adding another vertical slat next to the lightswitch. I determined the spacing by measuring that space. Then I divided it by 2 to that it would give me 2 equal boxes. LUCKILY they all ended up being about the same!!
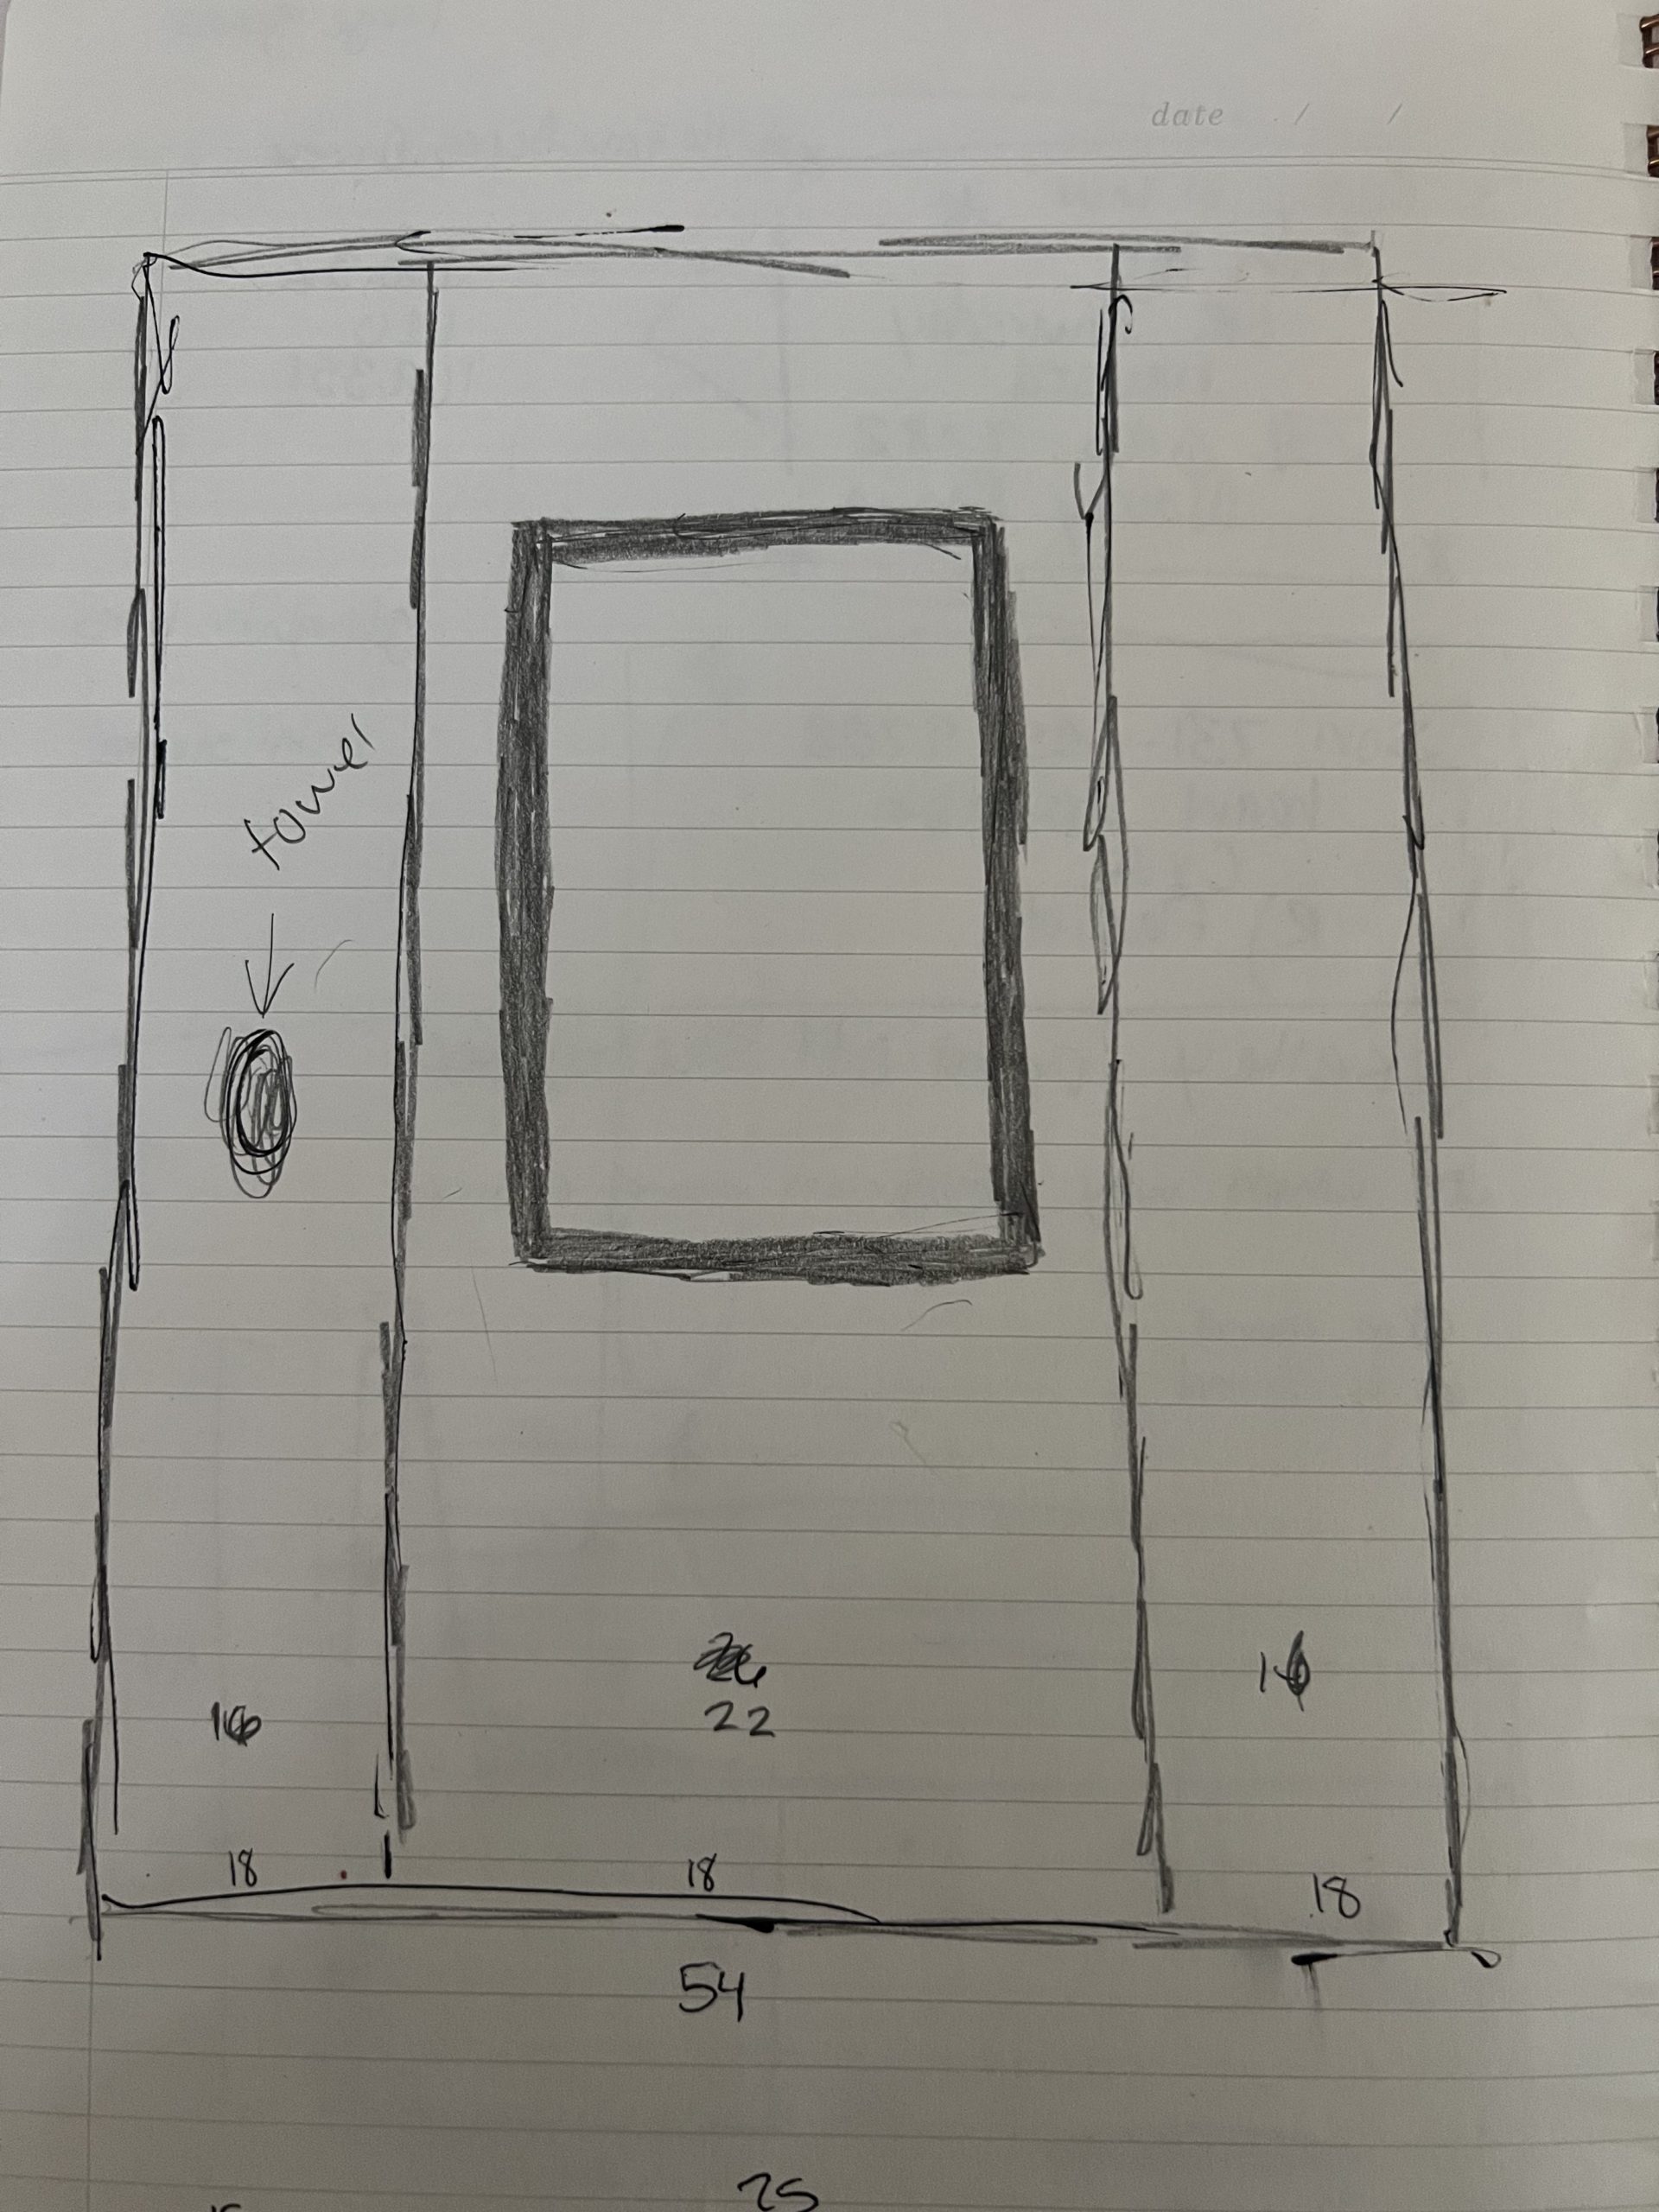
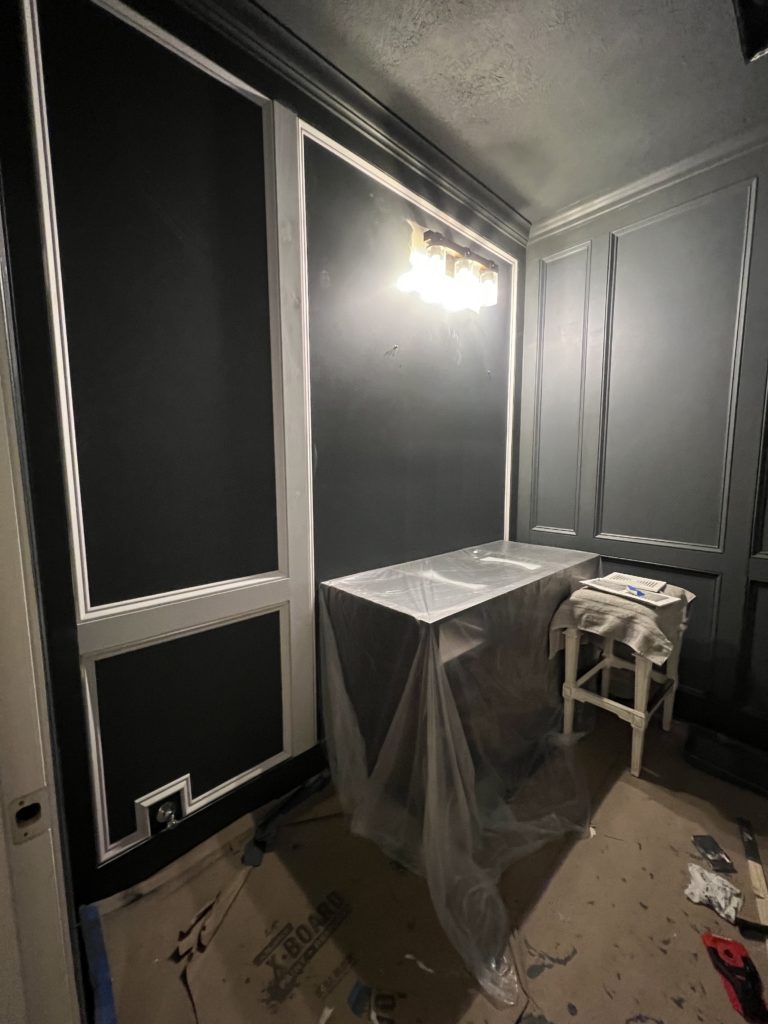
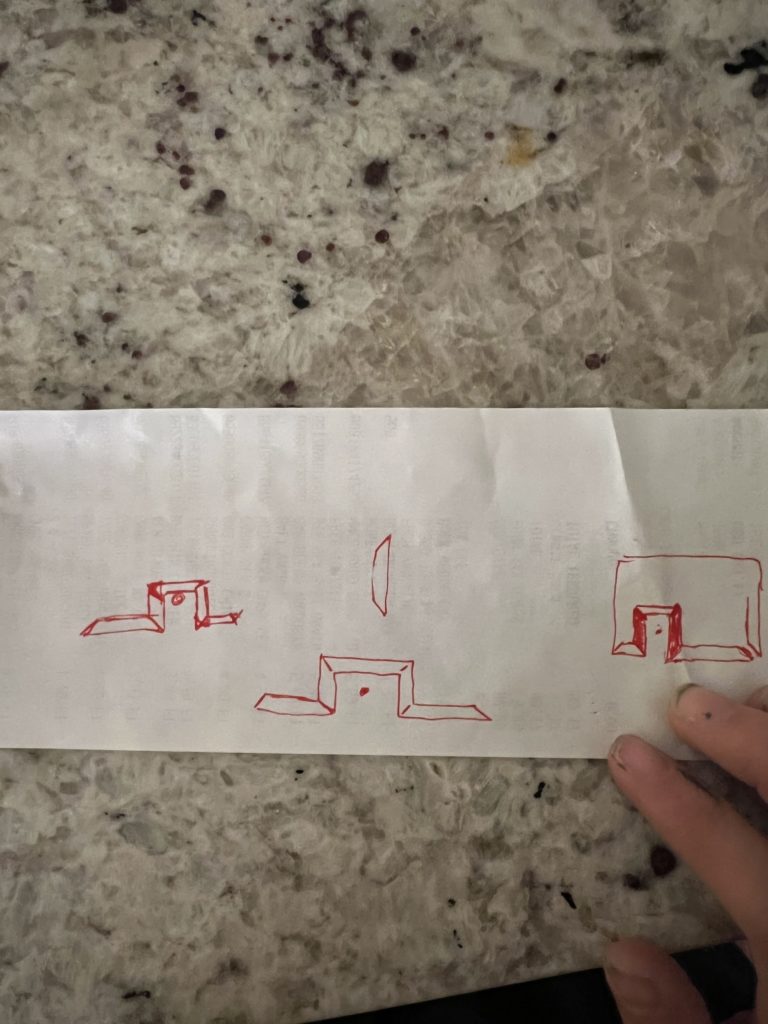
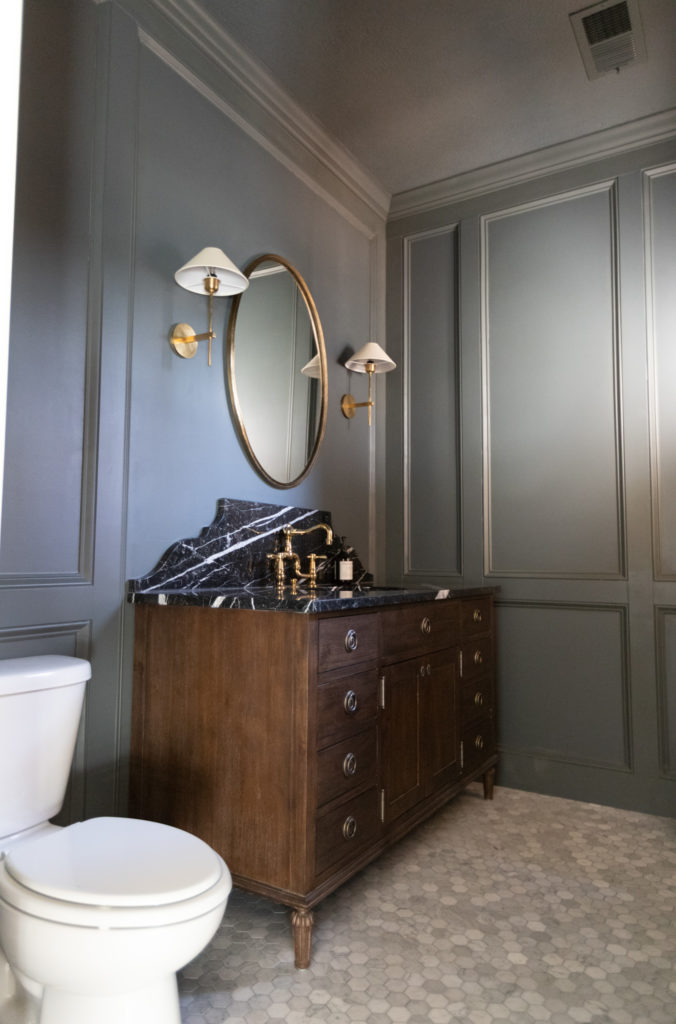
Next, it was time for the back wall. This is the wall that you see right when you walk in so I really wanted it to feel special. I debated back and forth for HOURS on whether to make it two boxes or three. I was afraid 2 would be off balanced and 3 would feel crowded. I will show my options below. I thought about off centering it with the width of the vanity as shown below in option B. As you can see I already had option A installed and was second guessing myself afterwards. Ultimately I decided what I chose and installed (Option A) was better because it kept the art centered in the room and divided the room in a way to make it a focal point. I will discuss how I decided on chair rail height in step 5.

AND I LOVE the way it turned out!
STEP 4: PLANNING THE VANITY / TOILET WALL
For the wall with the toilet and vanity I had lots of things to think about. I didn’t want to scoot the vanity too close to the toilet because that can feel claustrophobic using the bathroom. Plus, the more you push it closer to the entryway door, the more closed off the room feels. Our biggest priority was keeping the vanity as close to the other side of the room as possible.
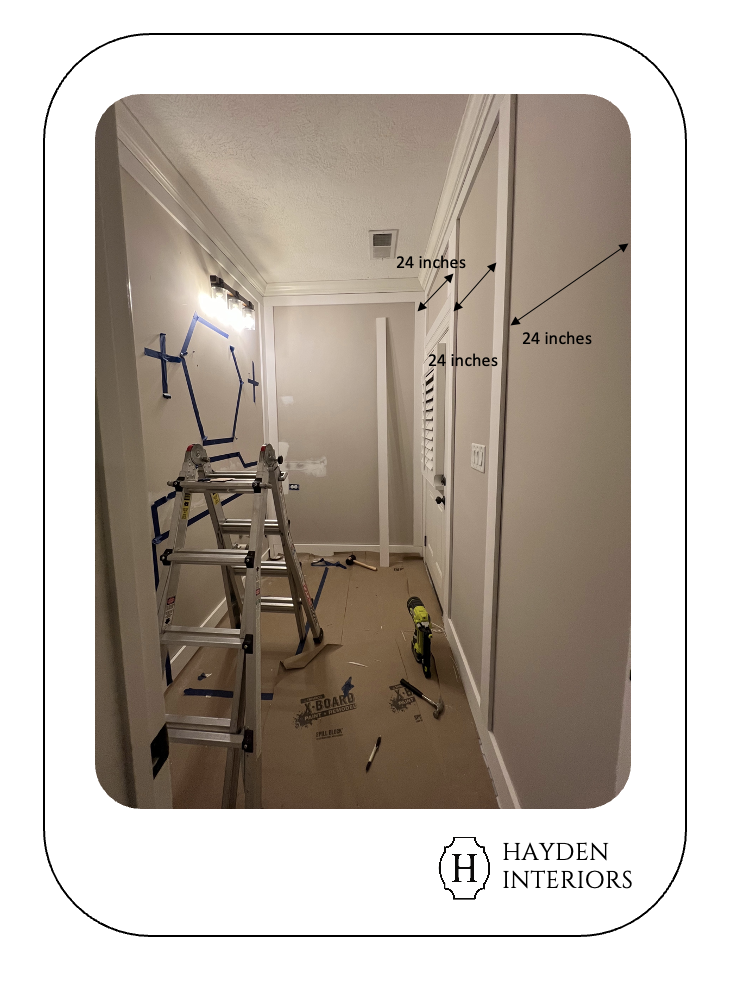
Anything on the right side of the vanity would be wasted space because it wouldn’t be wide enough for a trash can, etc. I taped out the dimensions of the vanity, mirror and light to give me an idea of what I was working with. I planned for the molding boxes to frame out the vanity by a couple inches on each side, but I ran into a problem.
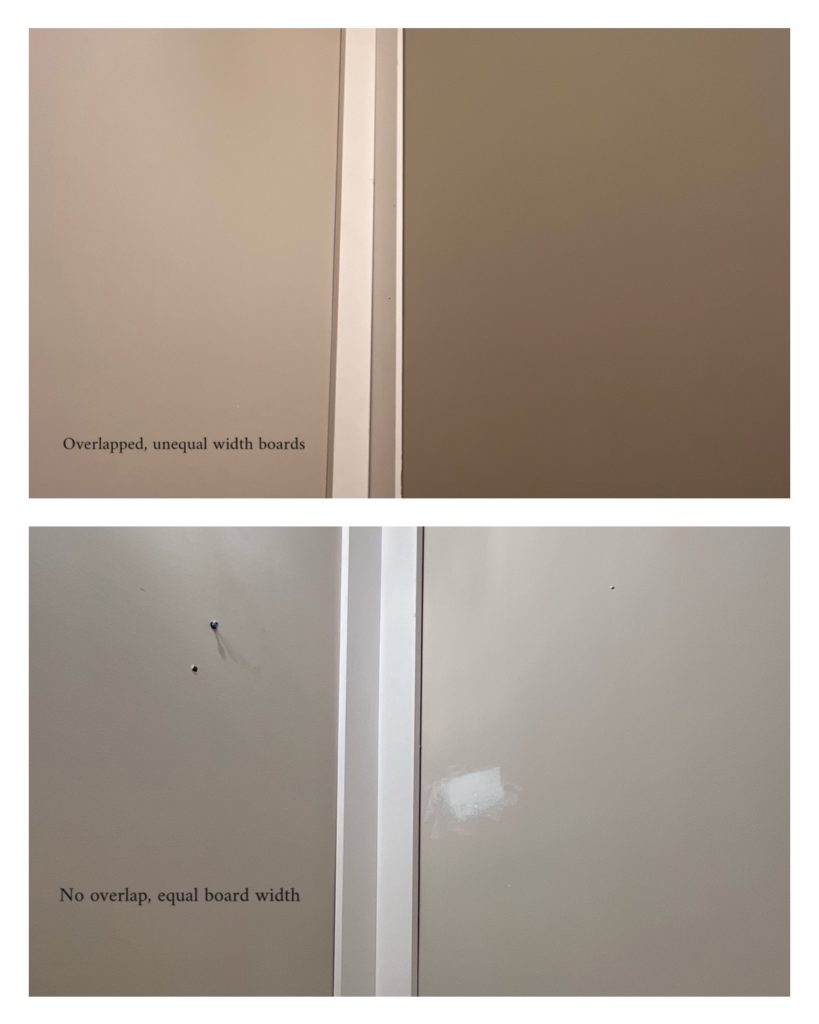
In each corner where the two vertical boards meet, I had the option of overlapping them or not overlapping them. Overlapping would create unequal boards BUT give us a couple inches of being able to keep the vanity closer to that opposite wall. The only reason why this was important was from what I said earlier about spacing. We didn’t want to push the vanity over too close to the entrance. The more we scooted the vanity over, the more dead space we would have on that right side. BUT, I hated the look of asymmetrical boards. To me, it didn’t look well thought out. SO it was a form over function decision.
I went to instagram to take a poll and I was shocked by the responses! This was something that I just couldn’t visualize so I ended up installing all the boards on that wall out both ways: I’ll call it asymmetrically vs symmetrically. Seeing it go from skinny board, to wide board, to skinny board, to wide board was so chaotic for my eyes. I knew right then for my eyes, I needed symmetry. From there I decided that it was only going to move the vanity over 1-2 inches which hopefully wouldn’t be a big deal in the end (and it wasn’t). So I decided to install both corners of that last wall, but the vertical plank that divides the vanity from the toilet, I waited until I knew what the countertop width from the fabricator would be.
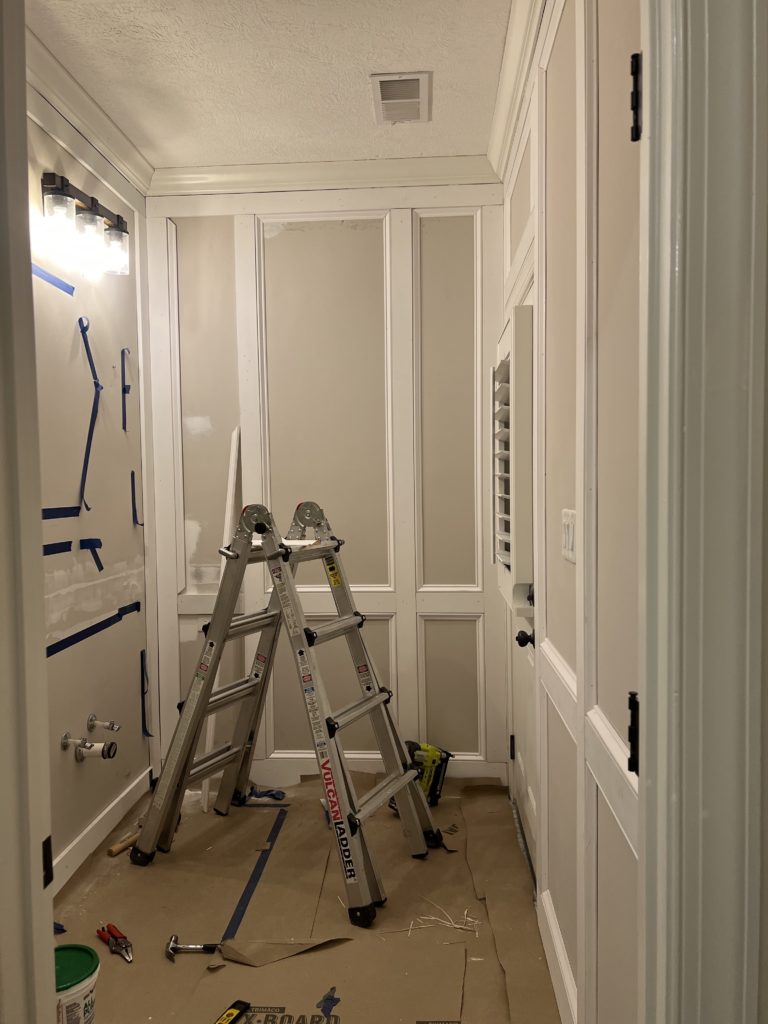
STEP 5 DECIDING / INSTALLING THE CHAIR RAIL HEIGHT
Deciding the chair rail height probably should’ve been done at the very beginning planning stages, but I have never been the best planner. I wasn’t sure if I should make the chair rail height to match the height of the vanity (34 in) or if I should divide it ⅓ with the height of the room (36 in). After playing around with it, I decided I liked the look of dividing the room into thirds better. I know we are talking a couple inches here so looking back, not sure why I stressed so much! I also knew I wanted my molding box to frame the toilet so the bottom of my box needed to be higher than 30 inches. I decided to make the top of my molding box be at 36 inches which left us roughly two inches between the top of the toilet and the bottom of the molding box; it just so happens that a happy accident came out of it. The vanity ended up sitting perfectly in the middle of the chair-rail which looks extremely intentional, even though it was not!
Once I decided on height of the chair rail, I installed the 1x4s horizontally across the room, omitting the section where the vanity would go. I also love that it magically aligned with the doorknobs!
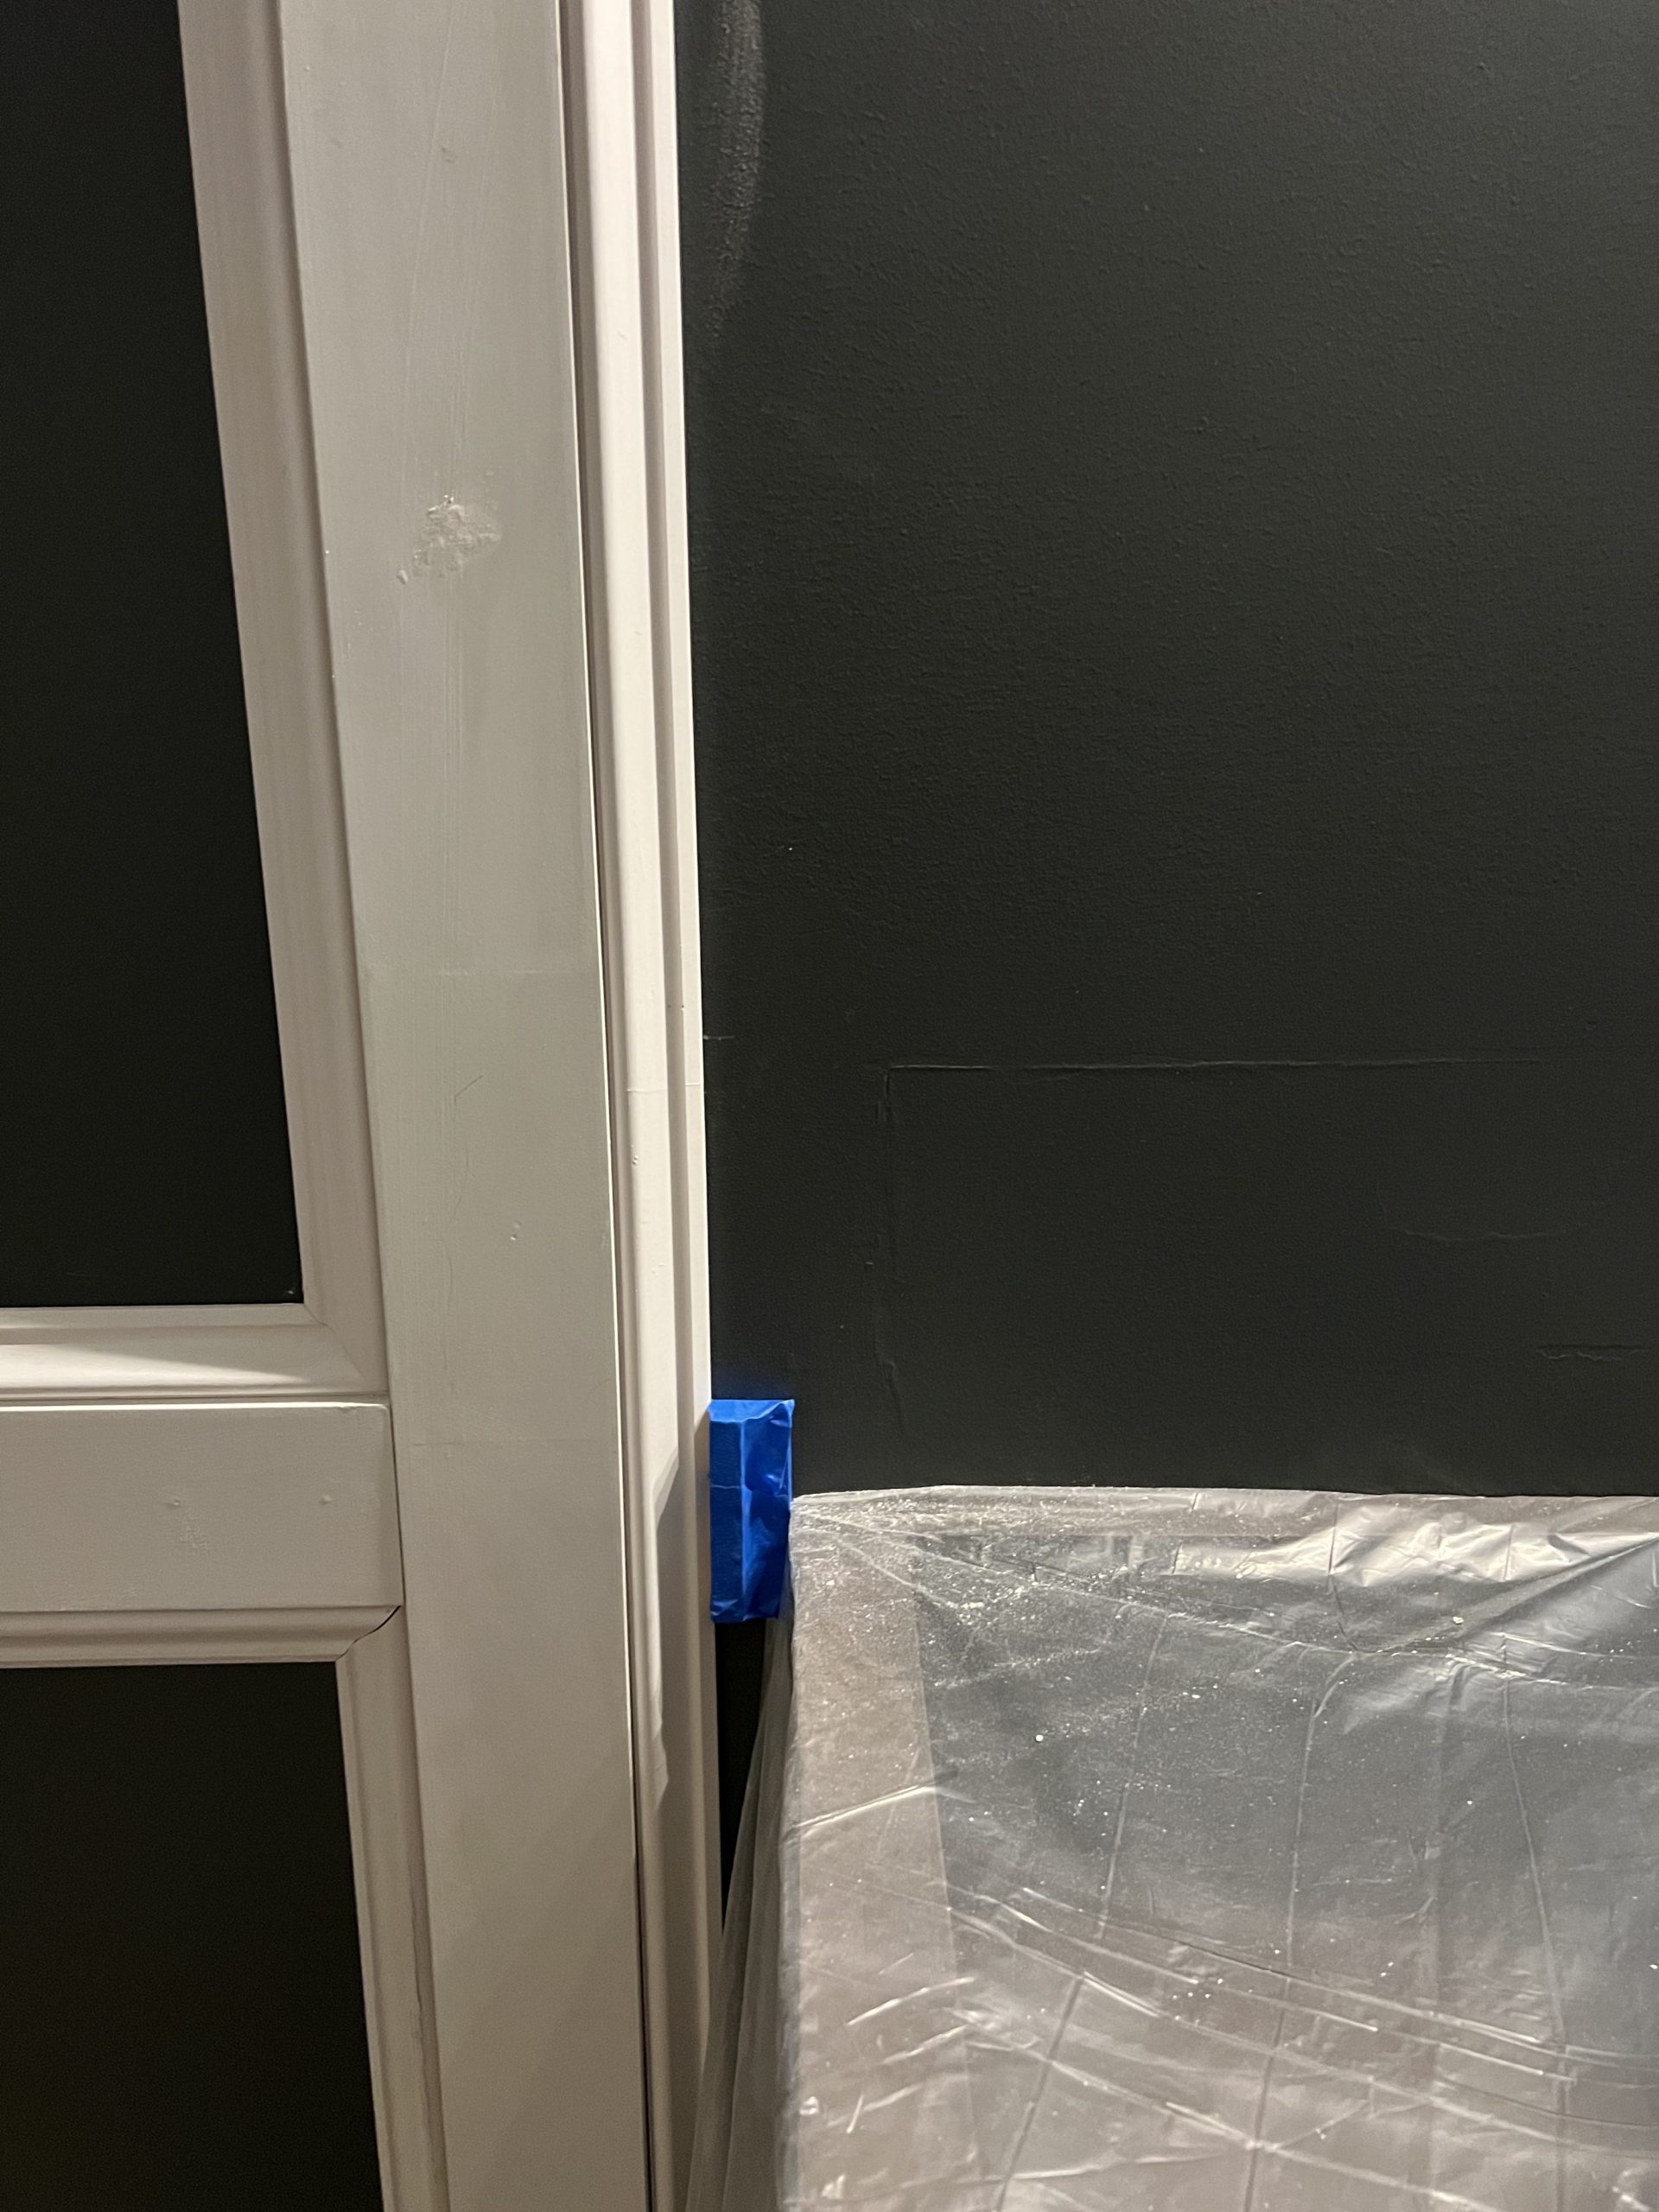
I tried to use shims in any places that were not completely flush. There is one area I did not focus on enough and it will ALWAYS bug me.
STEP 6 INSTALL BASE CAP MOLDING
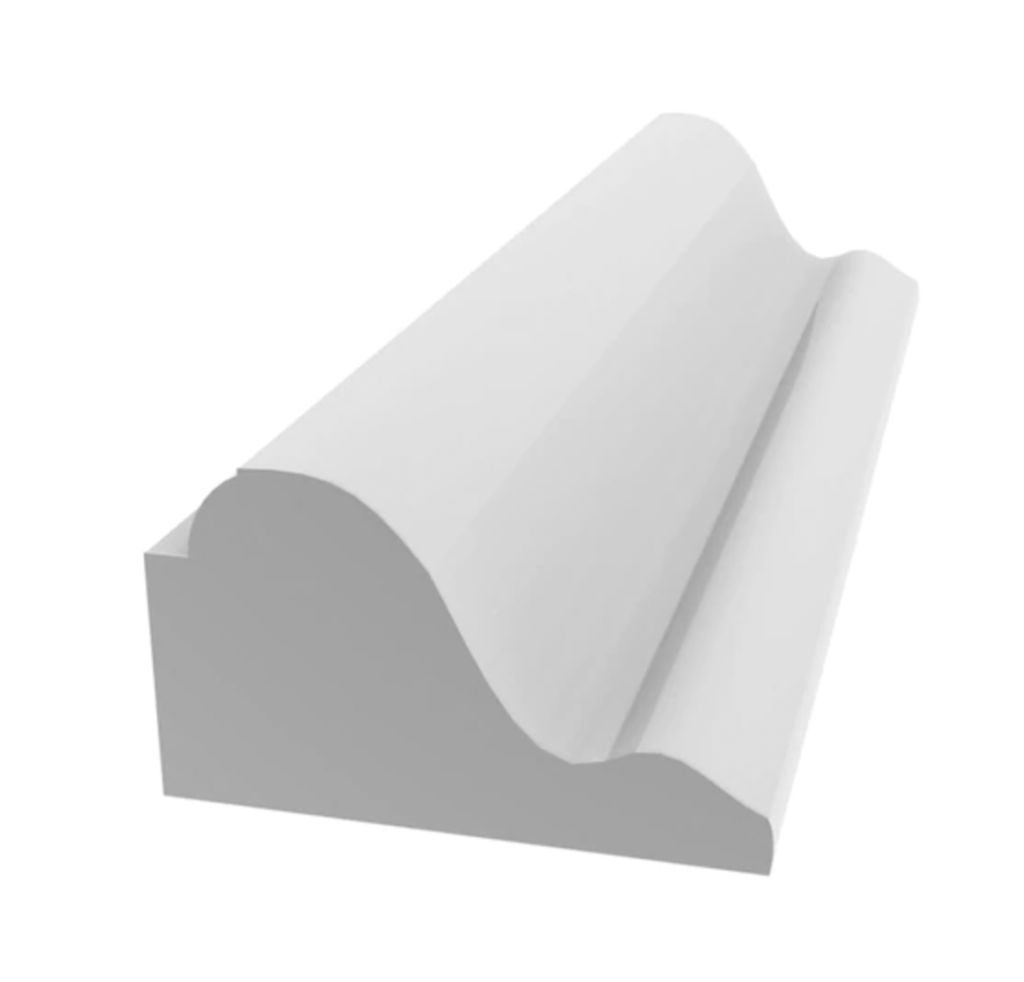
This is where you can really start to see your hard work coming to life! The wider / thicker portion of the base cap is the outside and the thinner, skinnier portion is the inside. Make 45 degree cuts and use your brad nailer to nail it up inside each box. I used my ______ gauge nail gun on these.
STEP 7: DETAIL WORK
Now you can step back and enjoy all your hard work! I will admit this part of the process is longggg for me. I love seeing big changes happen fast, BUT to get a finished look, these steps are the most important! Fill nail holes, sand, and caulk. Caulk any seam where wood meets wood or wood meets wall.
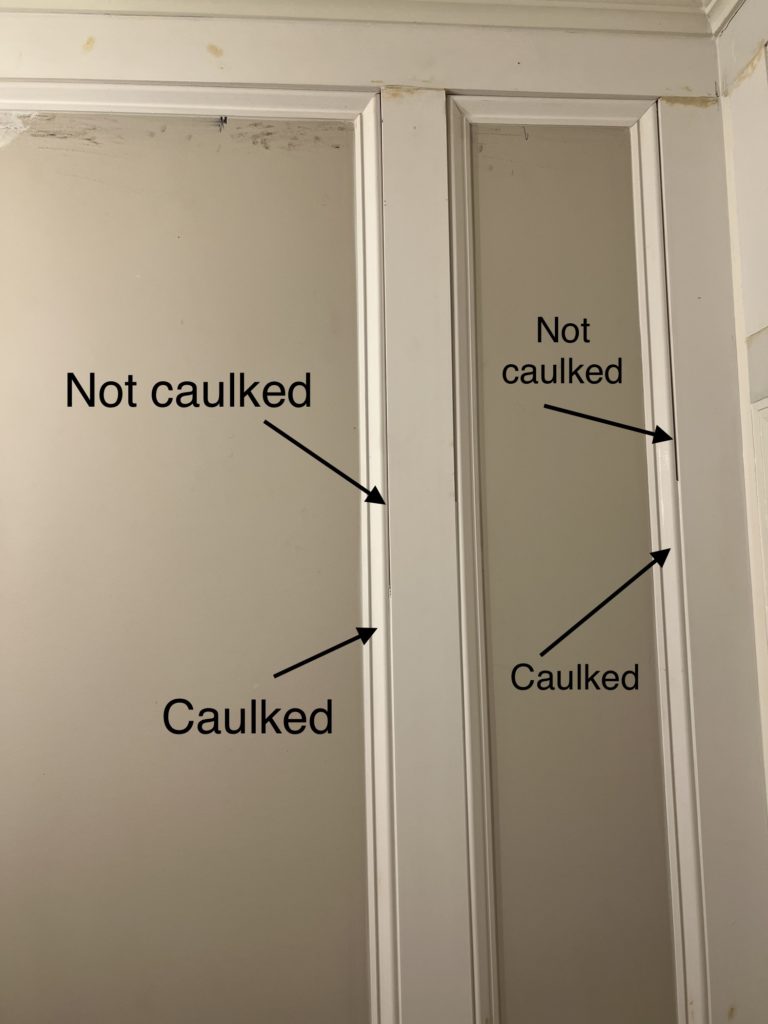
See what a difference it makes?! Thankfully I had my detail oriented husband to help with this step!!
STEP 8 : INSTALL VANITY / TOILET WALL SLAT
Depending on the layout of your room, you may not be doing this in the end like I did but I wanted to show you every step of the process.

I called the countertop fabricator one day and asked them how much overhang they usually do for inset cabinets. They told me usually 0.75-1 inch. I asked them if it was possible to do 0.75 since we didn’t have a ton of space and they said yes. So I taped together two blocks to equal 0.75 inch wide. Then I planned and installed the vertical boxes to make sure they would fit around those blocks which would end up being the countertops.
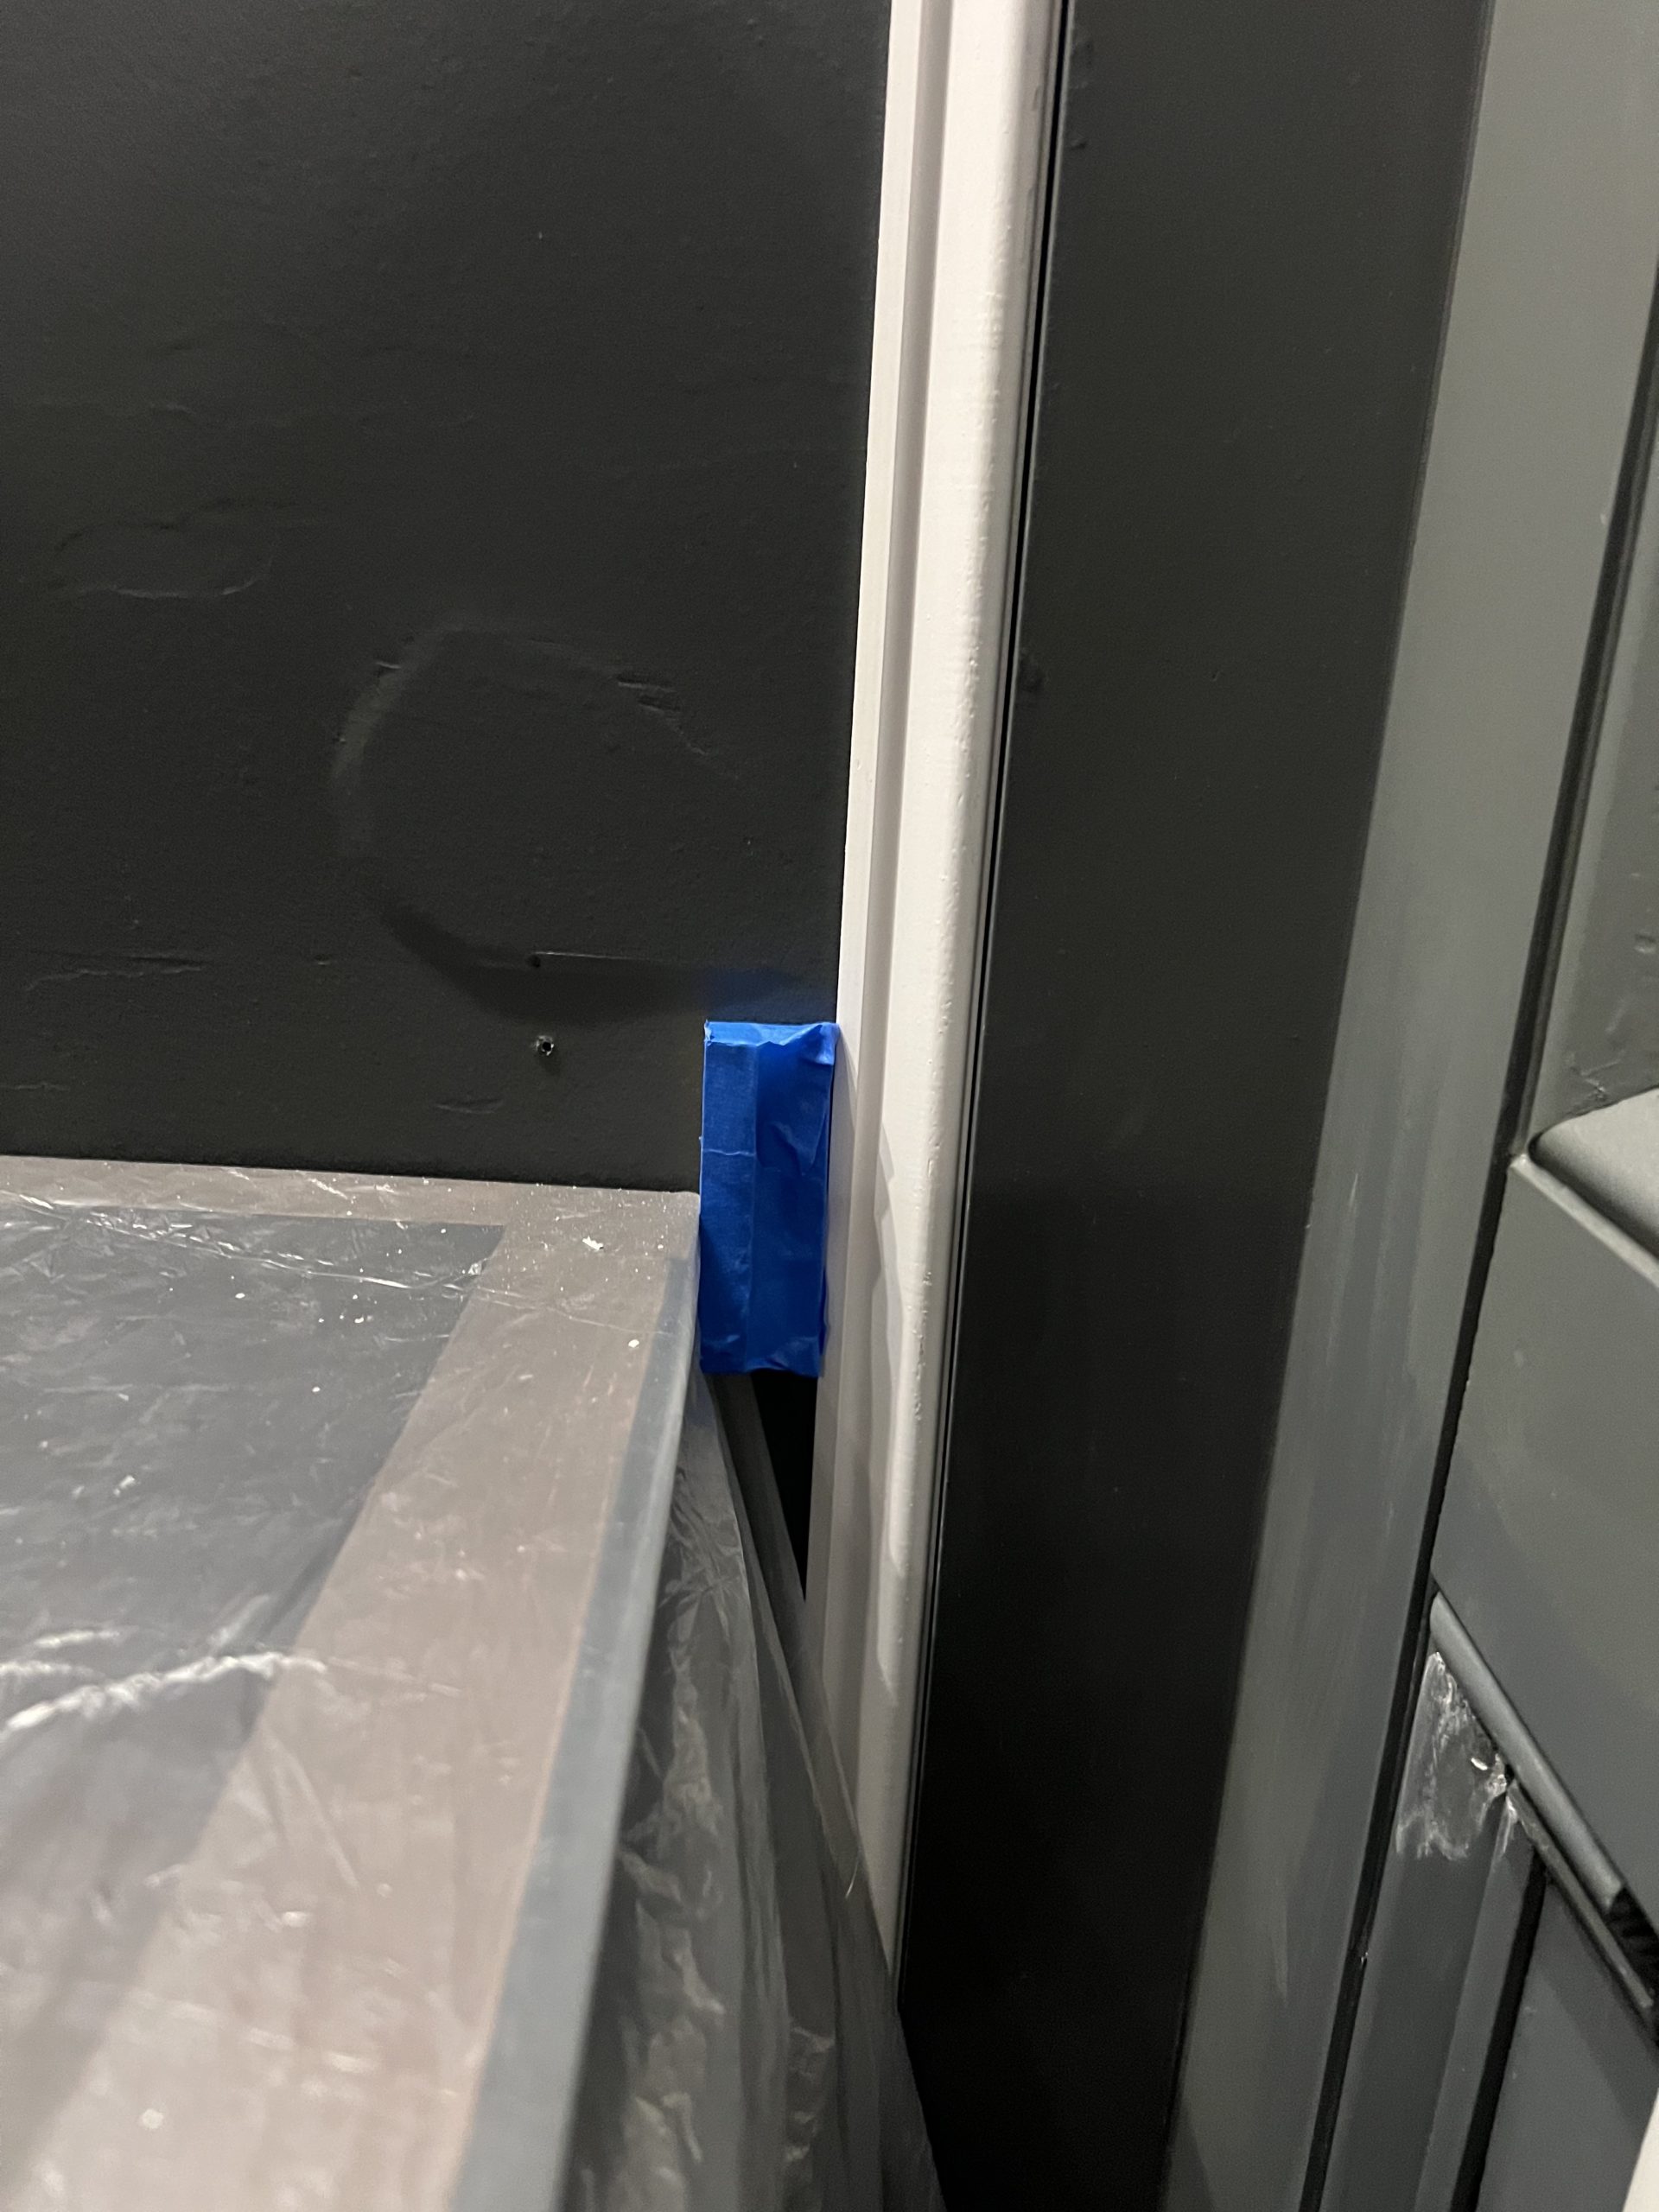
I made this little design to go around the toilet hookup.
Just measure and cut. Pay extra attention to the direction of the cuts. That was the trickiest part!
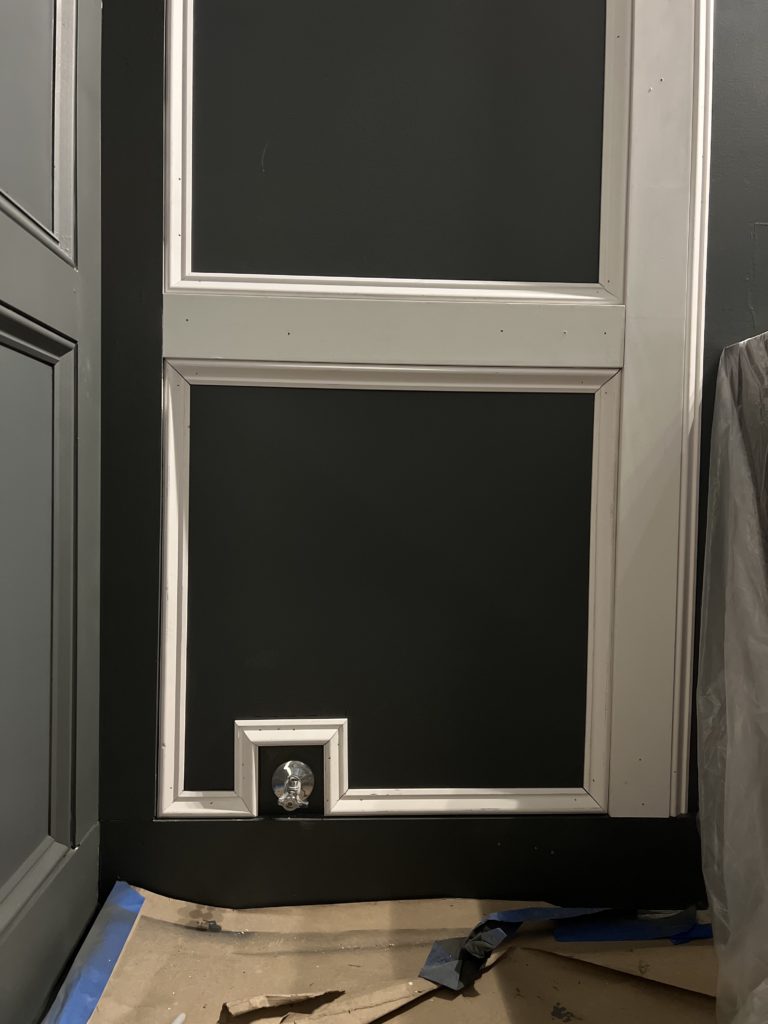
Once the vanity was installed, I used our multitool to cut out the baseboard. Mark your lines and cut. Better to make it smaller because you can always cut more if you need to.
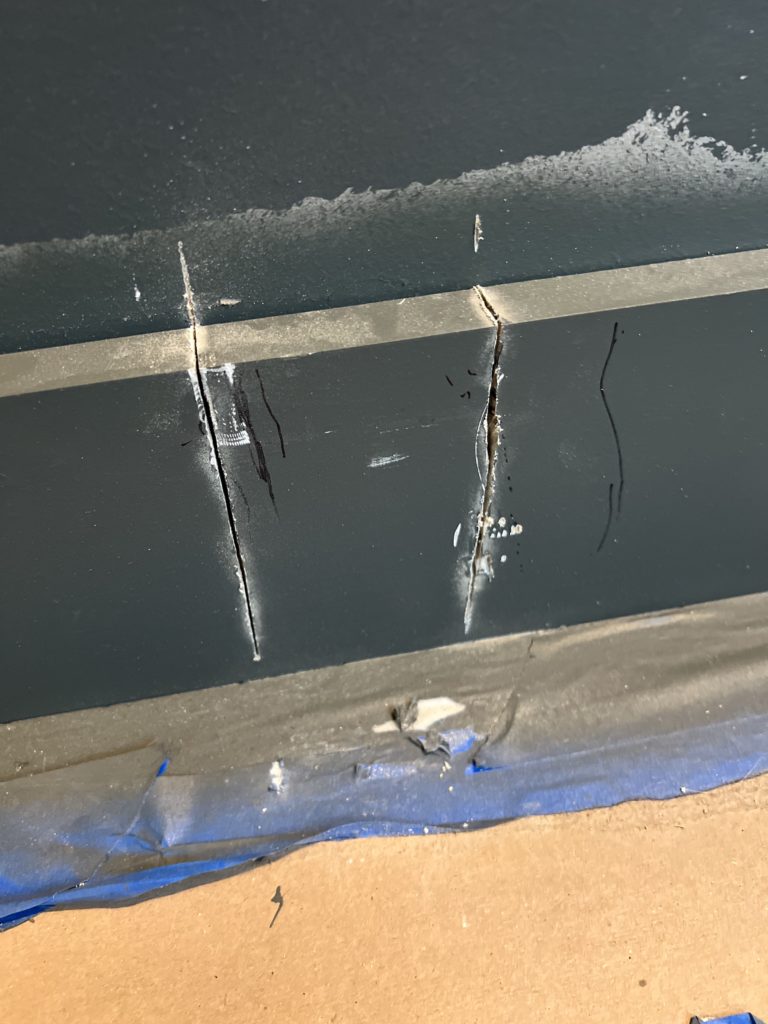
It’s not perfect but a little paint back there will touch that right up.
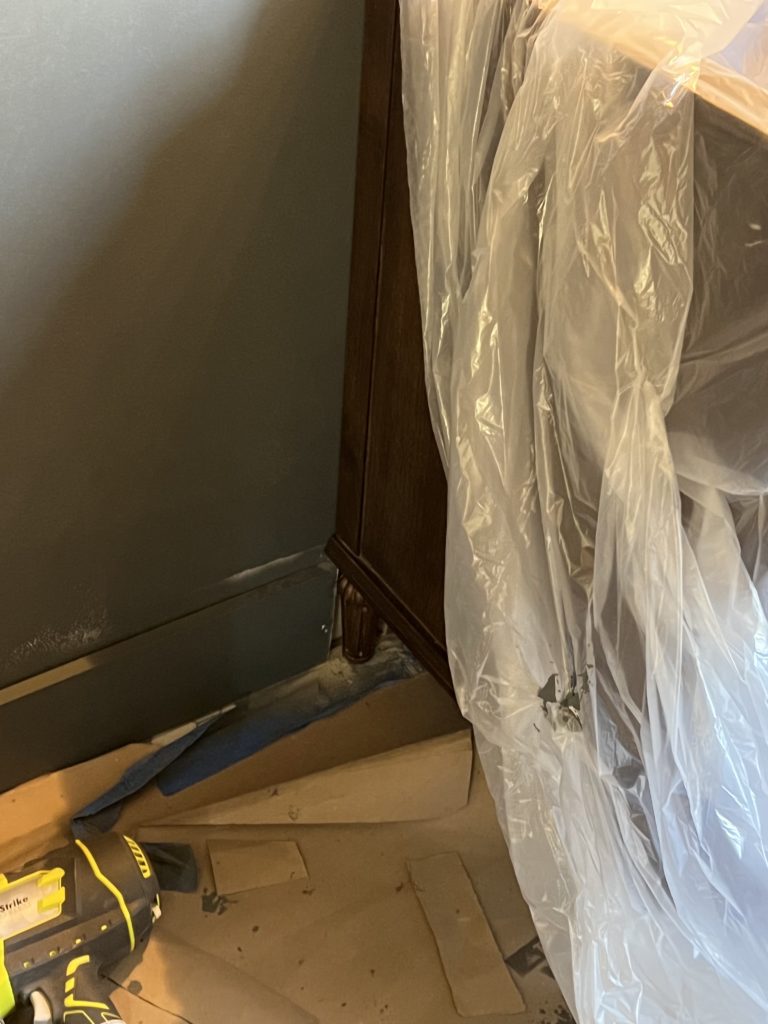
Now the vanity and countertop will be able to sit flush against the wall. Now stand back and admire everything you accomplished! Please reach out if you have any questions as I’m sure I missed some things.
SOURCES
VANITY | FAUCET | FLOORS | MIRROR | LIGHTS

IN CASE YOU MISSED IT, READ OTHER BATHROOM POSTS HERE


Leave a Reply to Kelley Cancel reply
Where we discuss all things design, obviously.
DESIGN
Browse Category
For more of our latest projects, follow along on instagram at @hayden_interiors
© Hayden interiors 2021 | design & Photos by Sara Hayden
Intentional Design for Beautiful Spaces
Jackson, Tennessee
So impressive and beautiful 👏🏻
Thanks Kelley!!! Can’t wait to see your mudroom area come to life!