

In January I reached out on social media to start working on a small, free giveaway. I knew I couldn’t take on a whole entire home renovation with all the projects we had going on in our own home, but I wanted to help someone transform a small space and also show that it doesn’t have to break the bank.

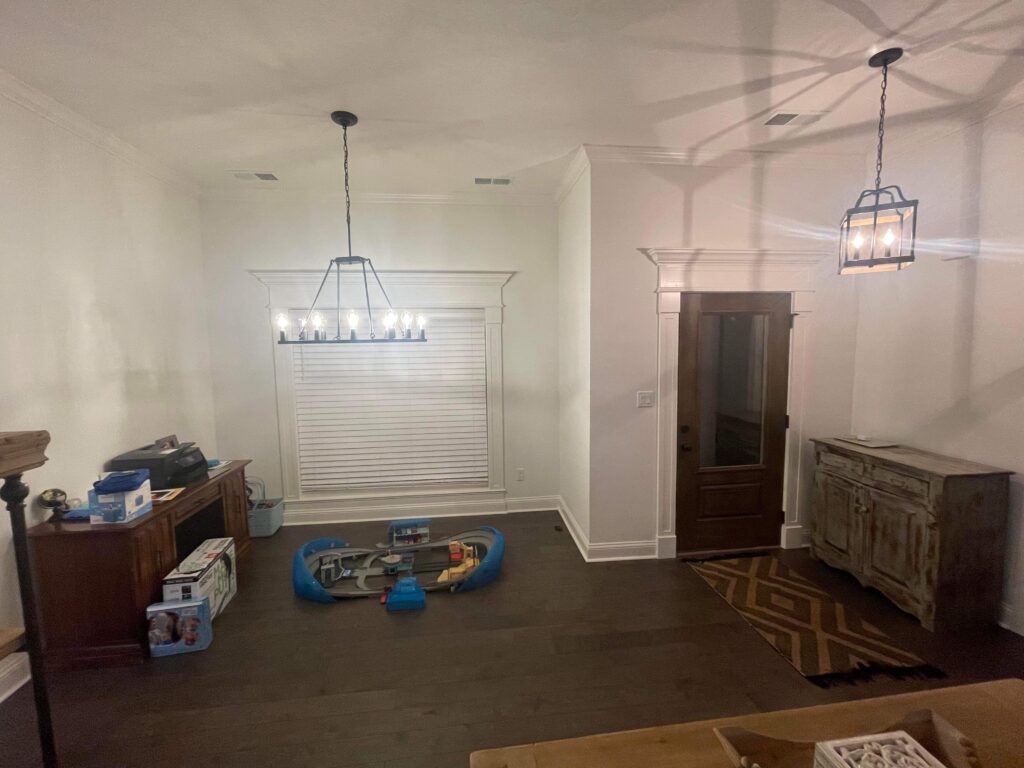
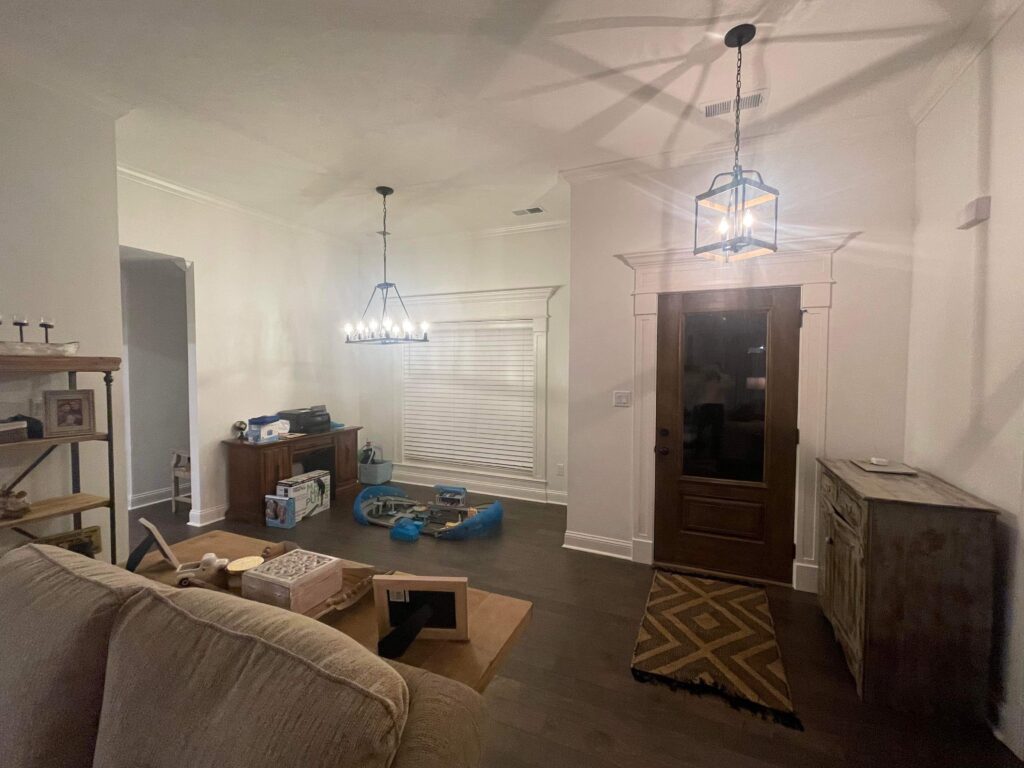
They had an unused area in their front entryway that didn’t serve much purpose for them. They have kids so they wanted to be able to play in the space but also have room for storage for things like their printer, etc. I realize that this specific part of the house was probably designed for some sort of dining / eating area, but this is what I want to make clear about your home. It should function for how YOU live. Not what the room was “designed” for. She said they never used that area for eating. So why put a table there? When we discussed the space, I was so thankful she was open to no table there. She was also extremely open to color. So then the design process started!
ENTRYWAY TRANSFORMATION: SHARING THE PROCESS
I always ask, “how do you want the space to function?” before I start a project because for some, they may have a specific purpose in mind. If not, we throw out ideas and then the family thinks about what would work best for their lives. In this situation, we did the second.
I started by showing her inspiration pictures and going from there. Then I came up with a few different layouts and put them together for her in a mood board so that she could visualize the space and see which one would function best for her family. We discussed the pros / cons of each and then once they chose a layout, we went on to the fun part! Accessorizing!


ACCESSORIZING
This is where the fun part happens and things start to take shape but before that happens, there is quite a bit of tedious behind the scenes work that happens first. We were able to transform this space with the following accessories:
- paint
- lighting
- artwork
- furniture
- rug
- curtains… to be determined
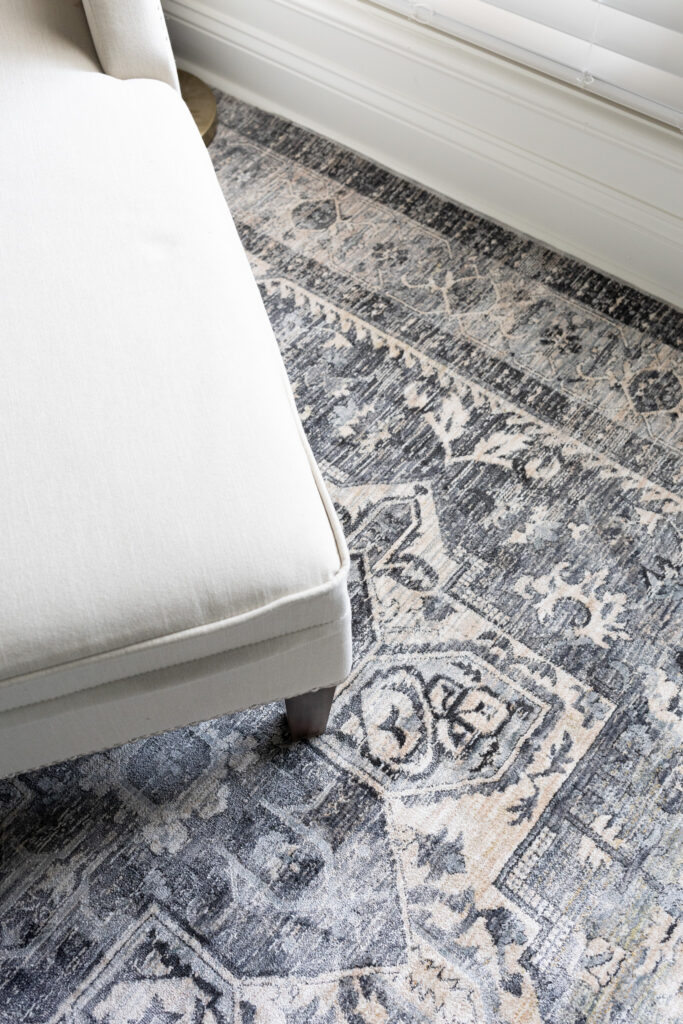
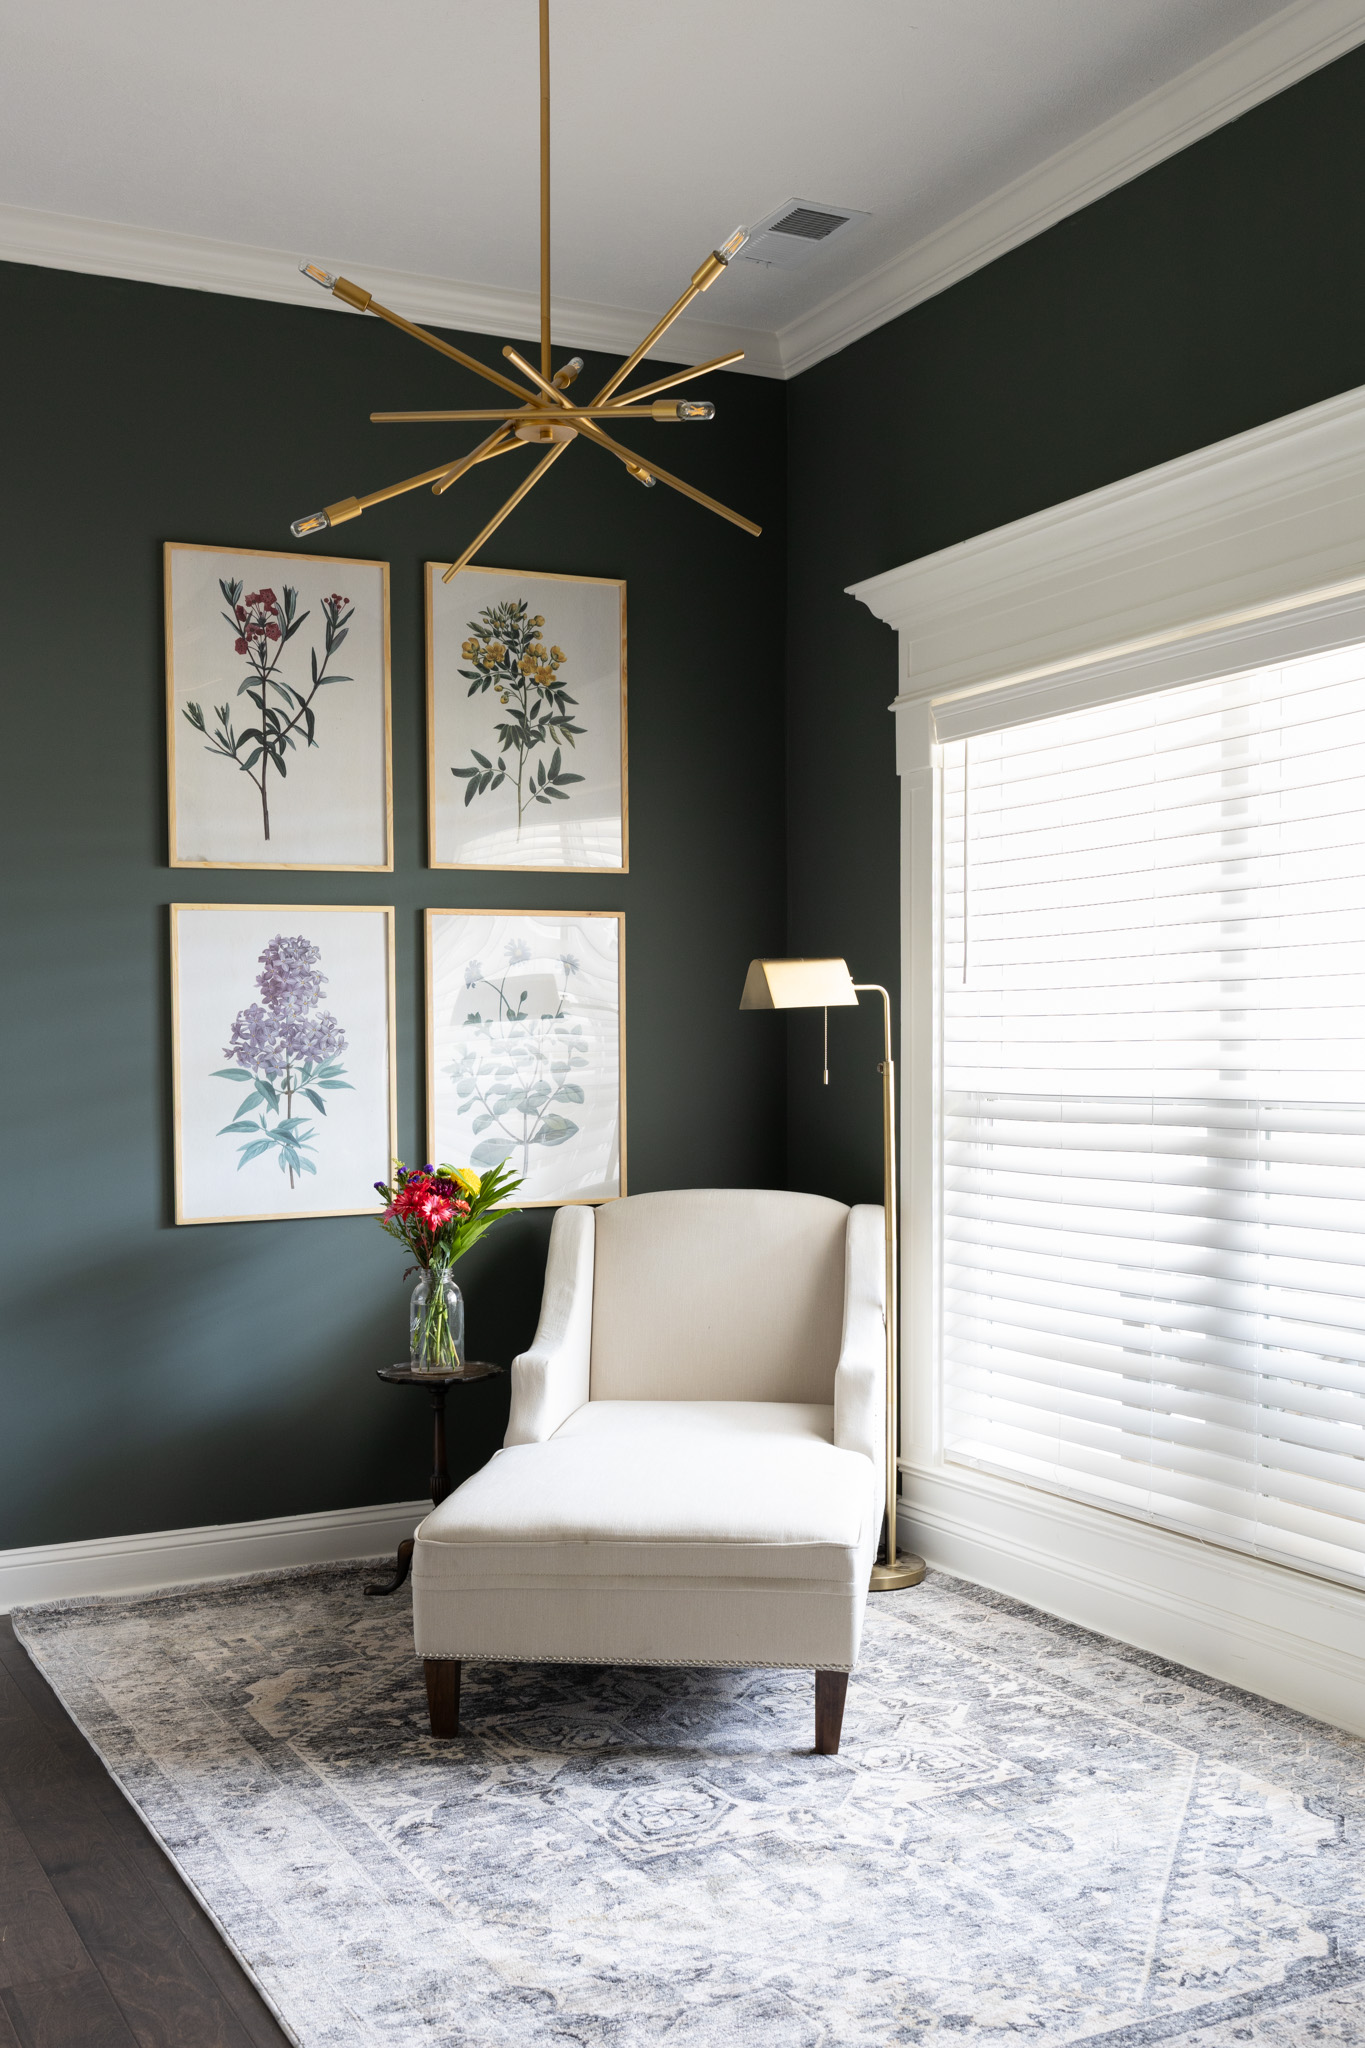
Just like you wouldn’t build a building from the top down, we started with choosing the rug first. I knew if we chose a rug to ground the space, then all the other elements in the room could play off nicely with this piece. I was so fortunate to able to work with one of my favorite online sources: Boutique Rugs. They have thousands of rug options in almost any size you could ever need. The quality and texture are unbeatable for the price and the shipping is incredibly FAST.
CHOOSING THE PAINT
MY FAVORITE PART! Choosing a paint color does NOT have to be overwhelming. I think one of the biggest problems I see with choosing a paint color is that you feel like there is only one right answer. This is not like Chemistry or Math or Science. There is no ONE right answer. Picking a paint could be as simple and easy as saying “I felt like going with this one.” I think lots of times we overthink it and then it immediately turns into a process we HATE. Here I will share my steps in the process that helped me narrow down a paint color.
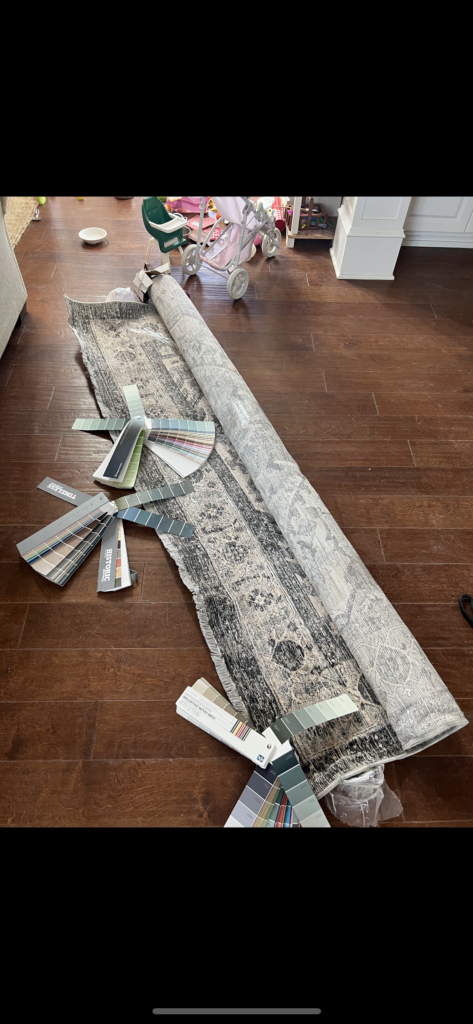
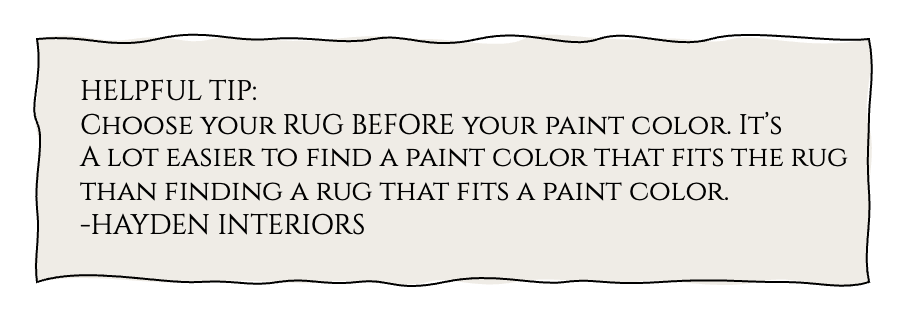
STEP 1: Gather all your sources and inspiration. Early in the process I knew that she was okay with color. We discussed how dark / light she preferred and she was totally open which was so nice! She sent me a few inspiration pictures and so I knew that she was open to blues, greens, and blacks. Once I had the rug in front of me, I started pulling all my paint sources to see which direction was better to go. HELPFUL TIP
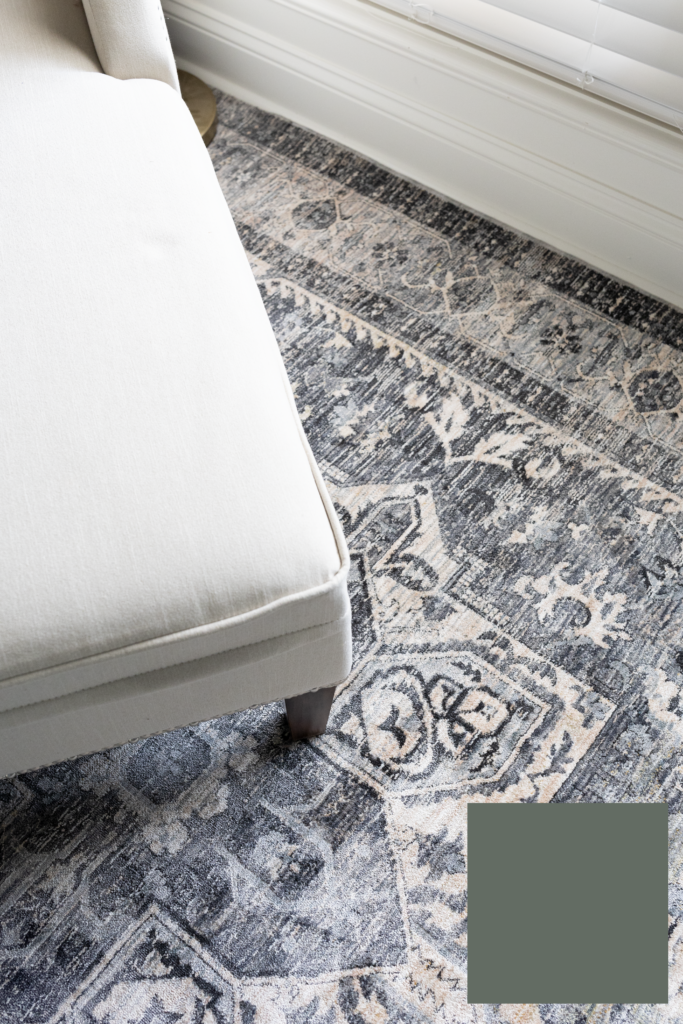
STEP 2: PULL COLORS FROM THE RUG AND GATHER THEM TOGETHER. If you aren’t sure what direction to go, pull out the colors you see in the rug and make a note of them. I got lucky and found that most of the blue tones on this rug were on the same swatch! If you look closely the lightest blues all the way to the darkest blues on the swatch all paired nicely with the colors from the rug.
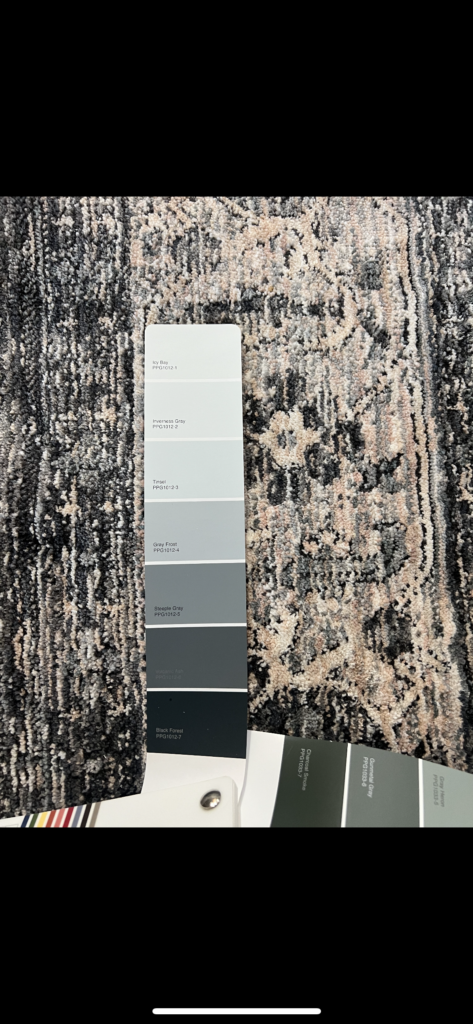
STEP 3: STEP BACK, TAKE PICTURES FROM FAR AWAY, PUT THEM ON COMPUTER. After I found close matches from the colors in the rug, I looked the specific swatches up on the computer and sent them to her in a picture to discuss further. It is noticeable that there was a lot of blue going on in the rug. I asked her which direction she wanted to go with it.Did she want to stick with a dark blue to pull out the tones in the rug? Or go a different, unexpected direction? She said she really didn’t care either way which for me meant trying something new! I thought it would be fine to stick with a blue paint color to match on the wall, but that almost seemed like it would be too easy!
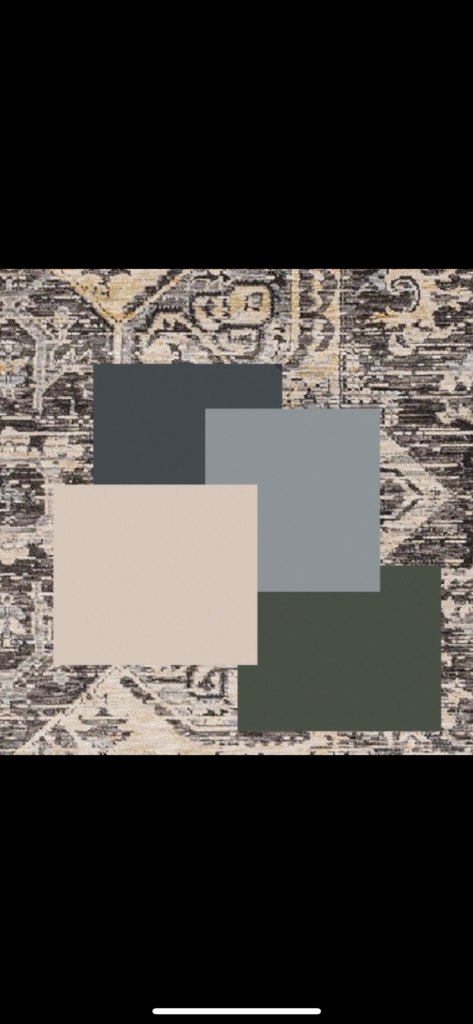
STEP 4: DO WHAT FEELS RIGHT. Try options on a computer or next to rug to see what feels best. I had been sampling tons of blues. Do we go light? Or dark? I was finding that it all seemed very masculine with all the blues. Then finally I tried an olive green and I loved the direction it was going! I then started searching down different greens and found this dark, foresty green and LOVED how it complimented all of the other tones on the rug. An unexpected change for me and thankfully she LOVED it too!
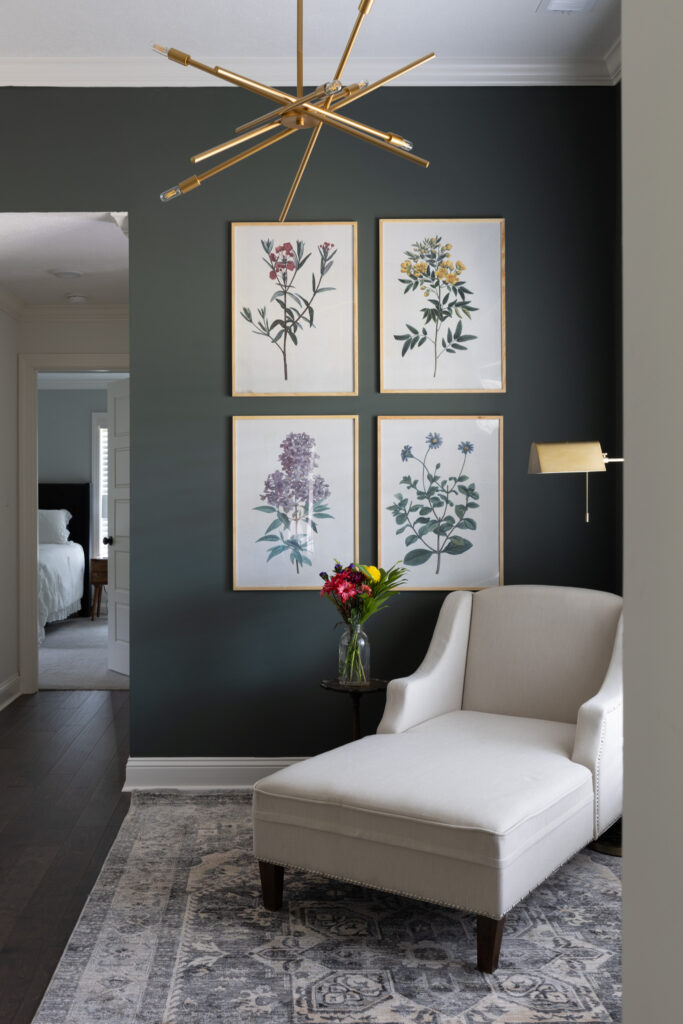
Stay tuned for later this week when I share all about the ART!
SOURCES
Disclaimer: This post contains affiliate links. I may receive a small comission for purchases made through these links at no extra cost to you. Just click on the bold links.
- RUG : Discount Code: HAYDENINTERIORS
- ART: stay tuned
- CHAISE
- CURTAINS
- LIGHT
- LAMP
- END TABLE: vintage
PAINT: GUNMETAL GRAY PPG PAINTS


Leave a Reply

Where we discuss all things design, obviously.
DESIGN
Browse Category
For more of our latest projects, follow along on instagram at @hayden_interiors
© Hayden interiors 2021 | design & Photos by Sara Hayden
Intentional Design for Beautiful Spaces
Jackson, Tennessee
Great blog post! Love the transformation of this room. ❤️
MARCHEL! THANK YOU SO MUCH!!! HOPE IT COULD HELP! YOU ARE AMAZING!!!!!