

Today I’m sharing an exciting post, our next project: our laundry room! Since finishing the bathroom (well I still need to hang art and get towel holders up) I have been taking it slow as far as BIG projects go. I wanted a break to recover from all the time, energy, and MONEY the last project took. In the meantime, I have been loving the extra family time. In this post, I will be covering ALL things laundry room: from mood board to design dilemmas so hang tight!
I call myself crazy because I started working on this project in February which is when I was completely in the middle of the bathroom renovation. In a weird way, getting my mind off of one project and starting another helped with my stress.
For our laundry room and basically any space I touch from now on, my goal is about pushing myself creatively. There are thousands of pictures of inspiration out there. But for me to be happy with it, the fun has always been taking something that I see that inspires me and putting our own spin on it. I’ve had 3 big issues with this laundry room that has kept me from moving forward. 1) cost. When I started calculating all the things I wanted to do in here, it added up pretty quickly. 2) Creativity. I have felt creatively stuck with certain design aspects in here and I’ll share them with you. 3) Layout. I’ve had difficulty with this room because the asymmetry in here has been challenging. Since I’m working with what we already have and not doing a complete renovation, this is a bit more challenging than starting from scratch.
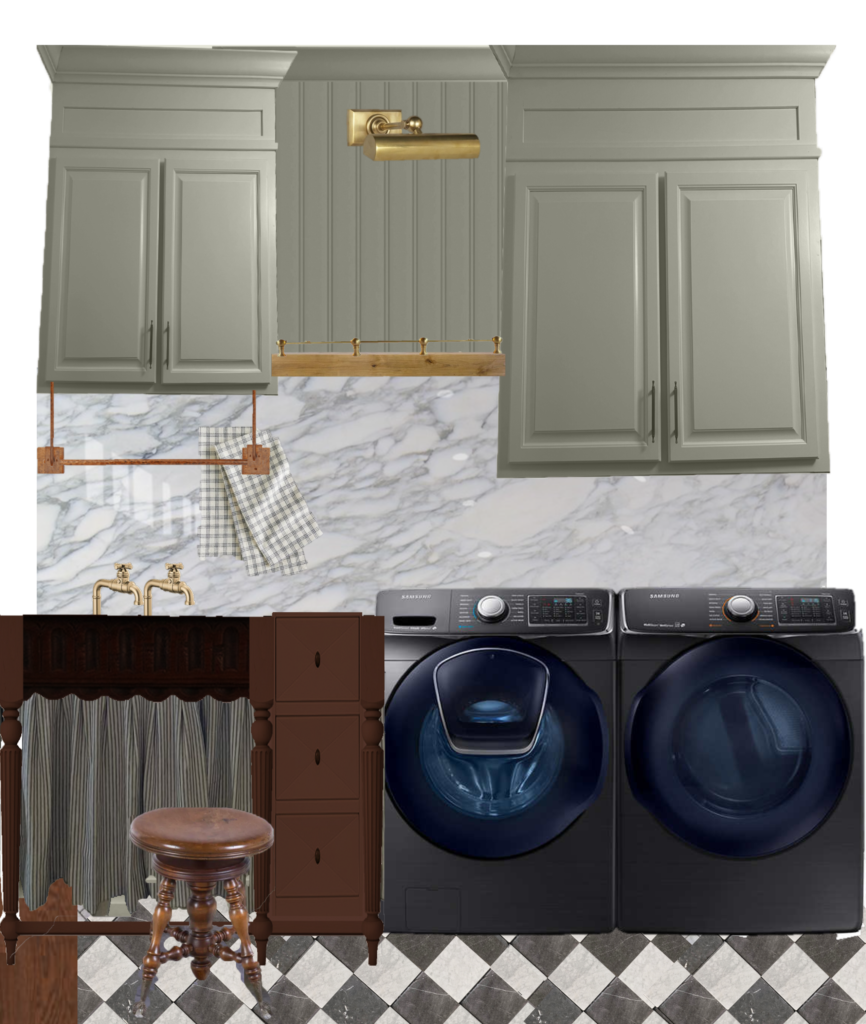
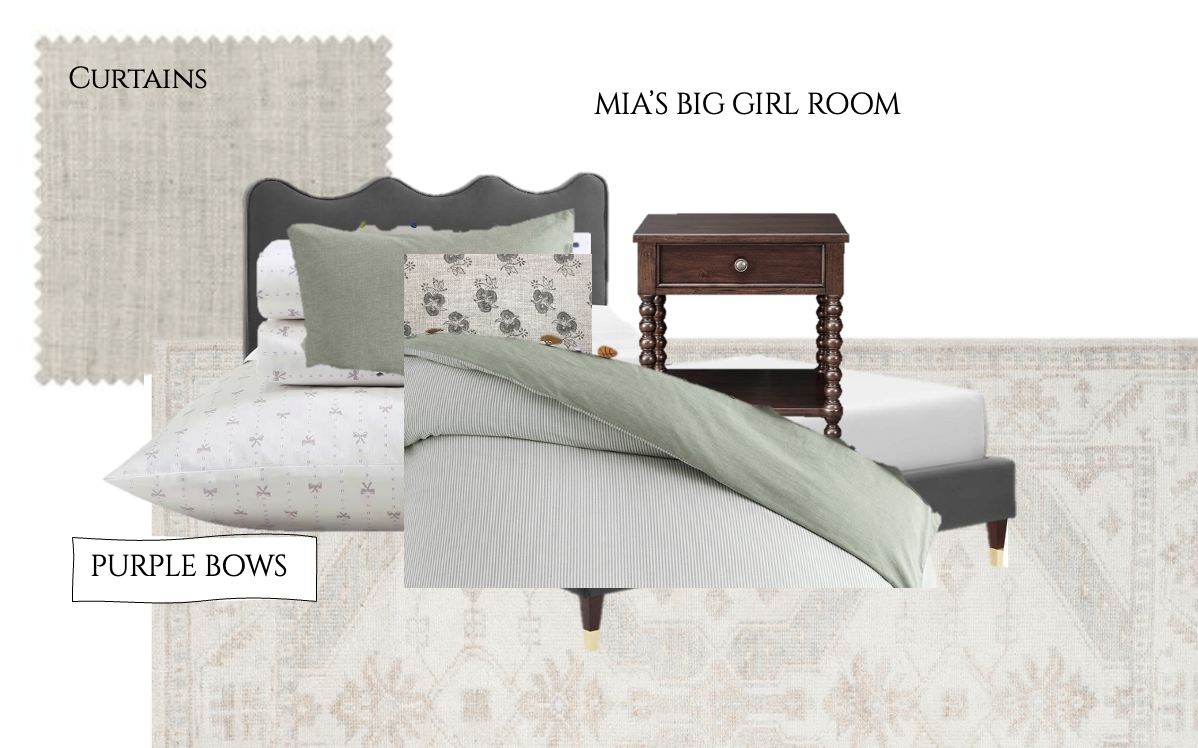
MOOD BOARD
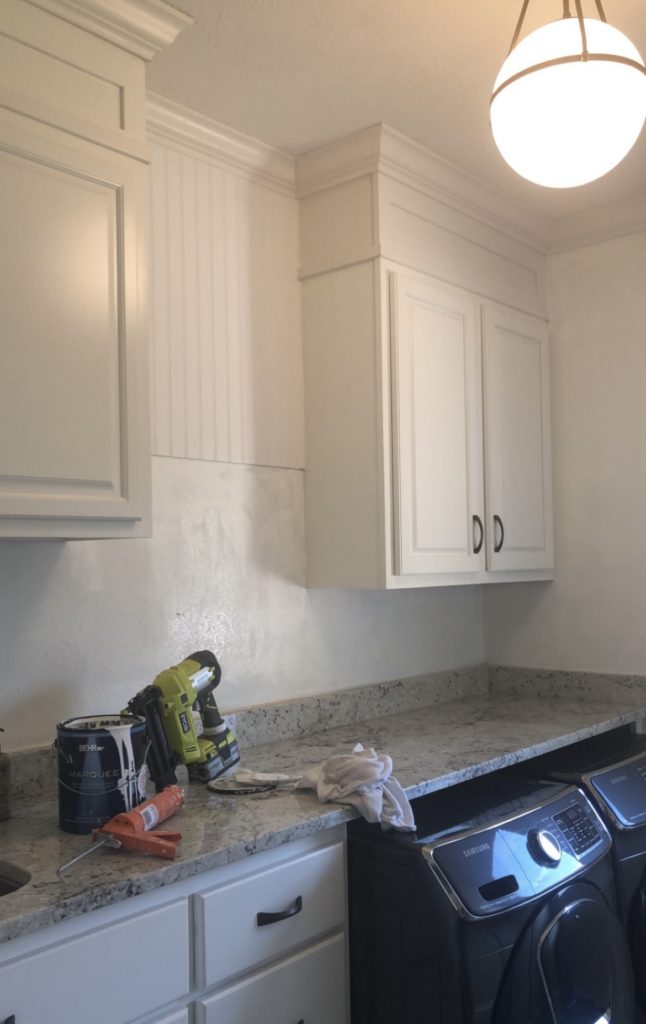
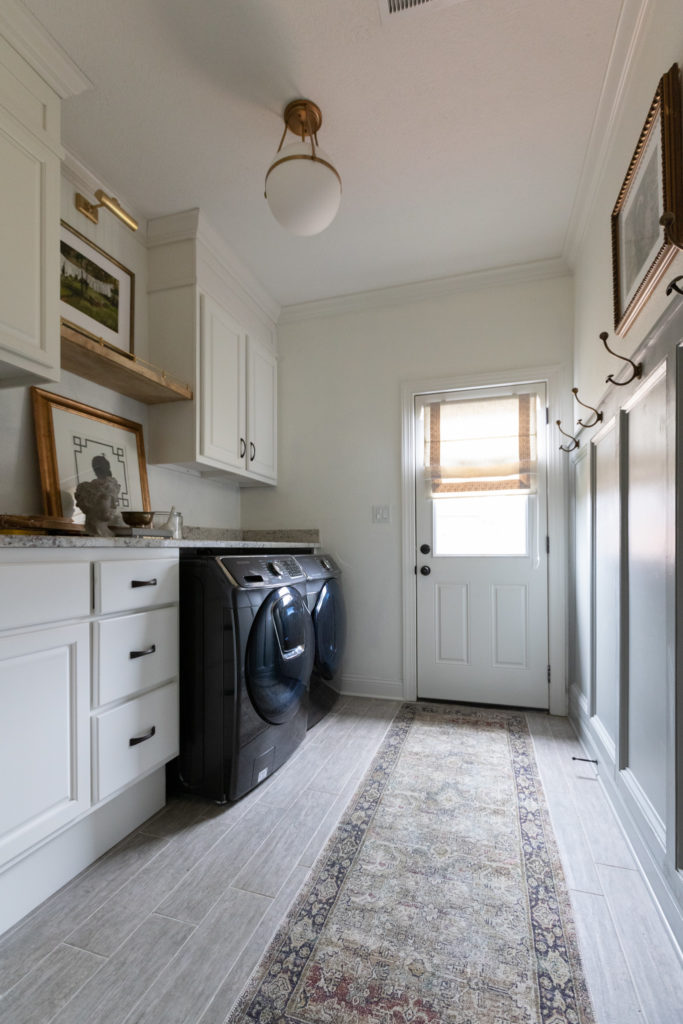
Let me begin by saying that this is not officially what we are doing. I’m still playing around with some things. The great thing about a mood board is that it’s free and you can change it a million times until you find something you are happy with. The goal when I create a mood board is filling it up with things that inspire me. From there I try and tweak things until they feel right. While my photoshop skills are still very basic at best, I love seeing it all laid out. Sadly, I cannot find ANY before pictures except this one right before we moved in.
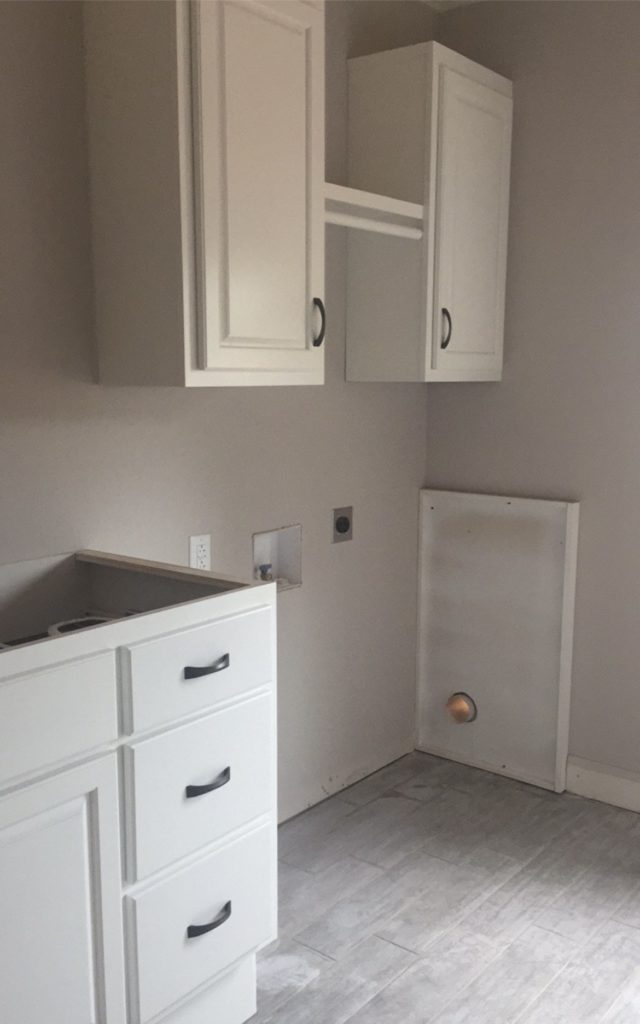
You can see the weird spacing of our upper cabinets. It didn’t really make sense to me when we moved in but I was fine with it! After living with it for four years I began to realize that it didn’t really look great visually AND it didn’t provide much storage. We never used that clothes rack thing between the cabinets because it was too tall for short little me. The entire wall to the left of that cabinet was empty. I decided to hang a mirror there at one point but you couldn’t even see it. So one day I drew out some plans and had a local cabinet maker come over.
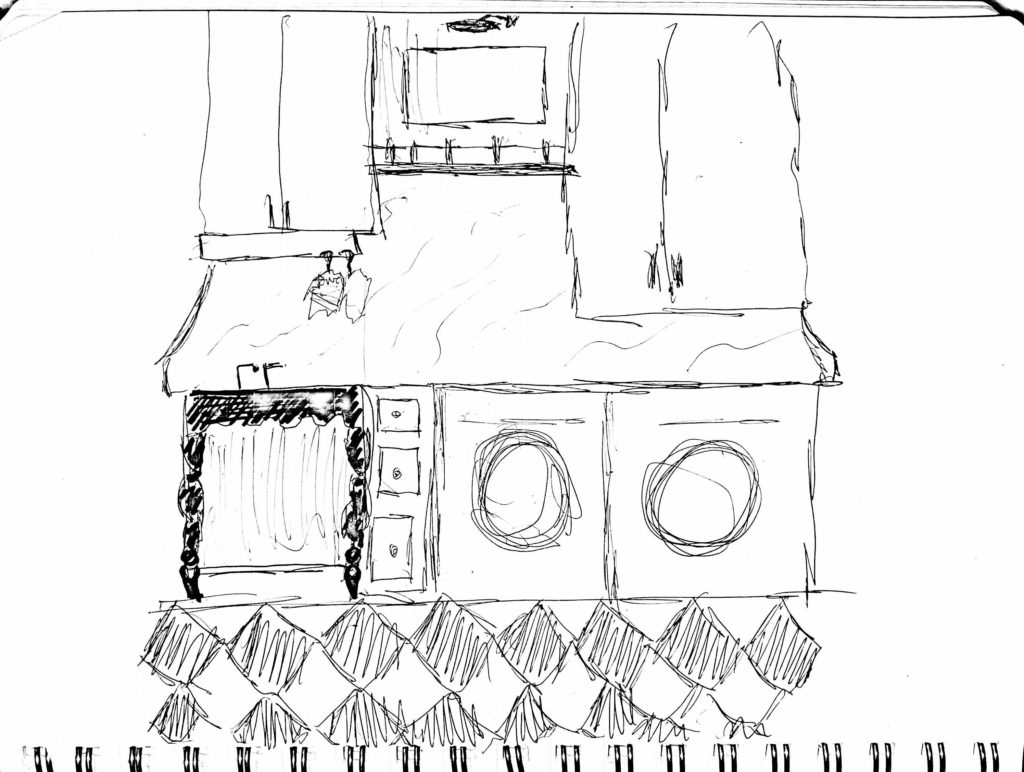
PLAN A (ON TOP)
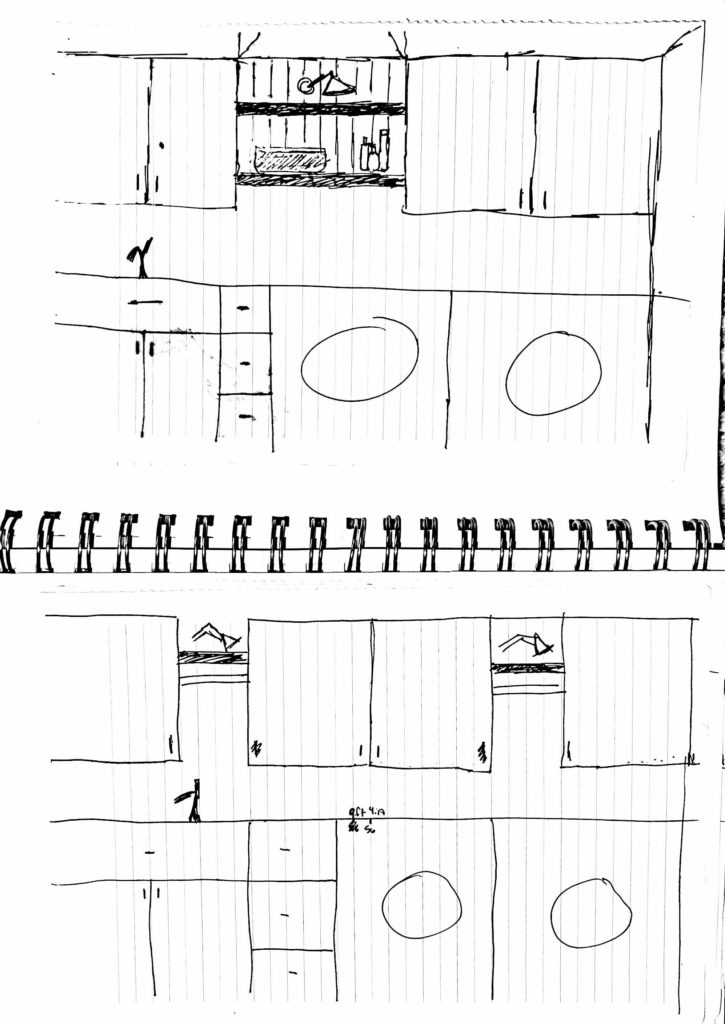
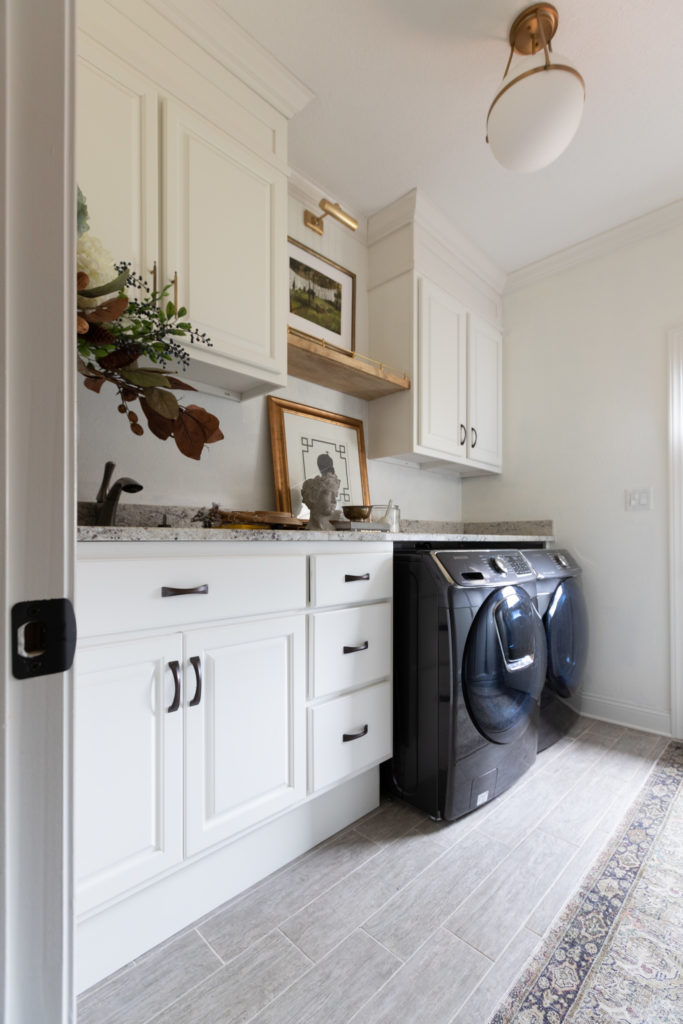
I decided on plan A as that seemed more visually appealing. Having cabinets in the center of the room seemed to feel closed off and disorganized. Placing a shelf in the middle seemed to open up the room more and provide better symmetry to the space. I found a local retired cabinet maker who was friendly and experienced. Instead of building us an entire new set of cabinets, I had him reuse our existing cabinets. I just had him push together what we had instead of having them spaced apart like that. Then I had him build an exact match to our existing on the other side. In other words he built us one set instead of two. I realize other designers do things differently, but it was really important that our cabinets went to the ceiling. I knew storage wise, it wasn’t necessary so this was purely aesthetic. I had him build me a shaker box on top of each cabinet set so that it draws your eyes up and makes the room feel taller
MY LAUNDRY ROOM REGRET
My only regret is that he talked me into raising the cabinet on the left side to accomadate for the faucet. I REALLY should have stuck with my gut on this because I do NOT like the look and now I can’t even reach those cabinets without a stool. This has been a huge problem area for me when it comes to design that I will go ahead and explain next.
THE DESIGN DELIMMA
As I said earlier, this was an extremely difficult space for me to plan because of the way I executed our upper cabinets. There was so much asymmetry in one small space that it felt unintentional in all areas. Yes, both of our upper cabinets were the same width across BUT they were not the same heights. When I thought about how a stone backsplash would look, I just couldn’t picture it. I wanted to find a way to make the left, shortened cabinet look intentional. I decided that I’m going to hang some sort of metal rod down from that cabinet and either use it as a paper towel rack or hand towel rack. Plus hanging clothes might actually be doable now with the bar at a lower height. We also wash our paintbrushes and supplies in this sink, so having a towel rack above would be oh so nice. Adding this accent under the set of left cabinets may balance out the room in a way to make it look intentional. Honestly, this sort of detail might not even bug some people.
DESIGNING THE VANITY

My absolute favorite part about the entire space! For what seemed like months I was stuck on figuring out the most aesthetically pleasing way to design this vanity. I knew I wanted it to be stained but the current plan had me super confused. Note the picture above. The highlighted areas represent painted cabinets. It seemed weird and choppy to me to add painted cabinets on the bottom too, so I had to figure out a plan. Have you ever noticed when you try to force something it just doesn’t come to you? For weeks it seemed like I kept trying to force it and I wasn’t getting anywhere. I decided not to pick it up until I wanted to. When I finally stepped back one day and just worked on it for fun, that is when the creative juices started flowing. It took a few tries but let me show you what I came up with and how I created it!
I also knew I wanted to have a set of drawers for a hidden pull out ironing board. We have this currently in our laundry room and let me tell you, it is SO nice to not have to pull out an ironing board from the closet every time I use it. I know myself and I would never put it up. So I knew I wanted to keep that feature if I could.
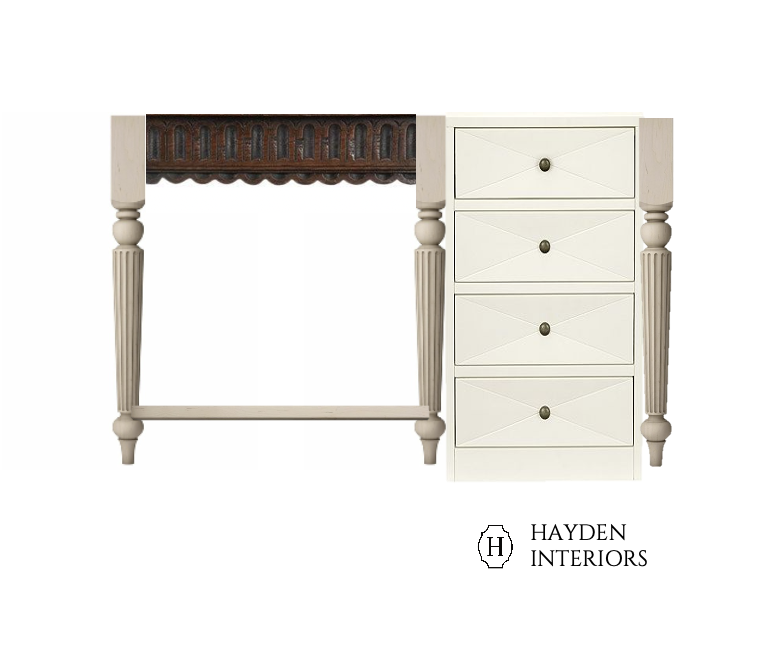
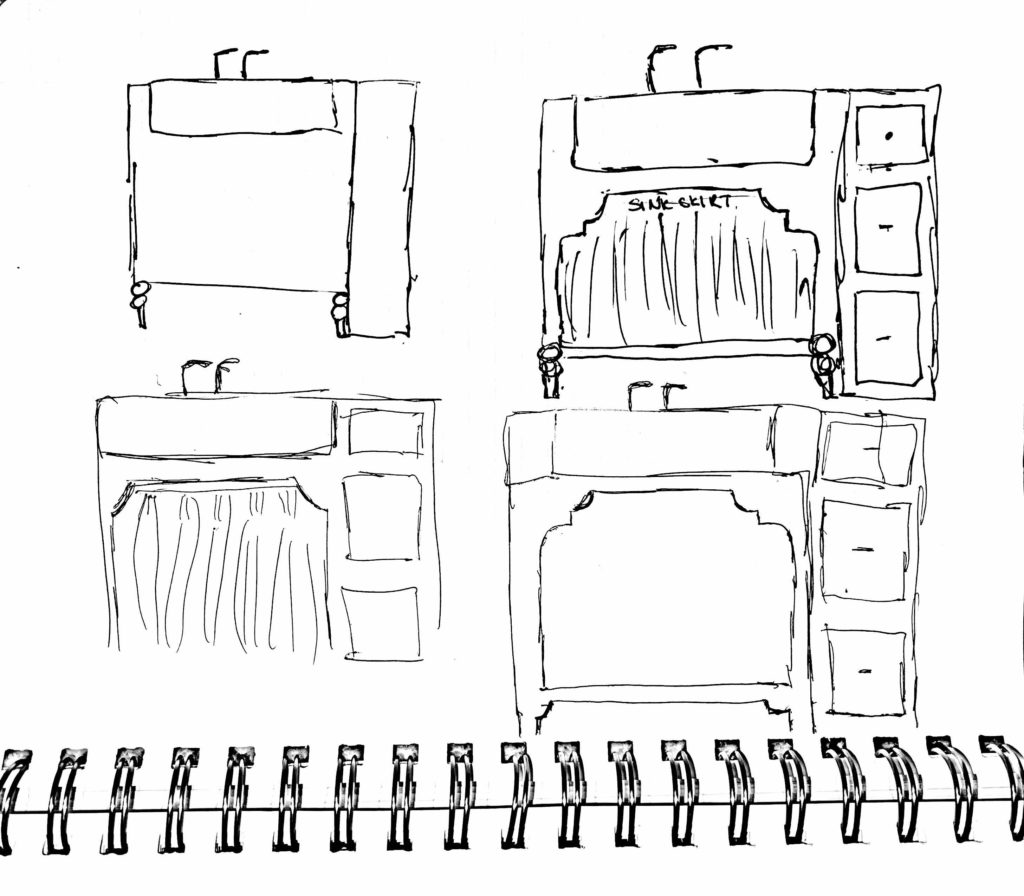
Plan A: I started with the most basic things. I knew I wanted a vanity that floated off the floor. And I knew I wanted drawers for our ironing board.
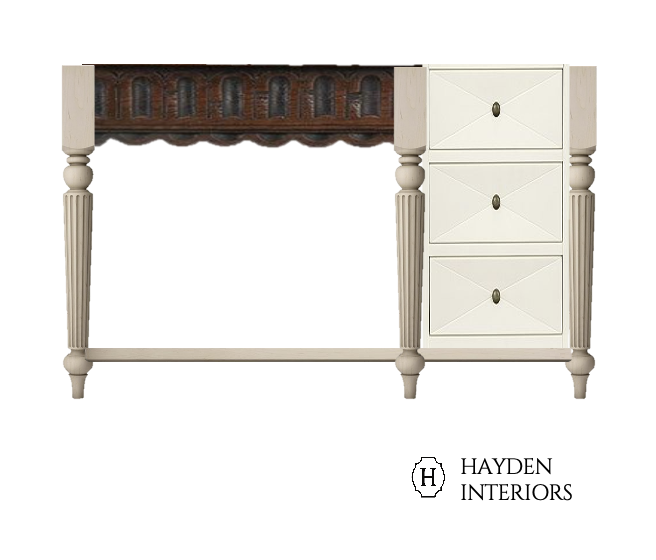
Plan B: I decided to add another leg at the end of the vanity to make it look more like a piece of furniture but somehow it still felt off balance.
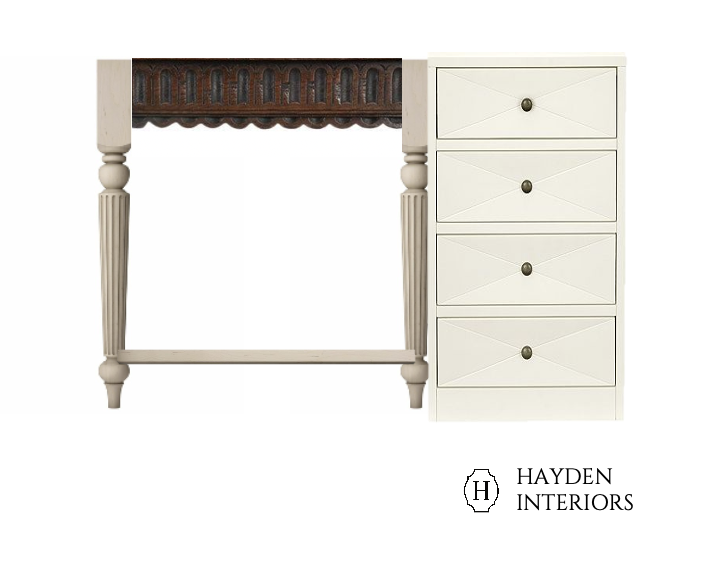
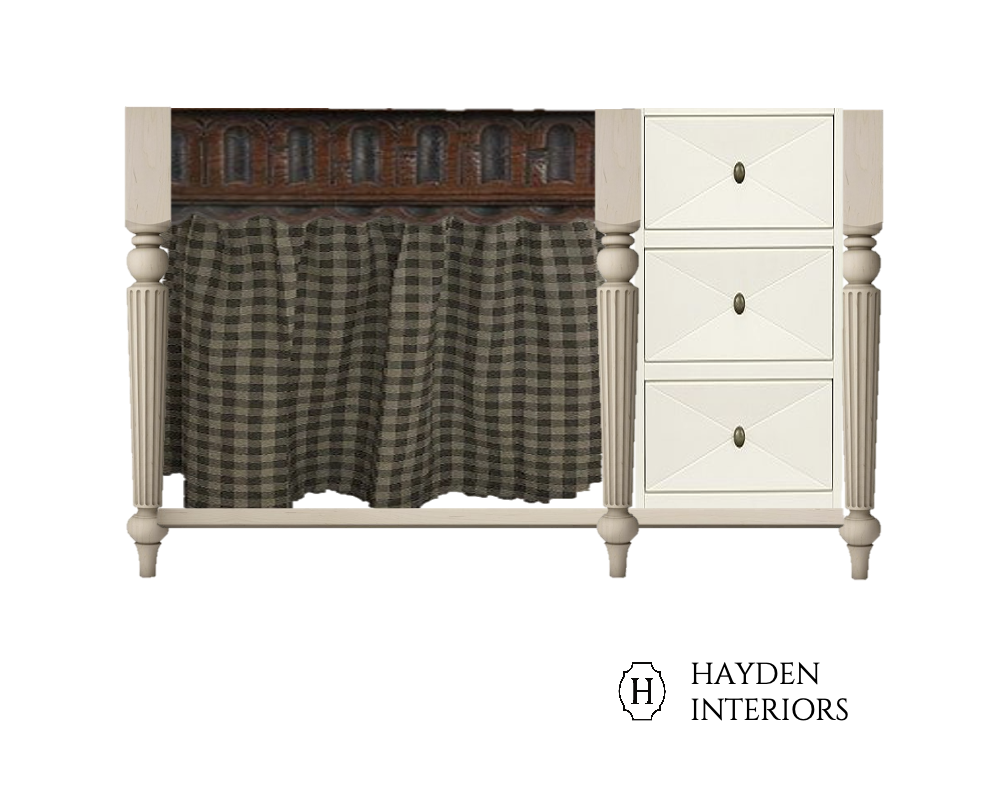
Plan C:4 drawers also seemed like a bit too much so I brought it down to 3 and decided to float that off the floor as well. It truly is magical how the tiniest changes make the biggest impact!!
Plan D: I added a sink skirt because I plan on keeping my tools under here and it will be so nice to just slide a curtain vs open both cabinet drawers and have them bang against the wall. I sent it over to the carpenter immediately to see if he could make it and he said he could! by the way, my mockup isn’t correct. This will all be stained and I’m SO excited for the amount of warmth it’s going to add to the space. This was the last missing piece that I needed creatively to be happy with this room. This is the kind of stuff that brings me life.
THE PLAN: WHAT I PLAN ON DOING VS WHAT I PLAN ON HIRING OUT
WHAT I’M DIY-ING
- skim coating the walls
- repainting the upper cabinets
- tiling the floor
- hang new light fixture
WHAT I’M HIRING OUT
- installing new countertops/backsplash
- plumbing hookup
- vanity
Remember when I asked in stories the other day if you are a “plan out every detail” type person or if you are a “make it up as you go” type person? I am a little bit of both, but when it comes down to all the final small details, this is where I procrastinate and start making it up as I go! I still need to narrow down floor tile, countertops, and sink which is basically everything hahahha. The carpenter making our vanity said it would be June or July before he can come out which works out great for us anyway and allows me to have time to finalize things! I will be learning another set of DIY skills in this room, which makes me extremely excited. I am planning on sharing them with you as I go. I don’t have a specific time frame in which I’d like to get this done, thankfully. I may not be able to really do a lot of it until Mia starts school in August but would like to at least share where I’m at.


Where we discuss all things design, obviously.
DESIGN
Browse Category
For more of our latest projects, follow along on instagram at @hayden_interiors
© Hayden interiors 2021 | design & Photos by Sara Hayden
Intentional Design for Beautiful Spaces
Jackson, Tennessee
+ Show / Hide Comments
Share to: