

Picking a stain: DIY table makeover. I thought I would dedicate a blog post just to share my experience with choosing a stain for your table. I will share some things I learned and some things I should have applied. Hopefully this saves you time and money and gives you a confidence boost to be able to try this on your own.
I’d say the most important thing you can do in the beginning is to research your wood type. This step matters! Different types of wood react differently to different stains so it’s a good idea to have a good idea on what you are working with. To begin, its good to know if the type of wood you are working with is considered a hardwood or a softwood.
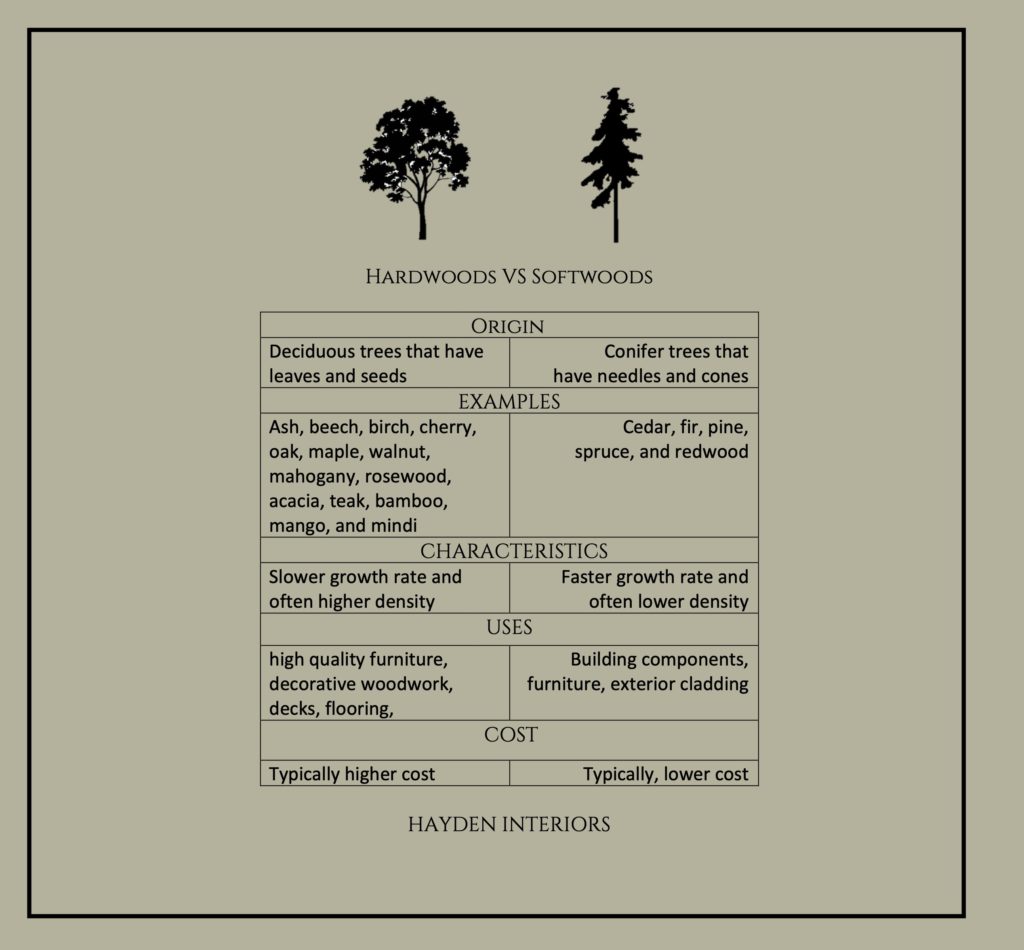
Hard vs. Soft Woods
Many people mistakingly think hardwoods vs softwoods classification has to do with how hard or how dense the wood is. They think hardwoods are harder, or more dense, and softwoods are softer, or less dense, but the actual classification between the two has little to do with density and more to do with the seeds. If the tree produces a seed that has a coating, it’s considered a hardwood. It can be a fruit or a shell. These include oak, maple, walnut, cherry, etc. In contrast, trees that drop their seed straight to the ground without a coating, such as pine, fir or cedar trees, are classified as softwood trees. In general, softwood trees grow much faster than hardwood trees, which typically results in softer wood and less dense wood, but there are exceptions to this rule (such as balsa wood).
Uses of Hardwood and Softwood
Because of the way they grow, hardwoods are generally denser than softwoods. Denser woods are better used for flooring, construction, decks, and high-quality furniture. Softwoods can be used for framing lumber (such as studs, joists and beams) as well as trim, doors and windows. Softwoods are also typically used for engineered products, like plywood, OSB, and paper.
Staining Softwoods
Softwoods generally have a very open cell structure which allows them to absorb massive amounts of stain, which can produce some undesired consequences while staining. Because of the way softwoods grow, the wood grains can vary in density throughout the plank, which can produce a splotchy or uneven appearance when stained.
If you are concerned about staining softwoods and want to maintain an even finished product, consider using a pre-stain conditioner about 20 minutes before you stain the project. This is soak into the open fibers and act as a barrier for the more porous areas of the wood, allowing the stain to sit more evenly on the surface.
Staining Hardwoods
Hardwoods have a much more dense cellular structure, which makes it harder for liquid stain to penetrate the wood. To help maximize the amount of stain absorbed, make sure you sand the wood before starting to stain the wood or the wood may not absorb the stain well. Roughly sanded wood exposes more surface area, giving the stain more area to soak into.
Staining Tips
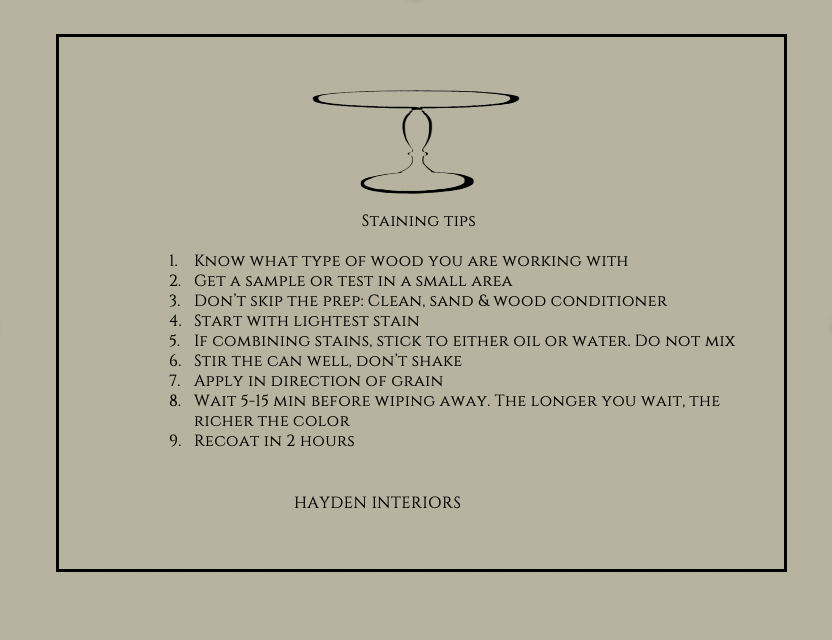
- Know what wood you are working with. Read above if you missed this.
- Now that you know what type of wood you are working with, try and get a sample of it so that you can practice stain combinations on it. If you can’t get a sample, then test in a small, inconspicuous area of the table that might not be easily seen.
- Don’t skip on the prep. I can’t tell you how important this step is. Softwoods tend to have an open cell structure which results in being able to absorb massive amounts of stain. Wood conditioner helps soak into the fibers and create an even layer allowing for the stain to absorb more easily onto the surface. Hardwoods may not absorb stain as easily so it is crucial that you sand before hand.
- Here is my advice. Start with the lightest coat first. Apply thin coats first. Even if you aren’t planning on combining stains, you still need to apply thin coats because you can always add more stain to darken it. However, you cannot go back and make stain lighter without starting completely over.
- This should be a given but when you are in project mode, this is something that can be easily skipped. If you are applying or mixing stains, always stick to either oil OR water. Do not combine oil and water.
- Stir the can. Don’t shake.
- Apply in the direction of the grain. I have always had better success with a cloth.
- Wait 5-15 minutes before wiping away stain. The longer it sits, the richer the color. You should always wipe away the excess stain. Wood can only absorb so much stain. Once the board has absorbed as much stain as it can, the stain will just sit on top of the wood and feel tacky even if you let it dry for days. You should wipe your excess stain off with a clean cloth when you’re done applying.
- Recoat in two hours. For best results, apply in 45-90 degrees Fahrenheit.
WOOD SPECIES CHART
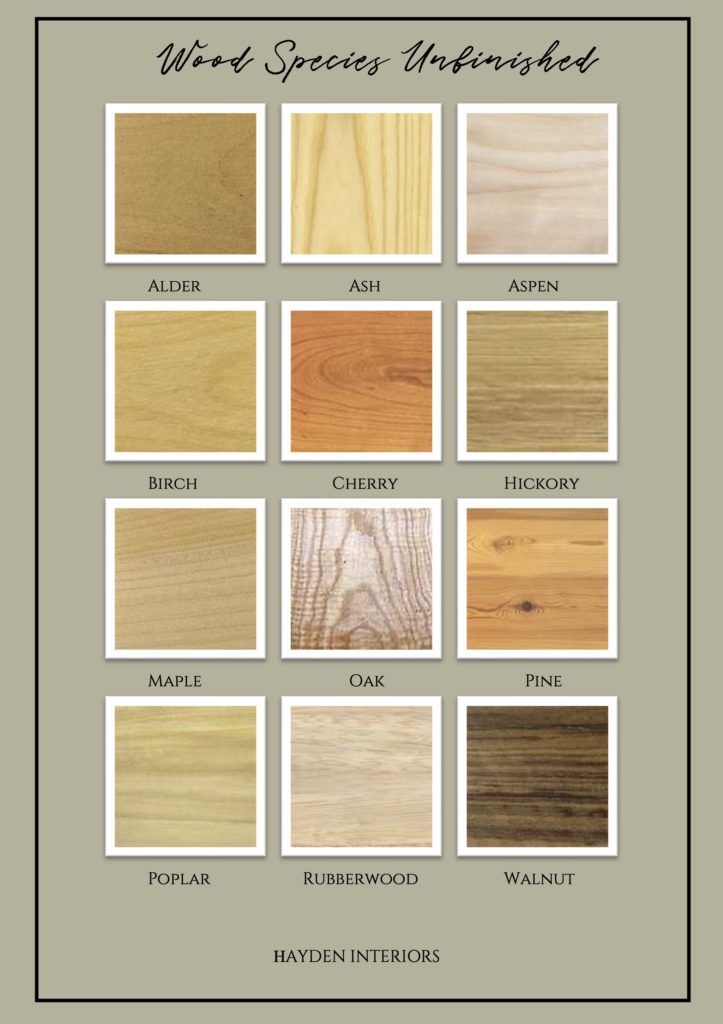
I put together this list of wood species in its natural state so that you can get an idea of how stains may or may not change the overall look of your furniture. This article is a great resource for helping people like you and me when determining how to finish our special pieces of furniture. Linked here. Another great one that refers to all the characteristics of each wood species listed here.
My Biggest Stumbling Block
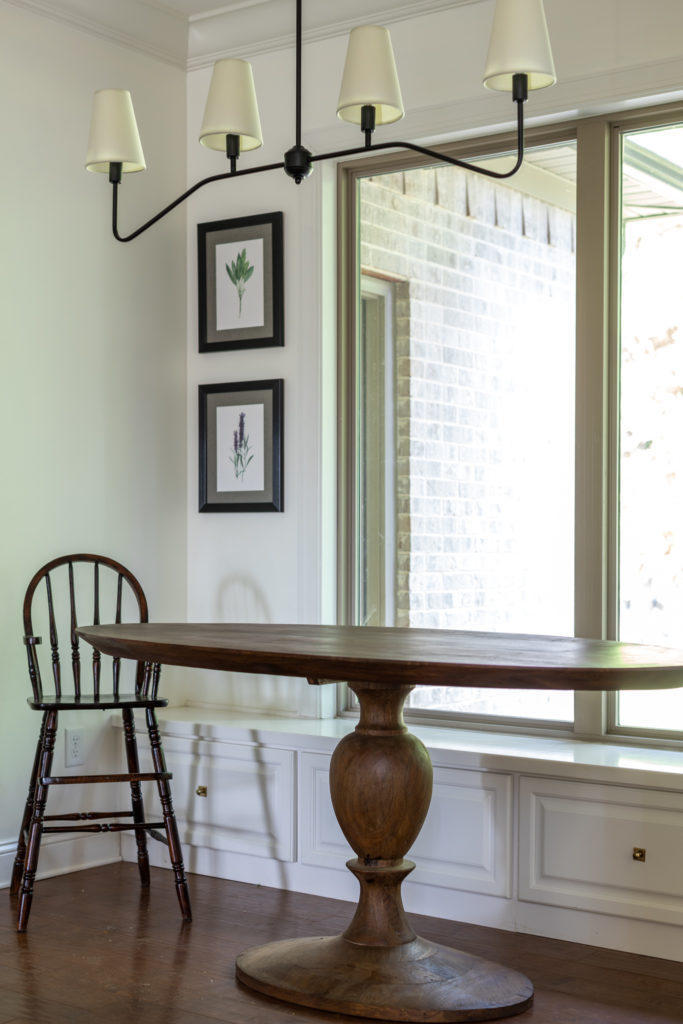
I would say the biggest stumbling block for me was not knowing enough about my wood therefore not knowing the type of stain to apply and how it would absorb and take stain. I assumed all woods would take stain very similarly and that isn’t the case. If you don’t have a sample, your best bet is trying it on your actual piece in a small area where you won’t be able to see that well. I also feel like I could have been a little more careful with how heavy I applied the stain initially. I would probably have made it a tiny bit lighter if I was going back and redoing it, so here is your warning to start light and slow! In a perfect world, I would have practiced with about any and every stain combination under the sun. I would have added in more gray to help balance out the red tone. Apparently adding white wash, green, raw umber, and bleach helps neutralize red tones but I was too scared to try these considering the cost of the table. Overall I’m extremely pleased with the finish and don’t mind the red undertone after seeing it in the space. If you are looking to start a project like this, please don’t hesitate to reach out. I’d be thrilled to help answer any questions.
SHOP PEDESTAL TABLES HERE


Where we discuss all things design, obviously.
DESIGN
Browse Category
For more of our latest projects, follow along on instagram at @hayden_interiors
© Hayden interiors 2021 | design & Photos by Sara Hayden
Intentional Design for Beautiful Spaces
Jackson, Tennessee
+ Show / Hide Comments
Share to: