

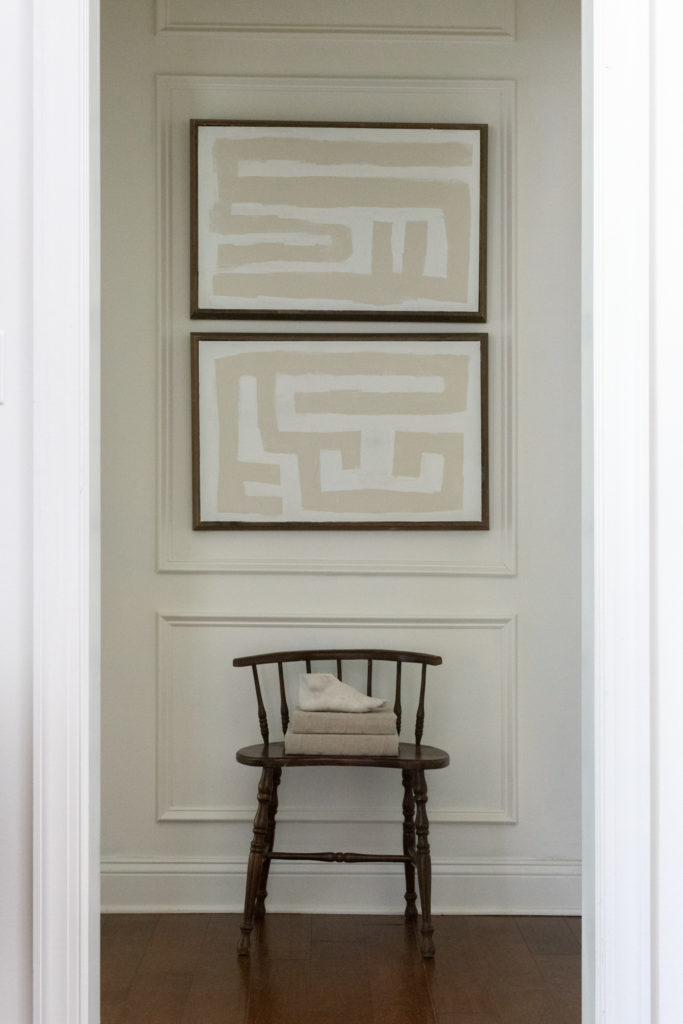
Before I begin, I want to share that this project is extremely meaningful to me not because it’s a foot tutorial, but because it was something I created myself, with my own two hands… or should I say feet. To take it one step further, I put my own spin on it by applying pattern to it and let me just say this, I love it. Anytime you get to make something yourself, it adds a whole new meaning and value to what you have. With all things design (or really anything in general), we are drawn to things that interest us. Whether it provokes a good or bad feeling, we are drawn to it. For me, inspiration came from Room For Tuesday’s wooden hand linked here. I have seen a few more instances with bust sculpture from designers and I’m always drawn to it because it makes you look and stare just a little bit longer. With that being said, I am going to show you how I made this custom foot sculpture art for under $25 and how I styled it.
LET’S BEGIN!
MATERIALS
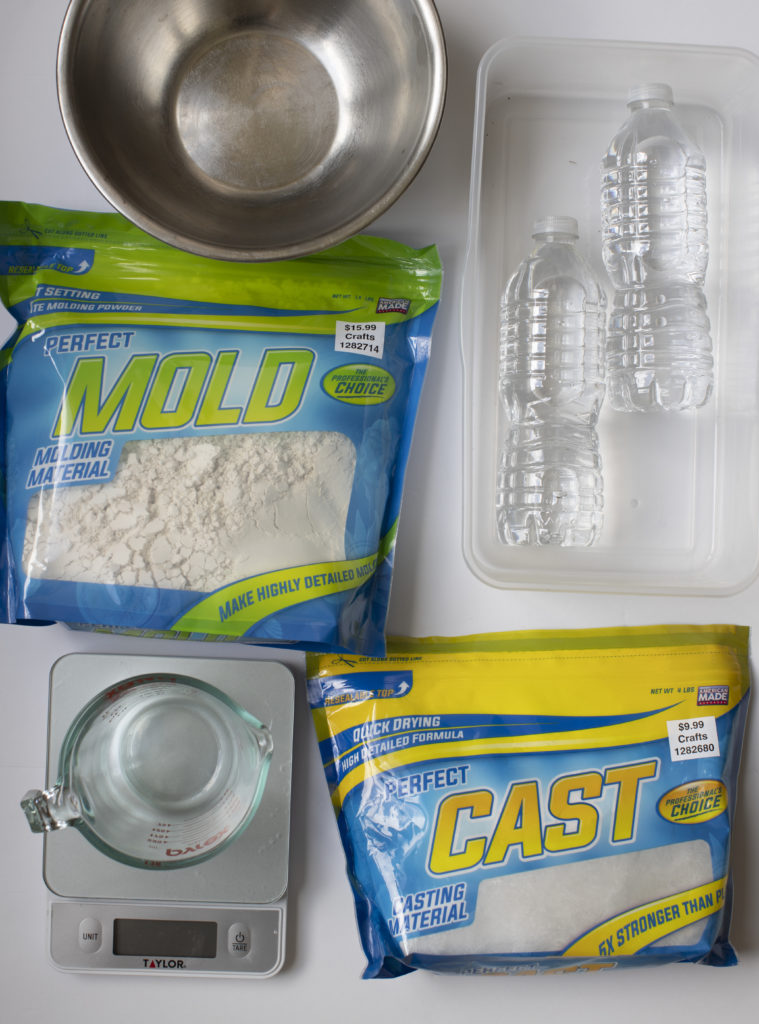
- 1 Bag Perfect Mold Cast
- 1 Bag Perfect Cast
- Clear Plastic Bin
- Bottled Water
- Measuring cup
- 2 Large Mixing Bowls
- Scale (optional)
- Gloves (optional)
- Paint stick for stirring (optional)
STEP ONE
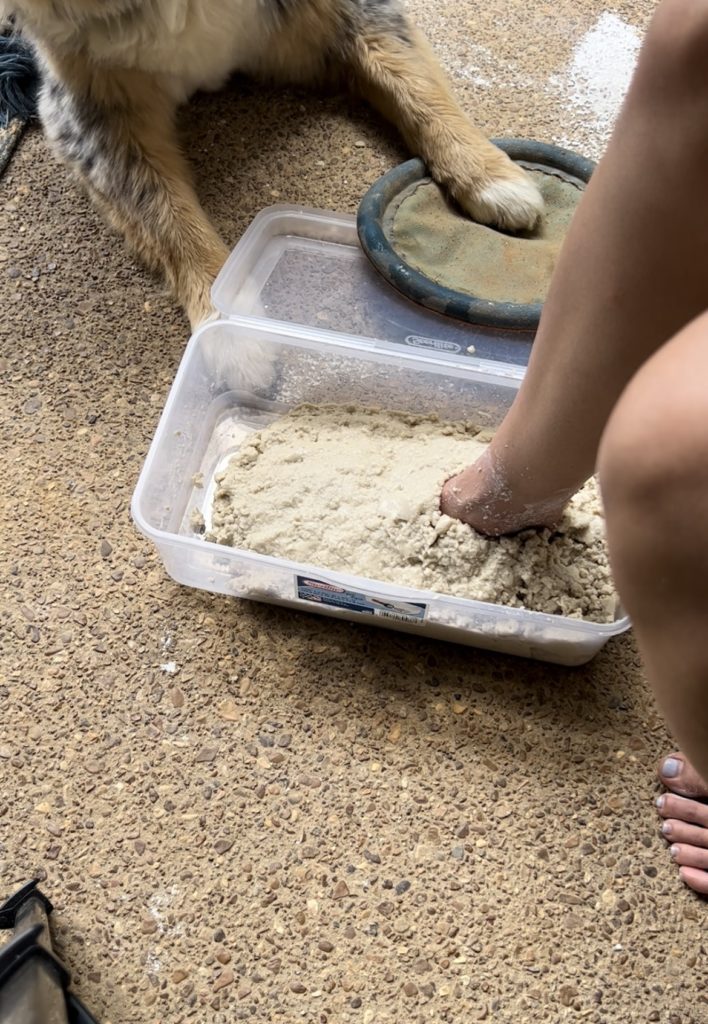
The best way for me to explain it is to follow the directions on the bag! I highly recommend watching this youtube tutorial if you hate reading instructions like me. It is very self explanatory. I began by finding some sort of plastic container that would fit my foot. I actually had to redo this project over because the first time, I used a container that was too big and didn’t mix enough mold to cover my foot. Then I started trying to move the mold to cover my foot and it had already set. I learned from my mistake to find a container that snuggly fits your object, or mix enough mold cast the first time.
STEP TWO
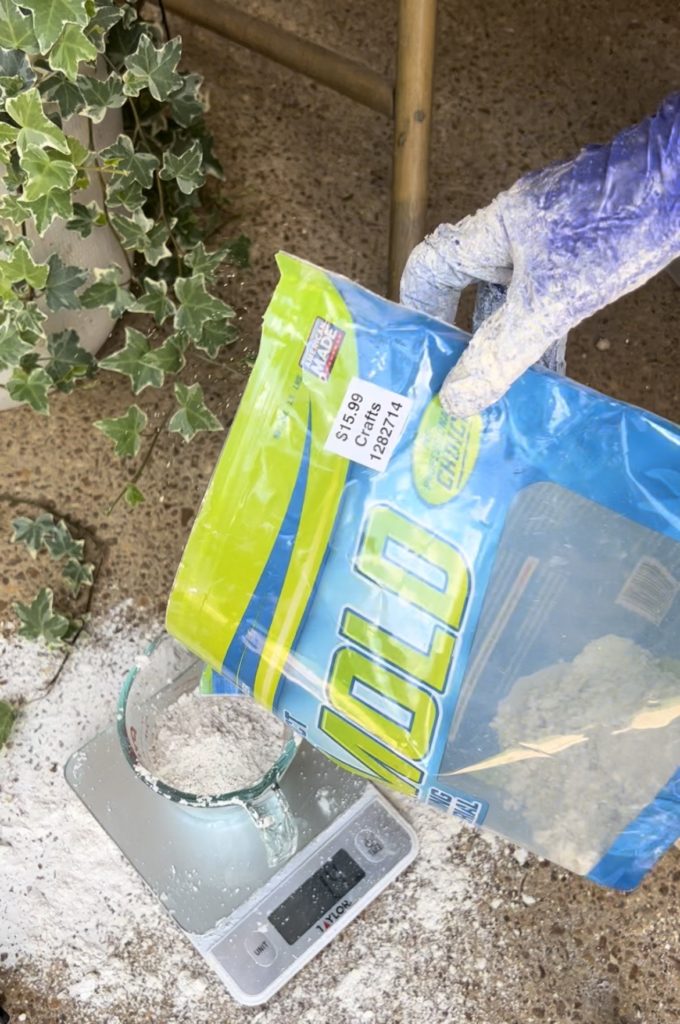
Measure your mold cast and pour it into a large mixing bowl using the ratio on the back of the bag. It saved me time to pour all my mold cast in the mixing bowl first, and then added the appropriate amount of water afterwards. Water activates the mixture so this also ensured that the mix wouldn’t start setting before I was ready. I used a digital scale to measure my mold cast, but you don’t have to. The ratio is kind of tricky and it involved doing math, so it helped me to just grab my scale and measure 1.75 oz to add with 1 cup of water. Be sure to zero your scale to account for the cup.
STEP THREE
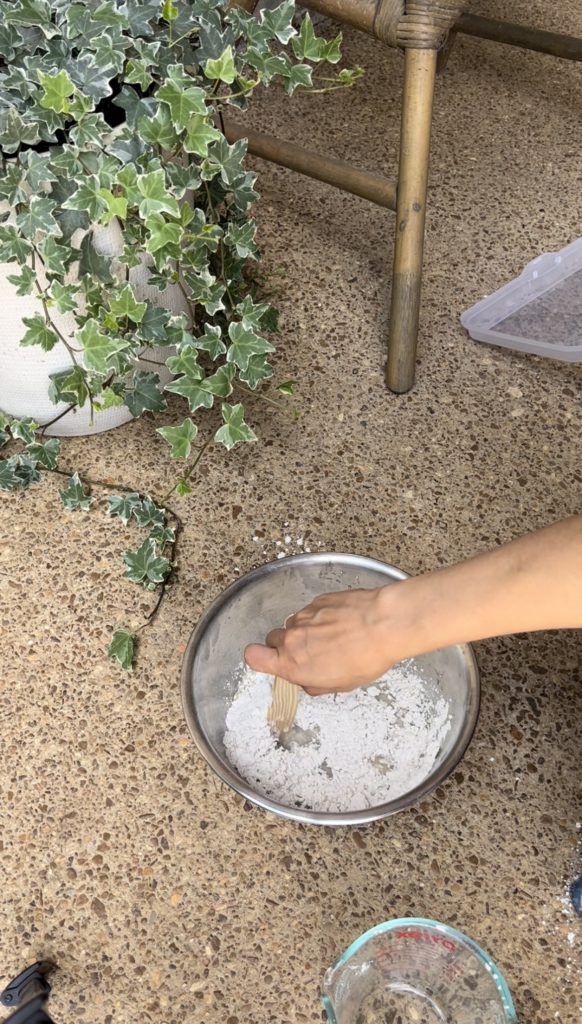
Once you’ve added your water, start mixing. I just tried to make sure I got the big chunks out. This stuff sets relatively quickly like within 5 minutes so I didn’t waste a lot of time on it. Tap the bowl around the edges and tap it on the ground gently to try and remove any air bubbles. The consistency will be pretty watery. It will start to harden up as it settles.
STEP FOUR
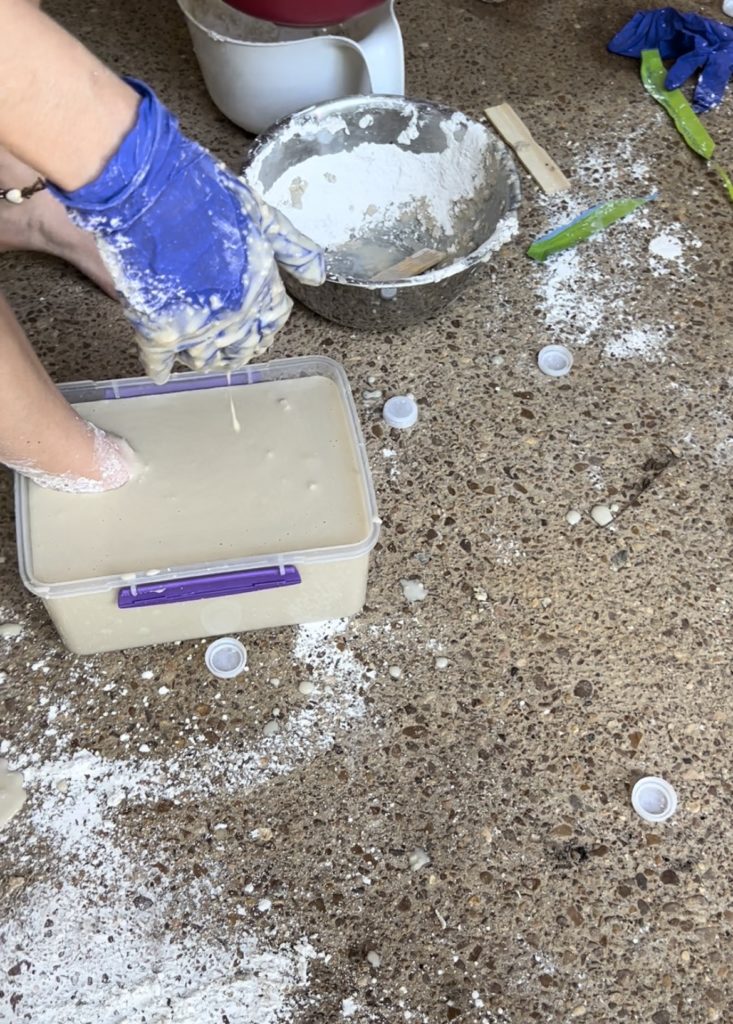
Pour your mold into your container and then set your object in. I tried to put my foot in almost simultaneously as pouring because the first time I thought I went a little too slow. (I’m not sure how much of a difference this really makes.) Just be sure you have the bottom of the container completely covered with a layer of mold first before you set your object in.
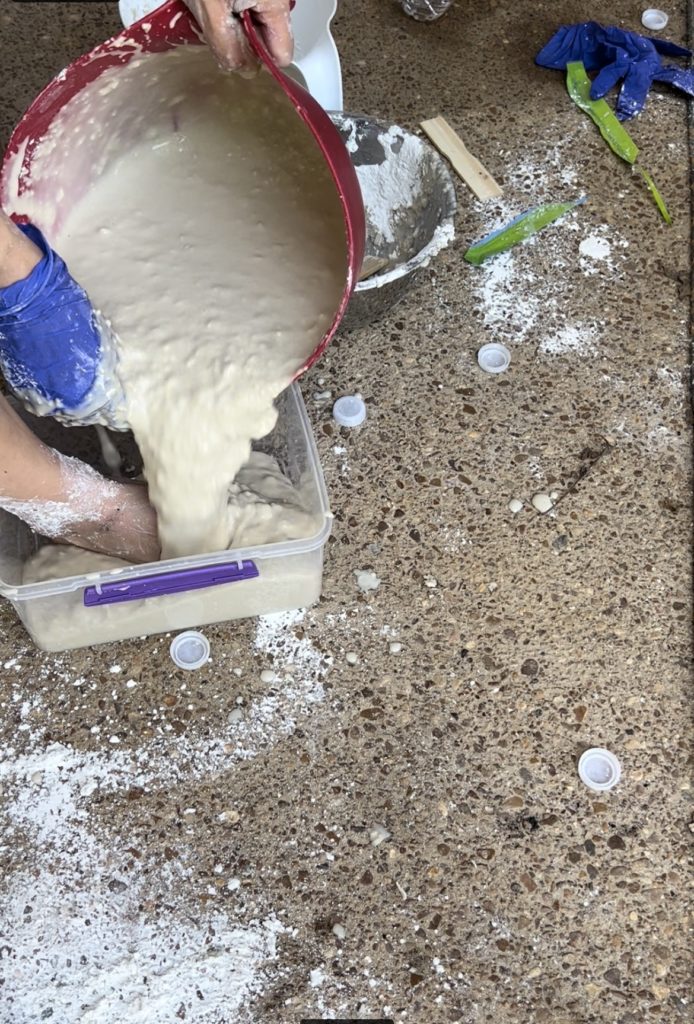
Then don’t move for 5 minutes. You will feel the mold slowly change from liquid to something “squishy.” I set a timer and sat for 7 minutes just so I was sure I didn’t remove it too quickly. When it was time to remove the object, I took a kitchen knife and gently slit the mold just enough so that I could get my foot out without damaging the shape of the mold too much.
STEP FIVE
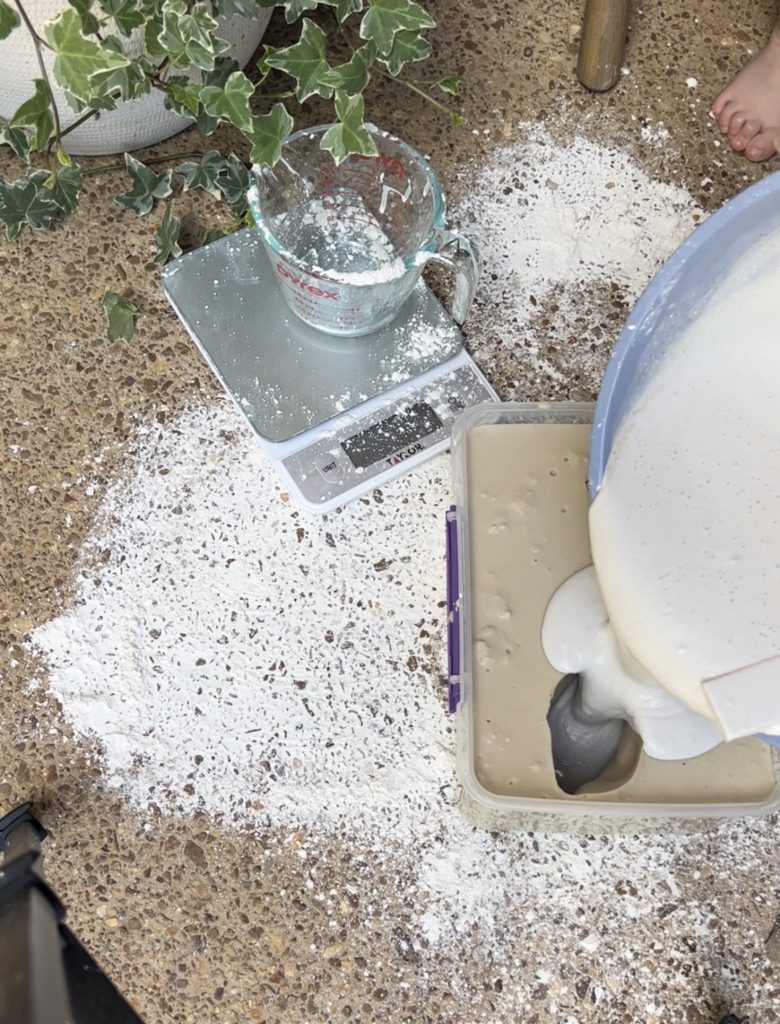
Mix your cast to the instructions on the package. This is a 3 to 1 ratio I believe. To make it easy, I did 3 cups of cast to 1 cup of water. I used 6 cups of cast and 2 cups of water, mixed it all together until there were no clumps, and then poured it into my mold.
PRO TIP: The package states that after you complete the previous steps, you want to hurry up and pour your mold. I think the mold starts to deteriorate the longer you leave it.
Set it aside and give it 45 minutes to cure.
FINAL STEP
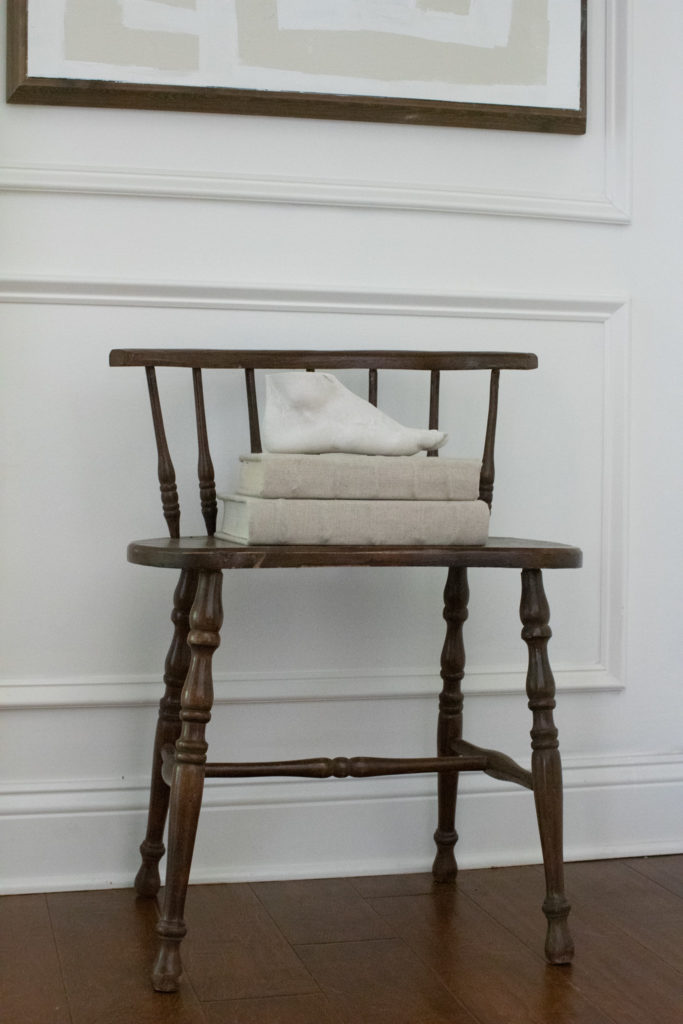
Now it’s time to gently remove your mold. I found that it comes apart pretty easily so I just gently turned over the container and pulled on the edges to remove my object. I did have some imperfections around the toes. Maybe if I would have tapped the bucket a couple times to remove some air bubbles that would have helped? Not exactly sure. I didn’t have enough material to try again.
Either way I’m pretty pleased with how it turned out! The detail on it is incredible and for $30 I got a high end and PERSONALIZED look! If you ever try this, please be sure and tag me!

Where we discuss all things design, obviously.
DESIGN
Browse Category
For more of our latest projects, follow along on instagram at @hayden_interiors
© Hayden interiors 2021 | design & Photos by Sara Hayden
Intentional Design for Beautiful Spaces
Jackson, Tennessee
+ Show / Hide Comments
Share to: