

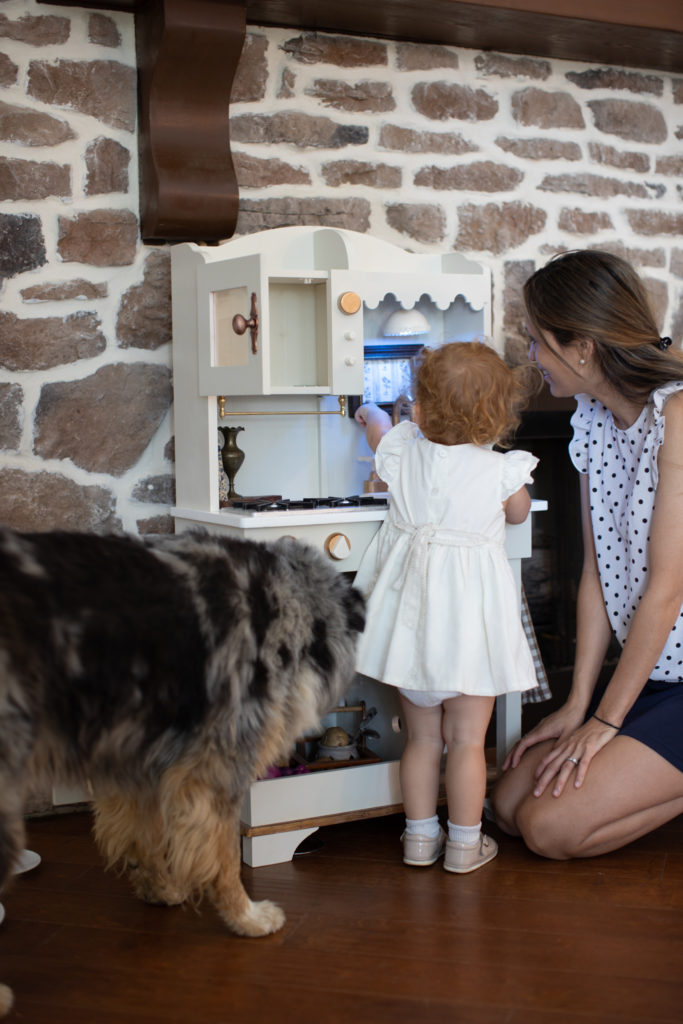
Mia turns 2 in November and I’ve been looking for a birthday present. She went to a relative’s house a few months ago and loved their play kitchen. I had it in the back of my mind for months that I was going to find one for her off of facebook marketplace. I spent hours searching and realized I couldn’t find one I loved. So then I thought why don’t I just redo one? It seemed like a great idea at first, but when it came down to it, I didn’t realize how much time, work, and hassle it was going to be. Now that it’s done, I’m SO glad I did it because it turns out she loves it!
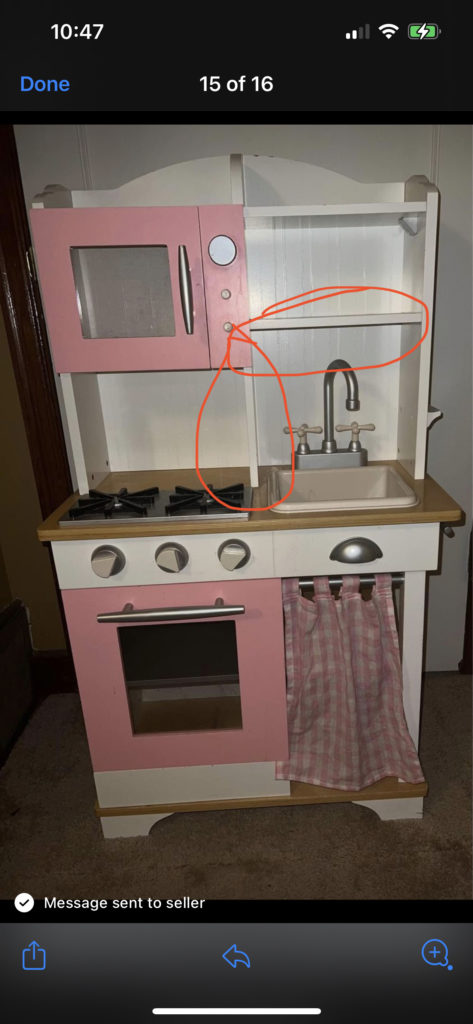
I didn’t really have much luck finding play kitchens around us locally so I decided to extend our search to the Memphis, TN area. I’m so glad I did because a pink kitchen with SO much potential popped up! I wasn’t really sure of what I was looking for when I started looking but when I stumbled upon this one, I knew it was the one! It had everything!! I am really drawn to the fabric sink skirt trend right now and I honestly don’t see that going away for me anytime soon… I think adding fabric is the perfect way to bring a soft feel to the space. This kitchen had a rod and curtain skirt already built in! And I loved that it was small and compact. Some kitchens these days can get super big and I wanted it to take up the least amount of space as possible, but still have all the things she would enjoy. It had a section for an oven, stove top, sink, microwave, open shelves, and a bonus chalk board on the side! I personally loved that it had a beadboard backsplash and detailed arch on top, but now I’m just being extremely picky.
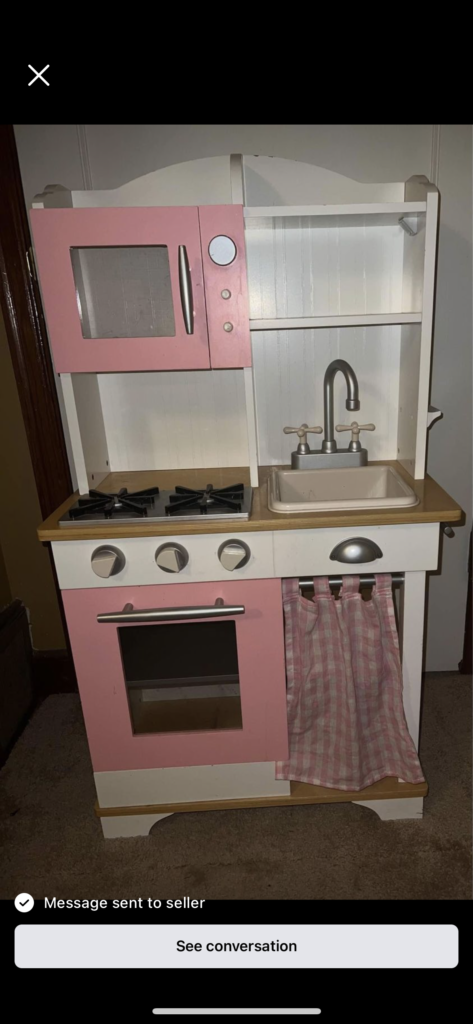
We messaged the seller and she was super accommodating and let us pick it up later that week! When we brought it home, I didn’t foresee the amount of work that was about to happen. But first lets talk about the fun part – the design!
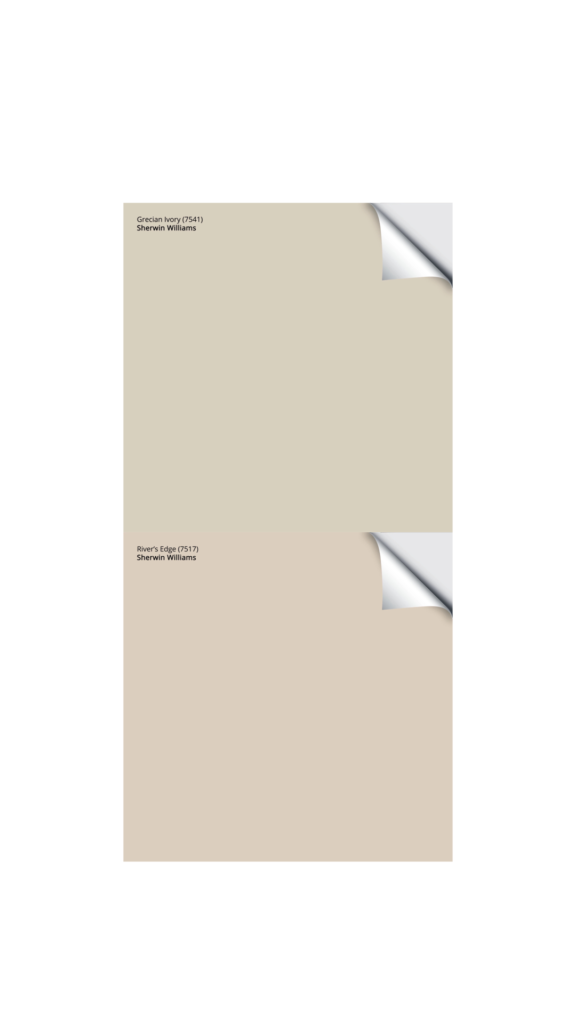
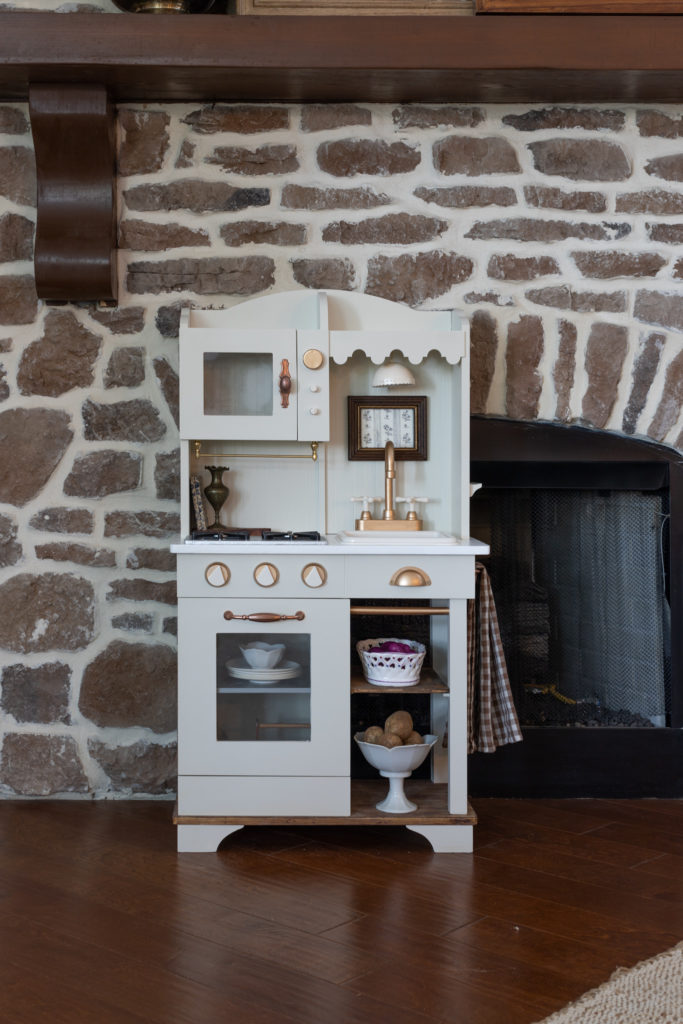
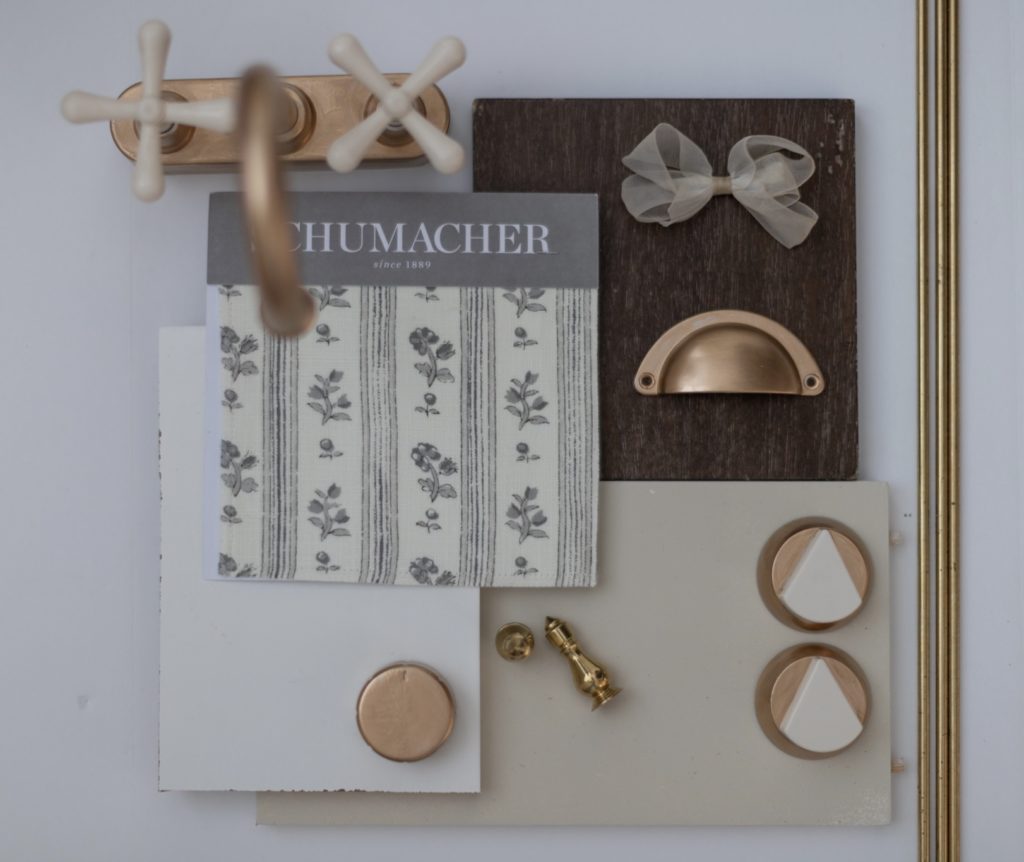
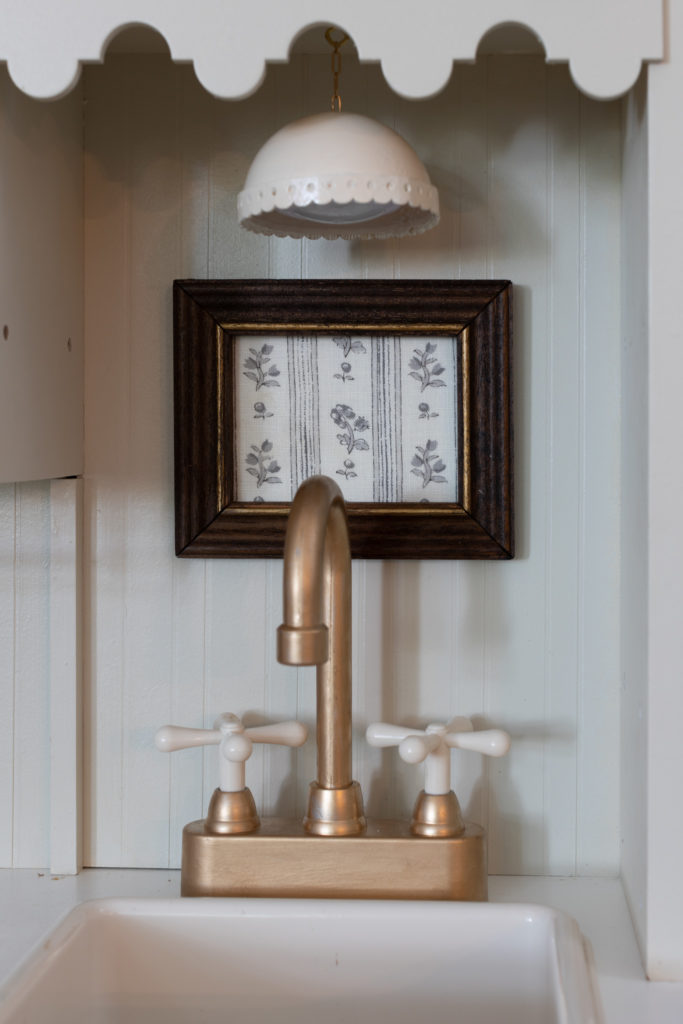
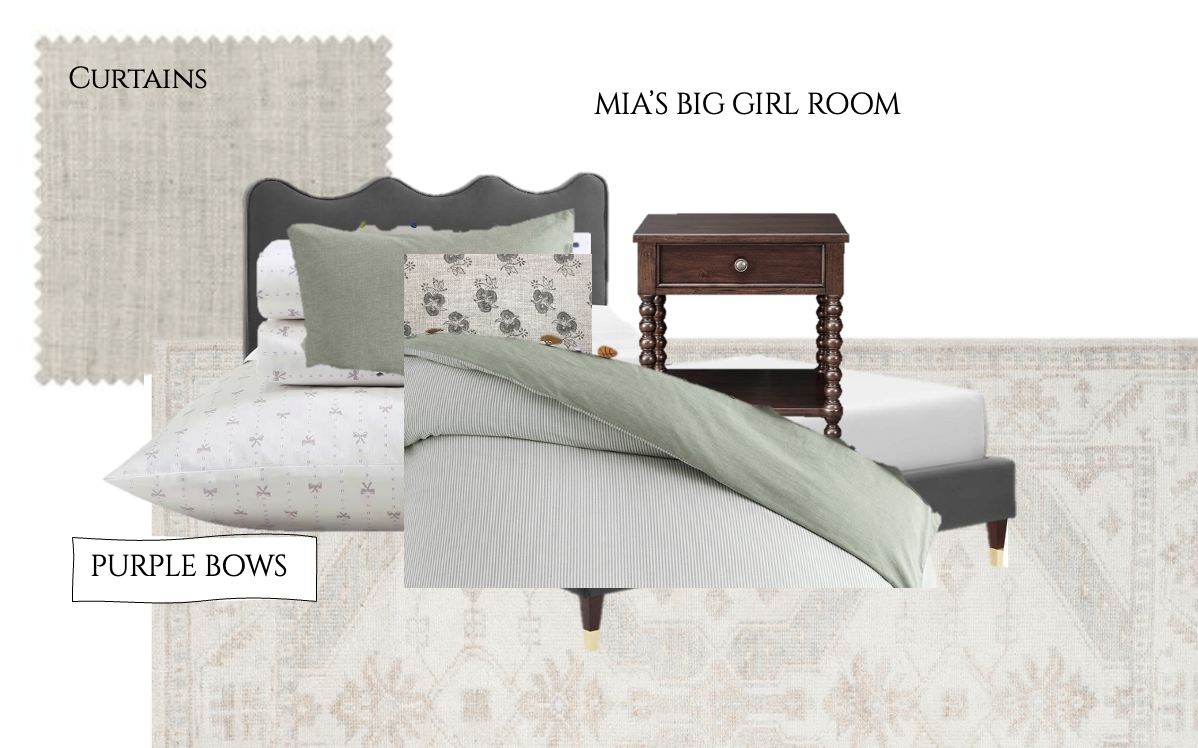
With my inspiration, you can see that I wanted to remove the center shelf and the shelf above the faucet. I also wanted to paint the whole thing one color and do some sort of marbled-look countertop. I thought it would be good to update hardware, add a light and art. I knew I wanted a neutral, lighter color for her cabinets. I narrowed it down to two choices. Ultimately I decided to go with grecian ivory to balance out all the warmth from the hardware. Plus, look how good it looks with the fabric! (see image below)
Once we got it apart, I realized that the countertops were going to be a lot of work. The original finish on the wood would NOT come off! The kitchen came with 3 pieces of wood: the countertop, the bottom support piece, and a shelf. I was able to almost full get the old lacquer off the bottom support piece, but the shelf and countertop wouldn’t budge! I tried for two days to get it off and ended up painting the countertop white in the end.
I wasn’t able to get the Citristrip to fully remove the old varnish. I don’t know if it’s because the piece was too old, I didn’t apply enough coats on the citristrip, or let it sit long enough. All I know is that after 3 coats and hours of scraping and messing with it, the stain still turned out blotchy. It was uneven especially around the stove top. It would be different if it was barely noticeable, but it was so noticeable that I knew I couldn’t be happy with it. I tried gel stain as well because that sits on top of the wood instead of penetrating the wood so I thought it would work but it didn’t. SO, I say all that to say that I ended up painting it white & applying a top coat in semi gloss.
When it came to painting I realized that it was a terrible idea to try and work on it when Will was working and I had Mia all day. This was the one time she decided not to nap for one single second. I made it through, but my sanity that day was lost. As always, sand the piece down, prime, and then paint. For me, a good old roller and detail brush did the trick for me. I didn’t realize how dusty and dirty our house is and spraying outside during windy weather was a terrible idea!
Once I painted, it was time to put it back together. One thing I forgot to mention early is that I removed two shelves in order to open up the kitchen so that I could hang a light. When I removed the middle section of the kitchen, I did not realize that one piece I removed was supporting the whole entire top section. Luckily I was able to come up with a solution to fix that. You can watch all those instagram stories here because it’s kind of difficult for me to explain.
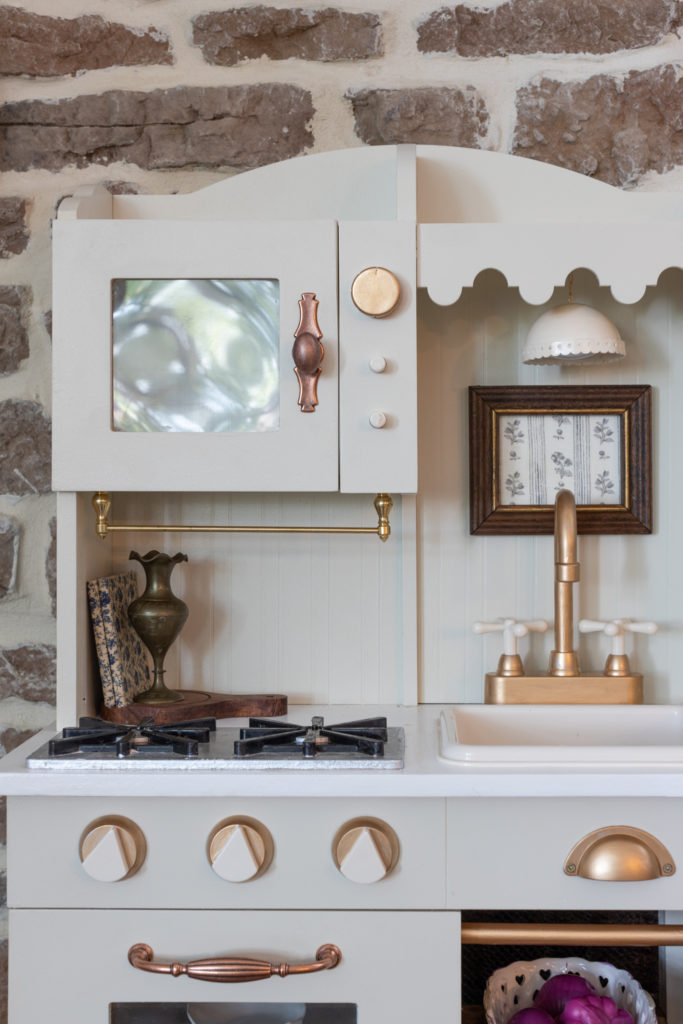
During this time I also came to another realization: a) I didn’t have much spray paint left to paint the hardware, and b) I didn’t like them anyway. Since it was midnight and no stores were open, I didn’t feel like buying 10 different gold spray paints to try on a kid’s kitchen, I decided to dig through my craft closet and found liquid gold leaf paint! If you haven’t tried this stuff before it works wonders! I think it’s better than “rub n buff” in lots of ways because it provides nice, thick coverage. This particular one gave off the most gorgeous copper toned color and I LOVE it! I have not seen ANY gold spray paint get close to matching this color. I applied it with a small paint brush to all her hardware. This stuff is wonderful because a little goes a LONG way! You can see how they turned out in the photo above.
BRASS ROD
Next, it was time to add the fun details! I had this leftover brass bar gallery rail from the shelf in our laundry room. I cut it down to size and predrilled holes in the “microwave” section and screwed it in. My only issue with this part was that I had to cut down the screws to fit. My husband later told me that I could have gone to home depot and bought the correct size. At least I saved us money!
SCALLOPED TRIM
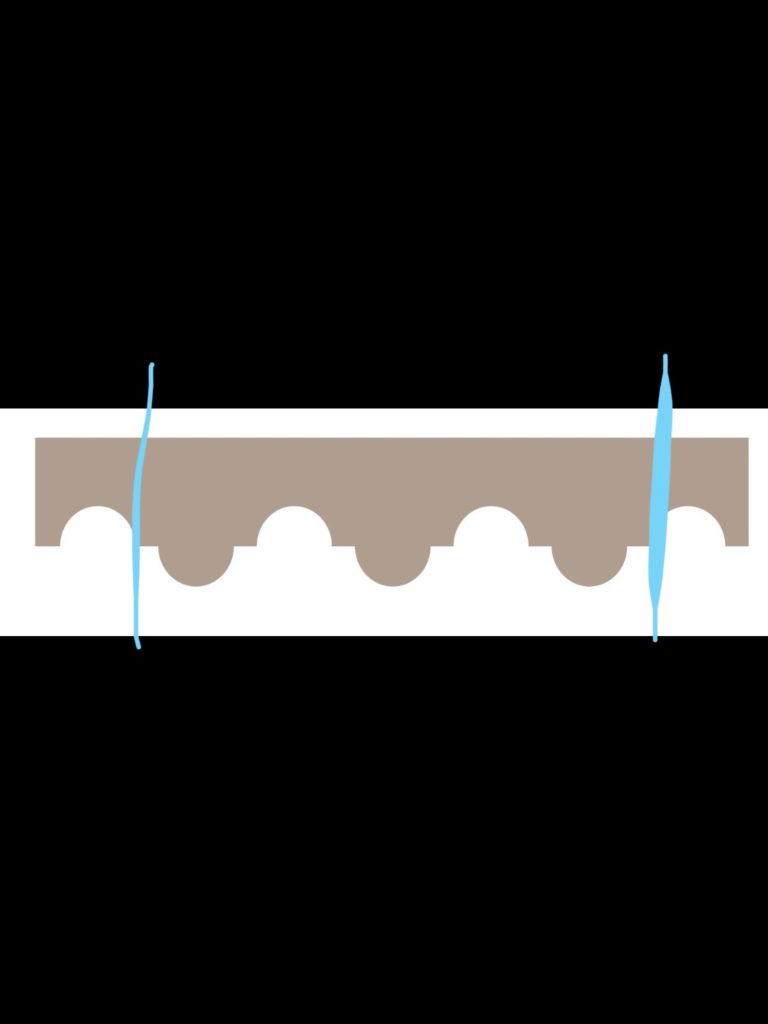
After that I ordered this fun scalloped border that I got to design with Blank of America. You should check out her etsy shop. She is so talented, responsive, and very affordable. She let me pick out the starting points, height, and width, and I think it came out perfectly! This custom scalloped detail cost me $7. At the end, I will add that above the faucet section of the kitchen.
DESIGNING THE LIGHT
Designing the light was by FAR the trickiest part of me! I had so many issues with it but I’ll sum it up as best as I can. I originally wanted a picture light so I could hang art under it. But I could not find anything that came close in scale. I bought a lego piece that looked like a picture light but had trouble figuring out how the light would stay in there. Ultimately I decided on doing a puck light. I spent literally hours in hobby lobby one day brainstorming. Here is what I came up with.
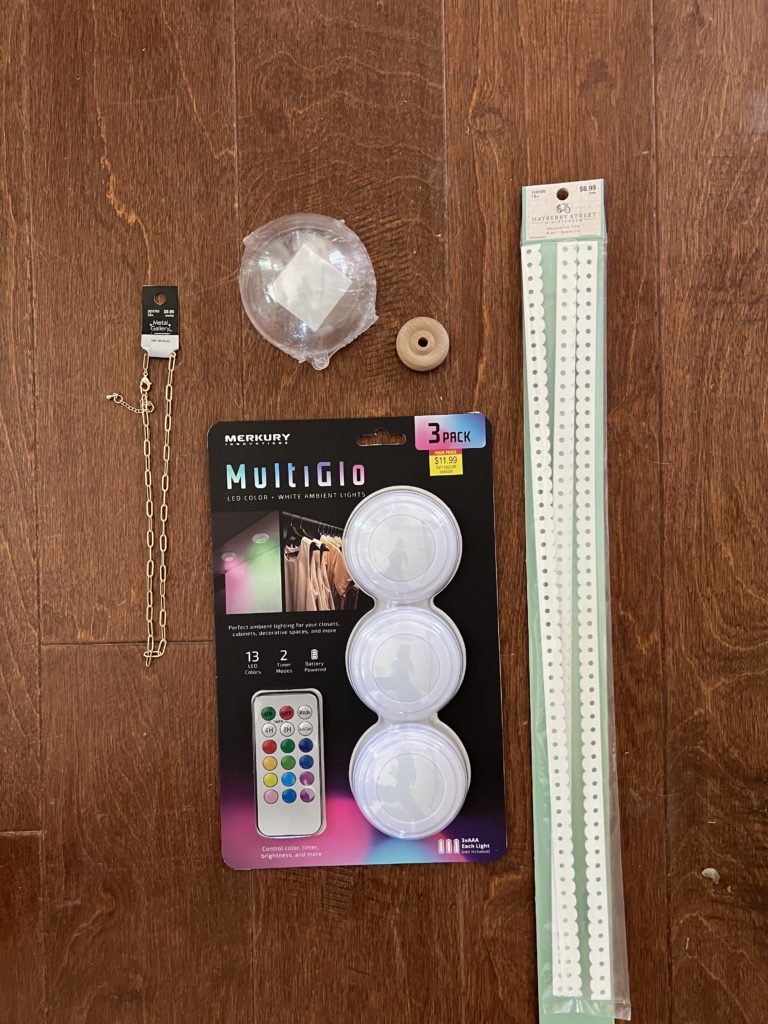
I got a plastic ball ornament in the metal aisle. I got a small necklace chain in the jewelry section. I got this wooden round medallion in the wood section. It came with a pack of 5. I got a scalloped border from the kids dollhouse section and a pucklight that was in the middle of a random aisle, along with some spray paint. I drilled a hole into the plastic ball, then I attached the chain to the wood medallion thing. I hammered the clasp part of the necklace into the wood so that it would stay. Then I cut small indentions with a knife into the scalloped border. This is so that the scalloped border would bend around the light. Then I super glued the scalloped detail on, spray painted it, put it all together, and hung it. I love that she can turn it on with a remote and change the colors! SO FUN! Check out the reel here.
HARDWARE
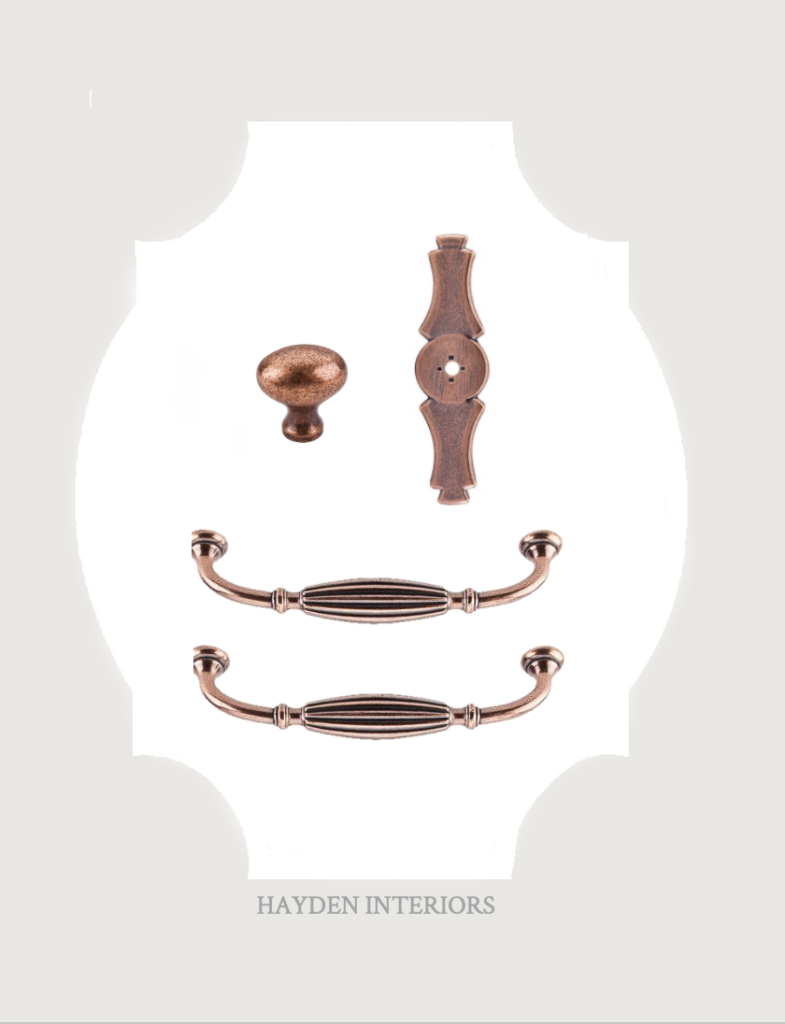
I decided to spend a little extra money and order new hardware for the oven handle, side handle, and microwave top. I really do think nice hardware can go a LONG way, especially for a kids play kitchen. I had trouble finding a 2.25 inch pull on the internet in the specific color scheme I was wanting so I had to get creative once again. I decided to just get a 3 inch backplate and put an oval knob in the center. This would allow me to cover up the other holes that are already visible, AND it would be a fun way to break up the other 2 pulls. I worried at first that Mia may have trouble opening the door if it wasn’t a handle, but this is actually EASIER for her than opening cabinet pulls!
The final details I’m thankful didn’t require any money. I reused a kitchen towel for the fabric since the one I wanted was totally unaffordable. It was going to cost $100/yard and I had to order 2 yards minimum to get this fabric. I couldn’t find ANYTHING similar online so I decided instead I would use it for the artwork.
COST BREAKDOWN
- KITCHEN $60
- LIGHT MATERIALS $30
- PAINT: GRECIAN IVORY SHERWIN WILLIAMS (countertop & cabinets) , PRIMER, SANDING MATERIALS, SCALLOP BORDER, $30
- HARDWARE: 2 pulls, 1 backplate and 1 knob $50
TOTAL COST: $170
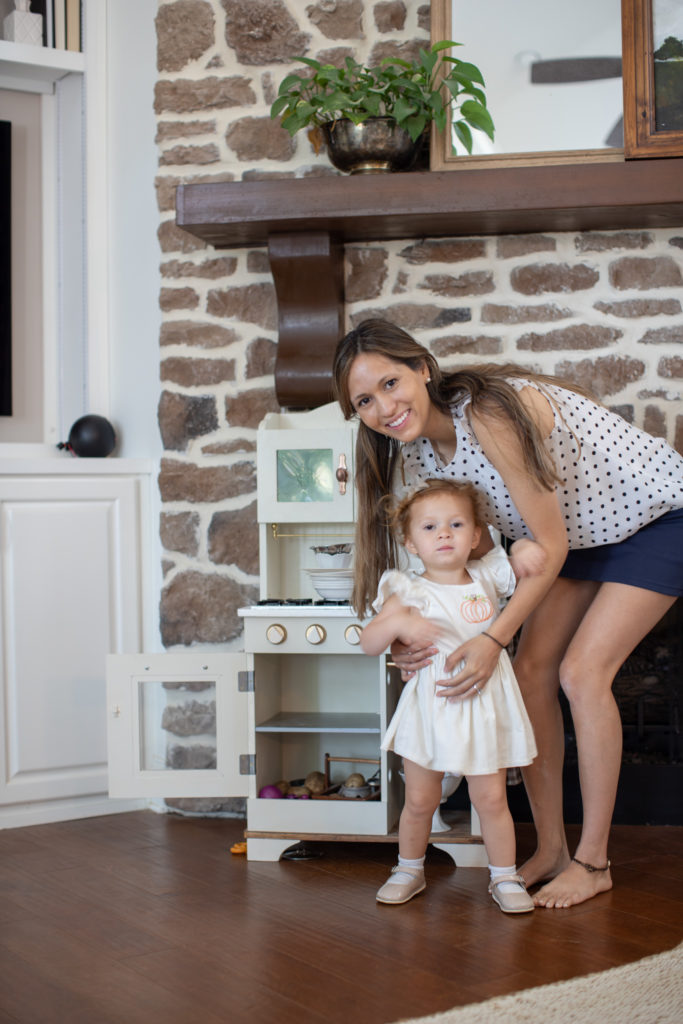
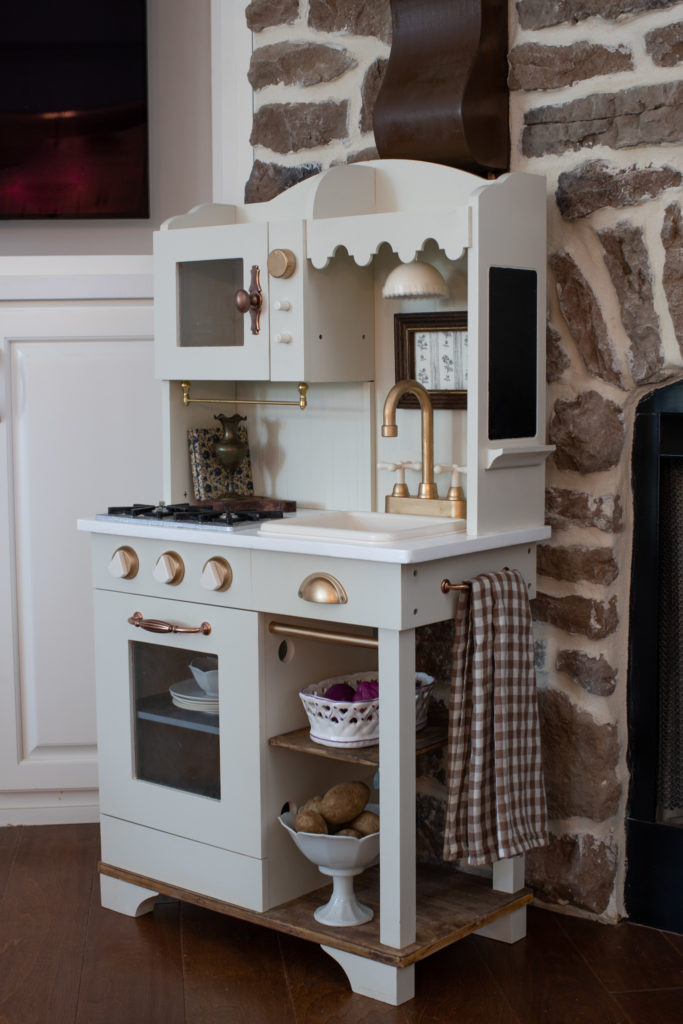
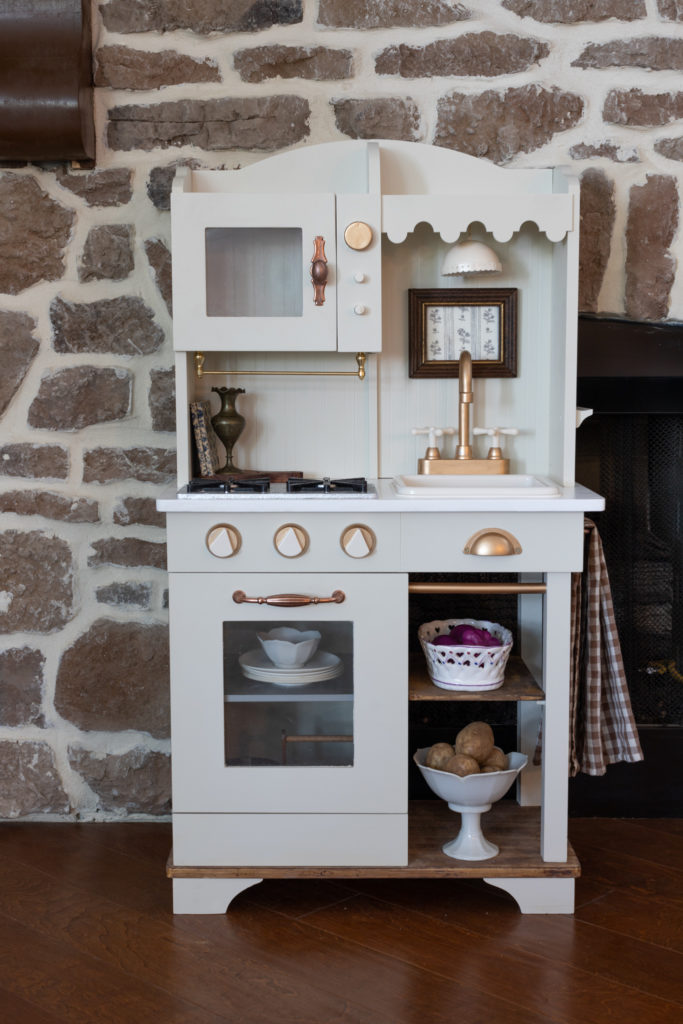
I already had the gold leaf paint, fabric, frame, brass rod, and 1 can of primer so I can imagine it being a little bit more expensive if you had absolutely nothing. I am in love with every inch of this kitchen and completely think it’s worth investing time into something you are going to be staring at everyday. Thank you so much for following along for this project.


Where we discuss all things design, obviously.
DESIGN
Browse Category
For more of our latest projects, follow along on instagram at @hayden_interiors
© Hayden interiors 2021 | design & Photos by Sara Hayden
Intentional Design for Beautiful Spaces
Jackson, Tennessee
+ Show / Hide Comments
Share to: